
The next step is to connect a keyboard, mouse, and display to the Raspberry Pi Zero. You may have much of this stuff already but, if you don't, there are some things to consider before buying additional equipment. Let's start with the keyboard and mouse.
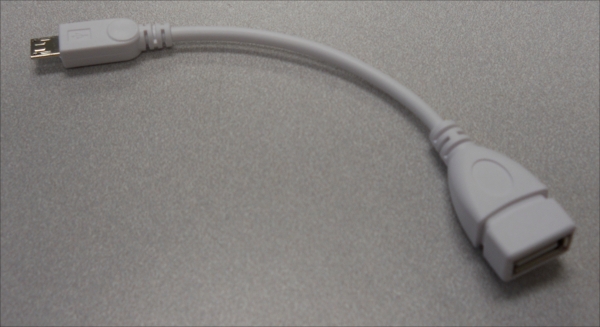
To connect any device to the Raspberry Pi Zero you'll need some sort of adapter or hub. You can buy a simple hub that goes from the microUSB connector on the Raspberry Pi Zero to the more common standard connector. You can find these at most electronics online retailers, and it looks something like this:
However, there will be projects when you will want to connect more than one device to the Raspberry Pi Zero. For these cases you may want to consider purchasing a powered USB hub. Before deciding on the hub to connect to your board, you need to understand the difference between a powered USB hub and one that gets its power from the USB port itself.
Almost all USB hubs are not powered, in other words, you don't plug in the USB hub separately. The reason for this is that almost all of these hubs are hooked up to computers with very large power supplies and powering USB devices from the computer is not a problem. This is not the case for your board. The USB port on your board has very limited power capabilities so if you are going to hook up devices that require significant power – a WAN adapter or a webcam for instance – you're going to need a powered USB hub, one that provides power to the devices through a separate power source. Here is an image of such a device, available at http://www.amazon.com/ and other online retailers:
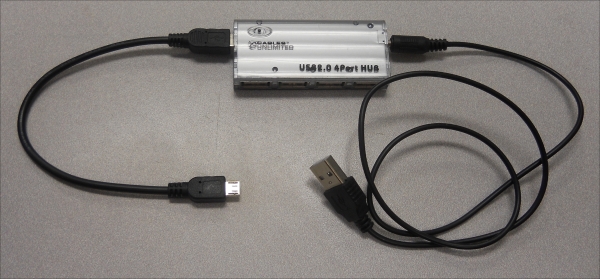
Note that there are two connections on this hub. The one to the far right is a power connection and it will be plugged into a battery or a USB power adapter with a USB port. The connection to the left is the USB connection, which will be plugged into the Raspberry Pi. To connect the power USB board to the Raspberry Pi Zero you need a cable that connects to a microUSB connector. Now, you'll have more connections to add a mouse and keyboard, webcams, and a USB WLAN device.
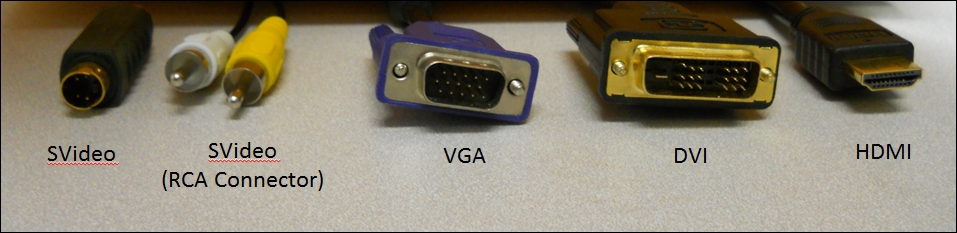
Now, you'll also need a display. Fortunately, your Raspberry Pi Zero offers lots of choices. There are a number of different video standards; here is an image of some of the most common ones for reference:
There is a mini HDMI connector on the Raspberry Pi Zero. In order to connect it to an HDMI monitor you'll need a mini HDMI to standard HDMI adapter or cable. You can also buy a cable that has a mini HDMI connector on one end and a regular HDMI connector on the other. Here is an image of the adapter:
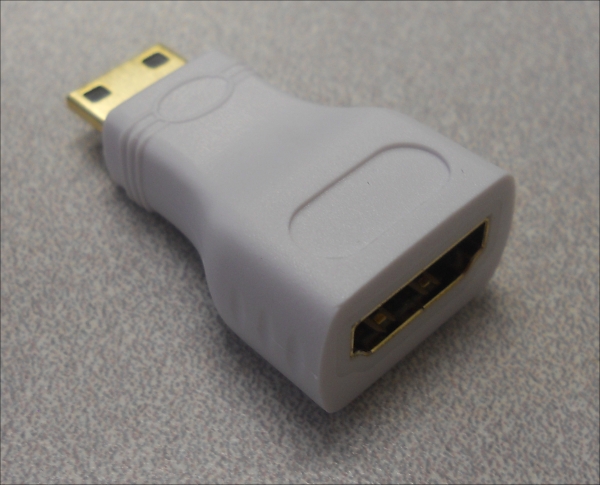
To use this connector, simply connect the adapter to your Raspberry Pi Zero, then the cable with the regular HDMI connections to the adapter and your TV or monitor that has an HDMI input connector. HDMI monitors are relatively new but if you have a monitor that has a DVI input, you can buy relatively inexpensive adapters that provide an interface between DVI and HDMI.
Tip
Don't be fooled by adapters that claim that they go from HDMI or DVI to VGA, or HDMI or DVI to S-video. These are two different kinds of signals: HDMI and DVI are digital standards, and VGA and S-video are analog standards. There are adapters that can do this, but they must contain circuitry and require power and they are significantly more expensive than any simple adapter.
You are almost ready to plug in the Raspberry Pi Zero. Connect your HDMI cable to your monitor and the Raspberry Pi Zero. Connect your USB hub to the Raspberry Pi Zero and connect your keyboard and mouse to the USB hub. Make sure that you connect all your devices before you power on the unit. Most operating systems support hot-swap of devices, which means you are able to connect a device after the system has been powered but this is a bit shaky. You should always cycle power when you connect new hardware. Here is a picture of everything connected:
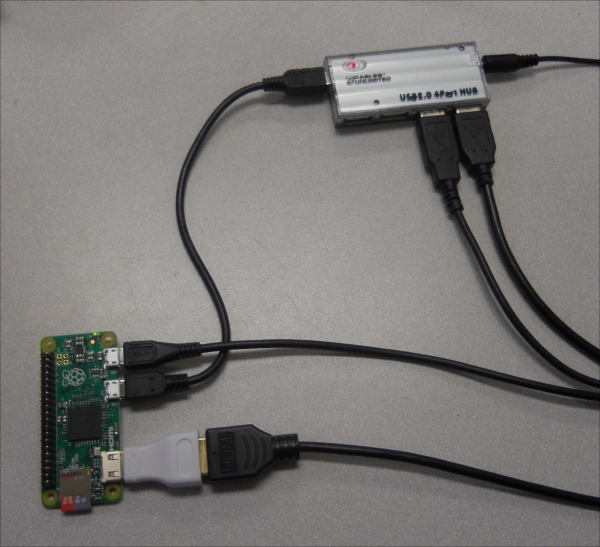
The USB connectors are connected to USB power adapters. Even though your hardware configuration is complete, you'll still need to complete the next section to power on the device. So, let's figure out how to install an operating system.