

Now that we have set up our environment and we can run and debug Android applications on both an emulator and a real device, we can start creating our own first custom view. To keep it simple, we will first easily modify an existing view and we will proceed, later on, to create our own view from scratch.
Creating our own first custom view
Extending a view
Using the example from the previous section, or just creating a new project with an Empty Activity if you've skipped it, we will change the TextView with our own implementation.
If we take a look at the default layout XML file, usually called activity_main.xml if you haven't changed it during project creation, we can see there is TextView inside a RelativeLayout:
<?xml version="1.0" encoding="utf-8"?>
<RelativeLayout xmlns:android="http://schemas.android.com/apk/res/android"
    xmlns:tools="http://schemas.android.com/tools"
    android:id="@+id/activity_main"
    android:layout_width="match_parent"
    android:layout_height="match_parent"
    android:paddingBottom="@dimen/activity_vertical_margin"
    android:paddingLeft="@dimen/activity_horizontal_margin"
    android:paddingRight="@dimen/activity_horizontal_margin"
    android:paddingTop="@dimen/activity_vertical_margin"
    tools:context="com.packt.rrafols.customview.MainActivity">

    <TextView
        android:layout_width="wrap_content"
        android:layout_height="wrap_content"
        android:text="Hello World!" />
</RelativeLayout>
Let's change that TextView to a custom class that we will implement just after this:
<com.packt.rrafols.customview.OwnTextView
        android:layout_width="wrap_content"
        android:layout_height="wrap_content"
        android:text="Hello World!" />
We've used the com.packt.rrafols.customview package, but please change it accordingly to the package name of your application.
To implement this class, we will first create our class that extends TextView:
package com.packt.rrafols.customview;

import android.content.Context;
import android.util.AttributeSet;
import android.widget.TextView;

public class OwnTextView extends TextView {

    public OwnTextView(Context context, AttributeSet attributeSet) {
        super(context, attributeSet);
    }
}
This class, or custom view, will behave like a standard TextView. Take into consideration the constructor we've used. There are other constructors, but we'll focus only on this one for now. It is important to create it as it'll receive the context and the parameters we defined on the XML layout file.
At this point we're only passing through the parameters and not doing anything fancy with them, but let's prepare our custom view to handle new functionality by overriding the onDraw() method:
@Override
protected void onDraw(Canvas canvas) {
    super.onDraw(canvas);
}
By overriding the onDraw() method we're now in control of the drawing cycle of the custom view. If we run the application, we'll not notice any difference from the original example as we haven't added any new behavior or functionality yet. In order to fix this, let's do a very simple change that will prove to us that it is actually working.
On the onDraw() method, we'll draw a red rectangle covering the whole area of the view as follows:
@Override
    protected void onDraw(Canvas canvas) {
        canvas.drawRect(0, 0, getWidth(), getHeight(), backgroundPaint);
        super.onDraw(canvas);
    }
We can use the getWidth() and getHeight() methods to get the width and height respectively of the view. To define the color and style we'll initialize a new Paint object, but we'll do it on the constructor, as it is a bad practice to do it during the onDraw() method. We'll cover more about performance later in this book:
private Paint backgroundPaint;

    public OwnTextView(Context context, AttributeSet attributeSet) {
        super(context, attributeSet);

        backgroundPaint= new Paint();
        backgroundPaint.setColor(0xffff0000);
        backgroundPaint.setStyle(Paint.Style.FILL);
    }
Here, we've initialized the Paint object to a red color using integer hexadecimal encoding and set the style to Style.FILL so it will fill the whole area. By default, Paint style is set to FILL, but it doesn't hurt to specifically set it for extra clarity.
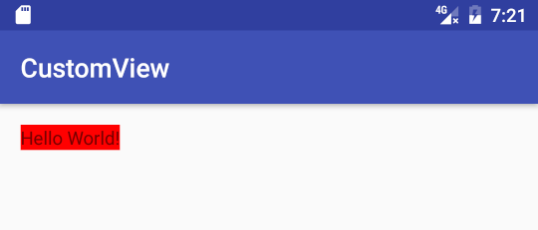
If we run the application now, we'll see the TextView, which is our own class right now, with a red background as follows:
The following code snippet is the whole implementation of the OwnTextView class. For more details, check the Example01 folder in the GitHub repository for the full project:
package com.packt.rrafols.customview;

import android.content.Context;
import android.graphics.Canvas;
import android.graphics.Paint;
import android.util.AttributeSet;
import android.widget.TextView;

public class OwnTextView extends TextView {

    private Paint backgroundPaint;

    public OwnTextView(Context context, AttributeSet attributeSet) {
        super(context, attributeSet);

        backgroundPaint = new Paint();
        backgroundPaint.setColor(0xffff0000);
        backgroundPaint.setStyle(Paint.Style.FILL);
    }

    @Override
    protected void onDraw(Canvas canvas) {
        canvas.drawRect(0, 0, getWidth(), getHeight(),
        backgroundPaint);
        super.onDraw(canvas);
    }
}
This example is only to show how we can extend a standard view and implement our own behaviors; there are multiple other ways in Android to set a background color or to draw a background color to a widget.
Creating a simple view from scratch
Now that we've seen how to modify an already existing View, we'll see a more complex example: how to create our own custom view from scratch!
Let's start by creating an empty class that extends from View:
package com.packt.rrafols.customview;

import android.content.Context;
import android.util.AttributeSet;
import android.view.View;

public class OwnCustomView extends View {

    public OwnCustomView(Context context, AttributeSet attributeSet) {
        super(context, attributeSet);
    }

}
We will now add the same code as the previous example to draw a red background:
package com.packt.rrafols.customview;

import android.content.Context;
import android.graphics.Canvas;
import android.graphics.Paint;
import android.util.AttributeSet;
import android.view.View;

public class OwnCustomView extends View {

    private Paint backgroundPaint;

    public OwnCustomView(Context context, AttributeSet attributeSet) {
        super(context, attributeSet);

        backgroundPaint= new Paint();
        backgroundPaint.setColor(0xffff0000);
        backgroundPaint.setStyle(Paint.Style.FILL);

    }

    @Override
    protected void onDraw(Canvas canvas) {
        canvas.drawRect(0, 0, getWidth(), getHeight(),
        backgroundPaint);
        super.onDraw(canvas);
    }
}
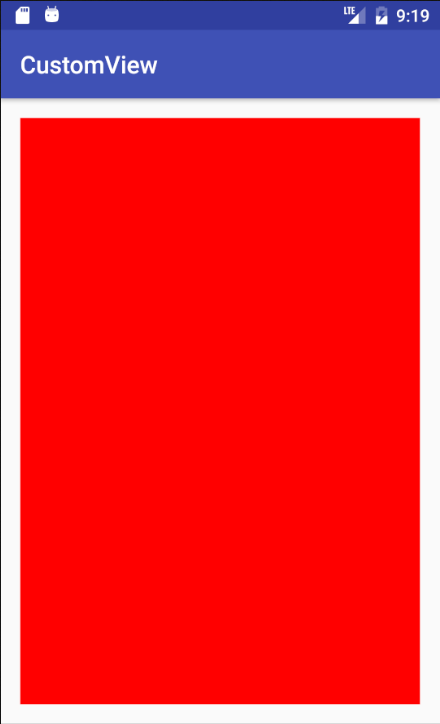
If we run the application, as we can see in the following screenshot, we'll have a slightly different result from the previous example. This is because in our previous example the TextView widget was resizing to the size of the text. If we remember correctly, we had android:layout_width="wrap_content" and android:layout_height="wrap_content" in our layout XML file. This new custom view we've just created doesn't know how to calculate its size.
Check the Example02 folder in the GitHub repository for the full implementation of this simple example.