

If you are familiar with developing applications using Visual Studio on Windows, then using Xamarin Studio should be very straightforward. Xamarin uses the same concept of a solution containing one or more projects, and it has created several new project types for iOS and Android applications. There are also several project templates to jump-start your development of common applications.
Xamarin Studio supports several out-of-the-box project types, including standard .NET class libraries and console applications. You cannot natively develop Windows applications on a Mac with Xamarin Studio, but you can certainly develop the shared code portion of your application in Xamarin Studio. We'll focus on sharing code in the later chapters, but keep in mind that Xamarin enables you to share a common C# backend between most platforms that support C#.
In this chapter, we will cover:
- Creating a "Hello World" application for iOS
- Apple's MVC pattern
- Xcode and storyboards
- Creating a "Hello World" application for Android
- Android activities
- Xamarin's Android designer
Launch Xamarin Studio and start a new solution. Just like in Visual Studio, there are lots of project types that can be created from the New Solution dialog. Xamarin Studio, formerly MonoDevelop, supports the development of many different types of projects such as C# console applications targeting the Mono runtime, NUnit test projects, and even other languages besides C#, such as VB or C++.
Xamarin Studio supports the following project types for iOS:
- iPhone or iPad project: These categories of projects use storyboards to lay out the UI and target either the iPad or iPhone only.
- Universal project: This category supports both iPhone and iPad in the same iOS application. This is the preferred project type if you need to target both types of devices.
- Single View Application: This is the basic project type that sets up an iOS storyboard along with a single view and controller.
- Tabbed Application: This is a project type that automatically sets up UITabViewController for applications with a tab layout.
- WebView Application: This project type is for creating hybrid applications that are partially HTML and partially native. The application is set up to take advantage of the Razor templating features of Xamarin Studio.
- iOS binding project: This is an iOS project that can create C# bindings for an Objective-C library.
- iOS unit test project: This is a special iOS application project that can run NUnit tests.
- iOS library project: This is a class library used within other iOS application projects.
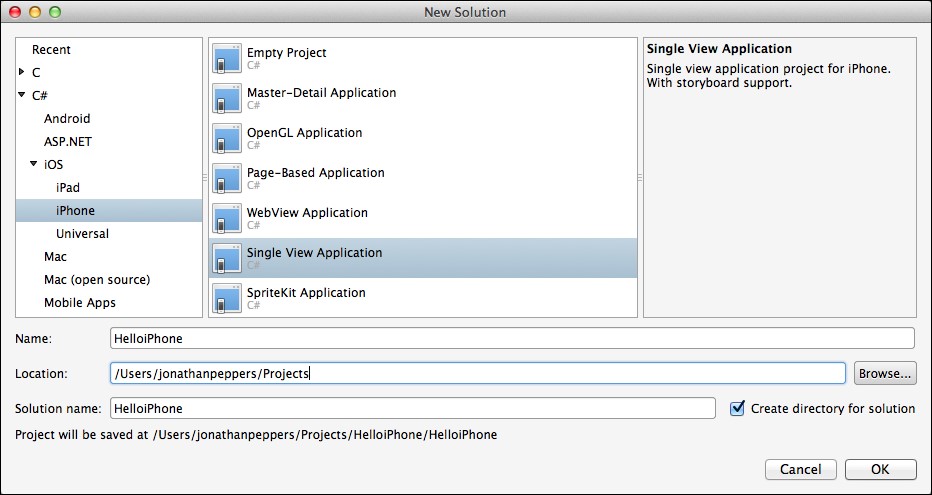
To get started, navigate to iOS | iPhone, and create Single View Application in the directory of your choice, as shown in the following screenshot:
You'll notice that several files and folders are automatically created from the project template. These files are as follows:
Components: This folder will contain any components added from the Xamarin Component Store. See Chapter 9, Third-party Libraries, for more information about the Xamarin Component Store.Resources: This directory will contain any images or plain files that you want to be copied directly to your application bundle. Note that this will contain a black splash screen image, by default. This ensures that your iOS application runs full screen on the iPhone 5.AppDelegate.cs: This is Apple's main class that handles application-level events in your app.Entitlements.plist: This is a settings file Apple uses to declare permissions for certain iOS features such as push notifications and iCloud. You will generally only have to use it for advanced iOS features.*ViewController.cs: This is the controller that represents the first screen in your app. It will have the same name as your project.Info.plist: This is Apple's version of amanifestfile that can declare various settings for your application such as the app title, icon, splash screens, and other common settings.Main.cs: This file contains the standard entry point for a C# program:static void Main(). It's most likely that you will not need to modify this file.MainStoryboard.storyboard: This is the storyboard definition file for your application. It will contain the layouts for the views in your app, list of controllers, and the transitions used to navigate throughout your app.
Now, let's run the application to see what we get by default from the project template. Click on the large play button in the top-left corner of Xamarin Studio. You will be greeted by the simulator running your first iOS application, as shown in the following screenshot:
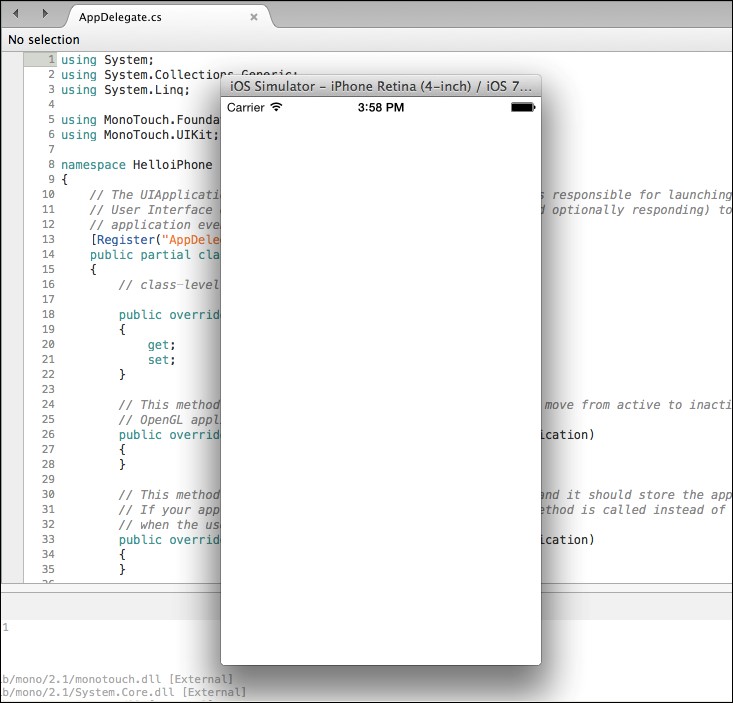
So far, your app is just a plain white screen, which is not very exciting or useful. Let's get a little more background on iOS development before moving forward.
Depending on your application's minimum iOS target, you can also run the application on different versions of the iOS simulator. Apple also provides simulators for iPad and all the different iOS devices currently in the market. It is also important to know that these are simulators and not emulators. An emulator will run an encapsulated version of the mobile OS (just as Android does). Emulators generally exhibit slower performance but give you a closer replica of the real OS. Apple's simulators run in native Mac applications and are not true operating systems. The benefit is that they are very fast in comparison to Android emulators.
Before getting too far with iOS development, it is really important to get a foundation with Apple's design pattern to develop on iOS. You might have used the Model View Controller (MVC) pattern with other technologies such as ASP.NET, but Apple implements this paradigm in a slightly different way.
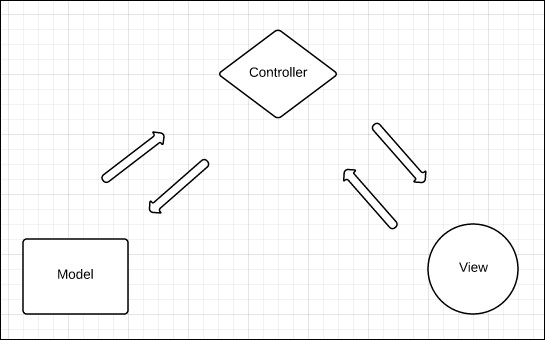
The MVC design pattern includes the following:
- Model: This is the backend business logic that drives the application. This can be any code that, for example, makes web requests to a server or saves data to a local SQLite database.
- View: This is the actual user interface seen on the screen. In iOS terms, this is any class that derives from
UIView. Examples are toolbars, buttons, and anything else the user would see on the screen and interact with. - Controller: This is the workhorse of the MVC pattern. The controller interacts with the Model layer and updates the View layer with the results. Similar to the View layer, any controller class will derive from
UIViewController. This is where a good portion of the code in iOS applications resides.
The following figure shows you the MVC design pattern:
To understand this pattern better, let's walk you through the following example of a common scenario:
- We have an iOS application with a search box that needs to query a website for a list of jobs.
- The user will enter some text into the
UITextFieldtextbox and click on theUIButtonbutton to start the search. This is the View layer. - Some code will respond to the button by interacting with the view, display a
UIActivityIndicatorViewspinner, and call a method in another class to perform the search. This is the Controller layer. - A web request will be made in the called class and a list of jobs will be returned asynchronously. This is the Model layer.
- The controller will then update the view with the list of jobs and hide the spinner.
Note
For more information on Apple's MVC pattern, see the documentation site at https://developer.apple.com/library/mac/documentation/general/conceptual/devpedia-cocoacore/MVC.html.
A point to note is that you are free to do anything you want in the Model layer of your application. This is where we can use plain C# classes that can be reused on other platforms such as Android. This includes any functionality using the C# Base Class Libraries (BCL), such as working with web services or a database. We'll dive deeper into cross-platform architecture and code-sharing concepts later in the module.
Since our plain white application is quite boring, let's modify the View layer of our application with some controls. To do this, we will modify the MainStoryboard.storyboard file in your project in Xamarin Studio. Optionally, you can open the storyboard file in Xcode, which was previously the method of editing storyboard files before the designer was available in Xamarin Studio. Using Xcode can still be useful if there is a feature in iOS storyboards that isn't available yet in the Xamarin designer or if you need to edit an older iOS format such as XIB files. However, Xcode is not quite as good of an experience, since custom controls in Xcode render as a plain white square. Xamarin's designer actually runs your drawing code in custom controls, so that you get an accurate view of what your application will look like at runtime.
Let's add some controls to our app by performing the following steps:
- Open the project you created earlier in this chapter in Xamarin Studio.
- Double-click on the
MainStoryboard.storyboardfile. - The iOS designer will open, and you will see the layout for the single controller in your application.
- In the Document Outline tab on the right-hand side, you'll see that your controller contains a single view in its layout hierarchy.
- In the top-left corner, you'll notice a toolbox that contains several types of objects that you can drag and drop onto your controller's view.
- In the search box, search for
UILabeland drag the label onto your view at a location of your choice. - Double-click on the label to edit the text of the label to anything you wish. You can also fill out this value from the Properties tab in the bottom-right corner.
- Likewise, search for
UIButtonand drag the button onto your view somewhere above or below the label. You can edit the text on the button using the Properties tab. Double-clicking on the button will add a click event handler as you might be familiar in Visual Studio when developing for other platforms. - Run the application.
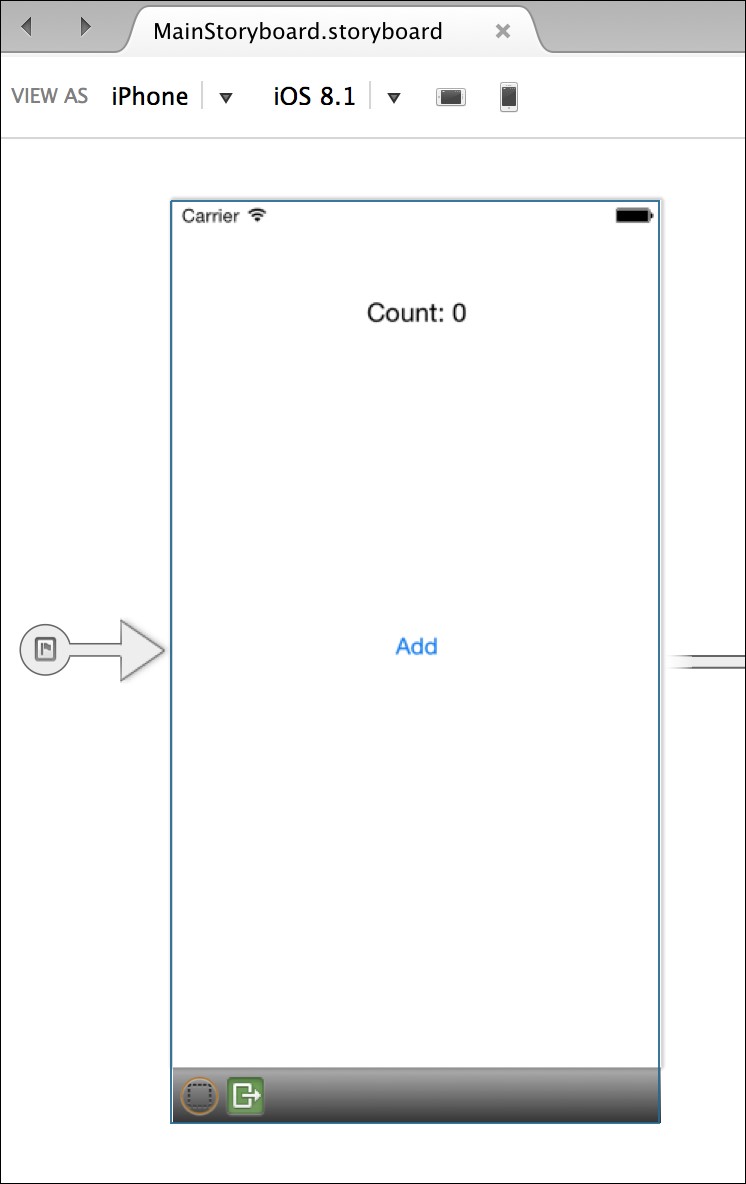
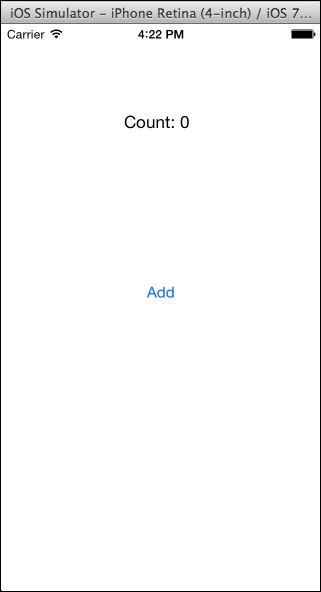
Your application should start looking a lot more like a real application, as shown in the following screenshot:
Now you might be wondering about adding user interaction options to the app at this point. In Xcode's iOS designer, you can make an outlet that will make each view visible from C#. An outlet is a reference to a view in a storyboard or XIB file that will be filled out with an instance of the view at runtime. You can compare this concept to naming a control in other technologies such as ASP.NET MVC, WebForms, or Windows Presentation Foundation (WPF). Luckily, Xamarin's iOS designer is a bit simpler than setting up an outlet in Xcode. You merely fill out the Name field in the Properties tab, and Xamarin Studio will generate a property in partial class, which gives you access to the label and button from your controller. Additionally, you can wire an action from a storyboard file, which is a method that will be called when an event occurs. Xamarin Studio exposes iOS actions as partial methods to be implemented in your classes.
Let's add some interactions to the app as follows:
- Switch back to Xamarin Studio.
- Double-click on the
MainStoryboard.storyboardfile again. - Select the label you created earlier and go to the Properties pane and make sure that you have the Widget tab selected.
- Enter the name
labelin the Name field. - Repeat this process for the button, and enter the name
buttoninto its Name field.
Xamarin has improved this experience greatly from what the experience used to be in Xcode. Xcode has a strange interface for those used to Visual Studio. The method used to create an outlet involved clicking and dragging from the control onto an Objective-C header file. Merely filling out a Name field is much simpler and much more intuitive for developers that have a C# background.
Now that we have two outlets defined, two new properties will be available from your controller. Expand the *ViewController.cs file in your solution and open the *ViewController.designer.cs file. You will see your properties defined as follows:
[Outlet]
[GeneratedCode ("iOS Designer", "1.0")]
MonoTouch.UIKit.UILabel label { get; set; }

[Outlet]
[GeneratedCode ("iOS Designer", "1.0")]
MonoTouch.UIKit.UIButton button { get; set; }
It is not a good idea to modify this file since Xamarin Studio can rebuild it if you make further changes in the designer or Xcode. Nevertheless, it is a good practice to learn how things are actually working behind the scenes.
Open your *ViewController.cs file, and let's enter the following code in your controller's ViewDidLoad method:
public override void ViewDidLoad()
{
  base.ViewDidLoad();

  int count = 0;
  button.TouchUpInside += (sender, e) =>
    label.Text = string.Format("Count: {0}", ++count);
}
When the ViewDidLoad method is called, your controller's view is loaded for the first time. This happens once in the lifetime of your controller. We subscribed to the TouchUpInside event, which is fired when the button is clicked; iOS does not have a click event, which might be what you are used to on Windows platforms. We also used C#'s convenient lambda expression syntax to update the label when the event is fired. A lambda expression is shorthand for an anonymous method, which is a feature that has been part of C# since .NET 4.0.
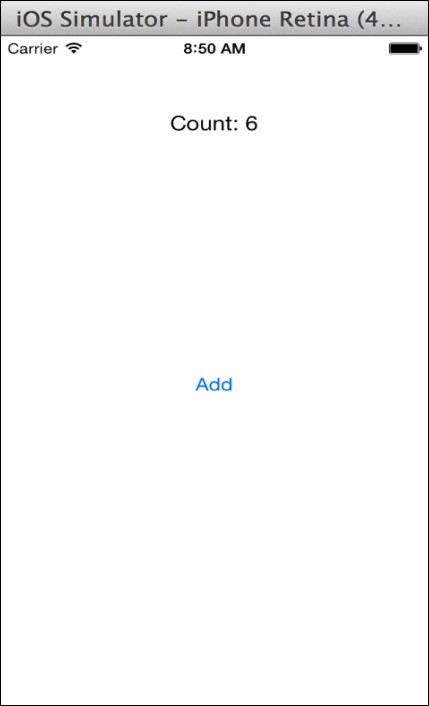
Run your application, and you will be able to interact with your button and increment the value displayed in the label, as shown in the following screenshot:
Next, we need to make a transition from one controller to another. To do this, iOS has a concept called segue, which is basically some kind of animation that switches from one controller to the next. There are several types of segues, but the most common segue slides transition to a new controller from the right or bottom of the screen.
Now, let's add a second controller to the application as follows:
- Return to your project in Xamarin Studio.
- Double-click on the
MainStoryboard.storyboardfile. - Drag a new controller from the object library that is usually in the bottom-left corner next to the first controller.
- Click on the controller to select it.
- Select the Properties pane and make sure you are on the Widget tab.
- Enter a name such as
SecondControllerfor the controller into the Class field. - Now let's add a segue for the transition from the first controller to this one. Hold the Ctrl key while clicking on the button from the original controller to your new controller. A blue line will appear followed by a small pop-up menu.
- Select modal from the pop-up menu.
- Run the application from Xamarin Studio.
Since we set up a modal segue from the first controller's button, your second controller will appear while clicking on it. However, there isn't a way to exit the new controller yet. If you return to Xamarin Studio, you'll notice that a SecondController.cs file and a SecondController.designer.cs file have been automatically created for you.
Let's add a button to SecondController as follows:
- Return to Xamarin Studio.
- Double-click on the
MainStoryboard.storyboardfile. - Drag a button from the object library onto the second controller.
- Navigate to the Properties pane and Widget tab.
- Set the Name of the button to
close. - Set the Title of the button to
Close.
Open the SecondController.cs file and add the following method:
public override void ViewDidLoad()
{
    base.ViewDidLoad();
    close.TouchUpInside += (sender, e) =>
      DismissViewController(true, null);
}
If you compile and run your application, clicking on the button will increment the value on the label and display the modal second controller. You can then close the second controller by tapping on the Close button. Notice the neat sliding animation; iOS automatically applies these kinds of transition effects and are very easy to customize on iOS:

Since we have gone over the basics of laying out controls in Xamarin's iOS designer and interacting with outlets in C#, let's go over the standard lifecycle of an iOS application. The primary location for handling application-level events is in the AppDelegate class.
If you open your AppDelegate.cs file, you can override the following methods:
FinishedLaunching: This is the first entry point for the application, which should returntrue.DidEnterBackground: This means that the user clicked on the home button on their device or another app, such as a phone call, came to the foreground. You should perform any action needed to save the user's progress or state of the UI as the iOS might close your application to save memory once pushed to the background. While your application is in the background, the user could be navigating through the home screen or opening other apps. Your application is effectively paused in memory until resumed by the user.WillEnterForeground: This means that the user has reopened your application from the background. You might need to perform other actions here such as refreshing the data on the screen and so on.OnResignActivation: This happens if the operating system displays a system popup on top of your application. Examples of this are calendar reminders or the menu the user can swipe down from the top of the screen.OnActivated: This happens immediately after theOnResignActivationmethod is executed as the user returns to your app.ReceiveMemoryWarning: This is a warning from the operating system to free up the memory in your application. It is not commonly needed with Xamarin because of the C#'s garbage collector, but if there are any heavy objects such as images throughout your app, this is a good place to dispose them. If enough memory cannot be freed, the operating system can terminate your application.HandleOpenUrl: This is called if you implement a URL scheme, which is the iOS equivalent of file extension associations on a desktop platform. If you register your app to open different types of files or URLs, this method will be called.
Likewise, in your *ViewController.cs file, you can override the following methods on your controller:
ViewDidLoad: This occurs when the view associated with your controller is loaded. It will occur only once on devices running iOS 6 or higher.ViewWillAppear: This occurs prior to your view appearing on the screen. If there are any views that need to be refreshed while navigating throughout your app, this is generally the best place to do it.ViewDidAppear: This occurs after the completion of any transition animations and your view is displayed on the screen. In some uncommon situations, you might need to perform actions here instead of inViewWillAppear.ViewWillDisappear: This method is called prior to your view being hidden. You might need to perform some cleanup operations here.ViewDidDisappear: This occurs after any transition animations are completed for displaying a different controller on the screen. Just like the methods for appearing, this occurs afterViewWillDisappear.
There are several more methods available to override, but many are deprecated for recent versions of iOS. Familiarize yourself with Apple's documentation site at http://developer.apple.com/library/ios. It is very helpful to read the documentation on each class and method when trying to understand how Apple's APIs work. Learning how to read (not necessarily code) Objective-C is also a useful skill to learn so that you are able to convert Objective-C examples to C# when developing iOS applications.
Setting up an Android application in Xamarin Studio is just as easy as it is for iOS and is very similar to the experiences in Visual Studio. Xamarin Studio includes several project templates that are specific for Android to jump-start your development.
Xamarin Studio includes the following project templates:
- Android application: A standard Android application that targets the newest Android SDKs installed on your machine.
- Android Honeycomb application: A project that targets Android Honeycomb, which is API (Application Programming Interface) level 12 and higher.
- Android Ice Cream Sandwich application: A project that targets Android Ice Cream Sandwich, which is API level 15 and above.
- Android library project: A class library that can only be referenced by Android application projects.
- Android Java bindings library: A project for setting up a Java library to be called from C#.
- Android OpenGL application: A project template to use low-level OpenGL for 3D or 2D rendering.
- Android WebView application: A project template for a hybrid app using HTML for certain parts. Support for Razor templating is available.
- Android unit test project: A project for running NUnit tests on Android.
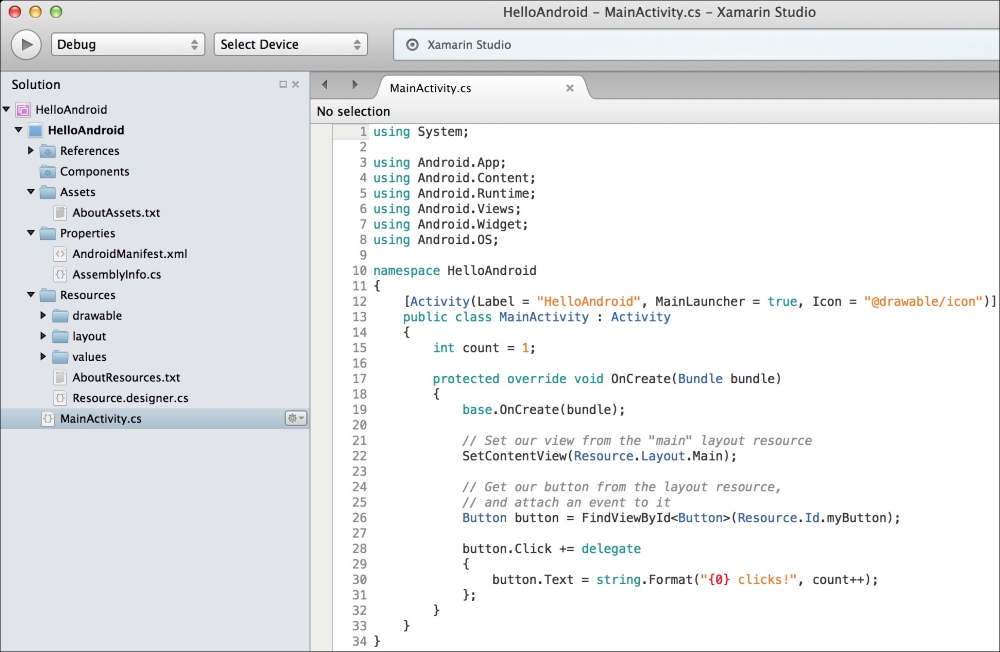
Launch Xamarin Studio and start a new solution. From the New Solution dialog, create a new Android Application under the Android section.
You will end up with a solution looking something similar to what is shown in the following screenshot:
You'll see that the following files and folders specific to Android have been created for you:
- The
Componentsfolder: This is the same as for iOS projects; the place where components from the Xamarin Component Store can be added. - The
Assetsfolder: This directory will contain files with abuildaction ofAndroidAsset. This folder will contain raw files to be bundled with an Android application. - The
Properties/AndroidManifest.xmlfile: This file contains standard declarations about your Android applications, such as the application name, ID, and permissions. - The
Resourcesfolder: Resources are images, layouts, strings, and so on that can be loaded via Android's resource system. Each file will have an ID generated inResources.designer.csthat you can use to load the resource. - The
Resources/drawablefolder: Any images used by your application are generally placed here. - The
Resources/layoutfolder: This contains any*.axml(Android XML) files that Android uses to declare UIs. Layouts can be used for an entire activity, fragment, dialog, or child control to be displayed on the screen. - The
Resources/valuesfolder: This contains XML files to declare key-value pairs for strings (and other types) throughout an application. This is how localization for multiple languages is normally set up on Android. - The
MainActivity.csfile: This is theMainLauncheraction and the first activity of your Android application. There is nostatic void Mainfunction in Android apps; execution begins on the activity that hasMainLauncherset totrue.
Now let's perform the following steps to run the application:
- Click on the play button to compile and run the application.
- A Select Device dialog will appear.
- Select the emulator of your choice and click on Start Emulator. If you have set up the x86 emulator in Chapter 1, Setting Up Xamarin, I would recommend that you use it.
- Wait a few seconds for the emulator to start. Once it starts, it is a good idea to leave it running as long as you are working on an Android project. This will save you a good deal of time waiting.
- You should see the emulator now enabled in the list of devices; select it, and click on OK.
- The very first time you deploy to an emulator or device, Xamarin Studio will have to install a few things such as the Mono shared runtime and Android platform tools.
- Switch over to the Android emulator and your application will appear.
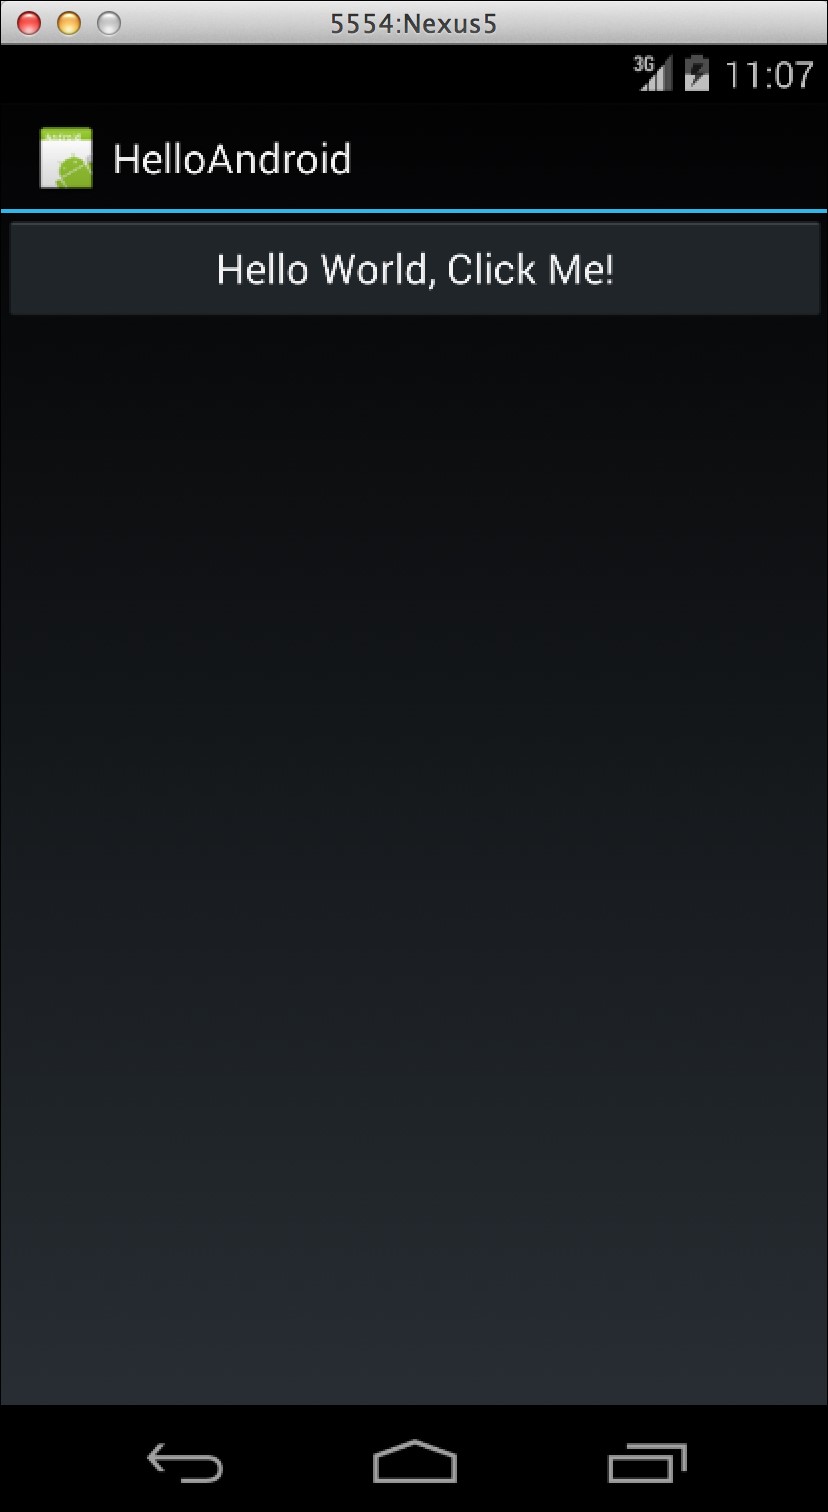
When all is done, you have deployed your first Android application, complete with a single button. Your app will look like what is shown in the following screenshot:
The Android operating system is very focused on the concept of an activity. An activity is a task or unit of work that users can perform on their screen. For example, users would perform a phone activity to dial a number and carry out a second activity that involves interacting with their address book to locate the number. Each Android application is a collection of one or more activities that users can launch and press the hardware's back key on their device to exit or cancel. The user's history is kept in the Android back stack, which you can manipulate from code in special cases. When a new activity starts, the previous one is paused and maintained in memory for later use, unless the operating system is running low on memory.
Activities are loosely coupled with each other; in some ways, you can think of them as having completely separate states from one another in memory. Static values will persist the life of the application as in .NET applications, but the common practice is to pass a state through an Android bundle. An Android bundle is a set of key-value pairs used to pass data from one Android object to another. This is useful to pass an identifier for an item displayed in a list to edit that item in a new activity.
Activities have the following lifecycle callback methods that you can override:
OnCreate: This is the first method called when your activity is created. Set up your views and perform other loading logic here. Most importantly, you will callSetContentViewhere to set up your activity's view.OnResume: This is called when your activity's view is visible on the screen. It is called if your activity is displayed for the first time, and when the user returns to it from another activity.OnPause: This is called to notify that the user has left your activity. It can happen prior to navigating to a new activity within your app, locking the screen, or hitting the home button. Assume that the user might not return, so you need to save any changes the user made here.OnStart: This occurs immediately beforeOnResumewhen the activity's view is about to be displayed on the screen. It occurs when an activity starts and when a user returns to it from another activity.OnStop: This occurs immediately afterOnPausewhen the activity's view is no longer displayed on the screen.OnRestart: This method occurs when the user returns to your activity from a previous activity.OnActivityResult: This method is used to communicate with other activities in other applications on Android. It is used in conjunction withStartActvityForResult; for example, you will use this to interact with the Facebook application to log in a user.OnDestroy: This is called when your activity is about to be freed from memory. Perform any additional cleanup that could help the operating system here, such as disposing of any other heavyweight objects the activity was using.
A flowchart of the Android lifecycle is as follows:

Unlike iOS, Android does not enforce any design patterns upon its developers. However, it is not possible to get away without understanding the Android activity lifecycle to some degree. Many concepts with activities are parallel to controllers on iOS; for example, OnStart is equivalent to ViewWillAppear and OnResume is equivalent to ViewDidAppear.
Other methods for working with activities are as follows:
StartActivity(Type type): This method starts a new activity within your application and passes no extra information to the activity.StartActivity(Intent intent): This is an overload method to start a new activity withIntent. This gives you the ability to pass additional information to the new activity, and you can also launch activities in other applications.StartActivityForResult: This method starts a new activity with the anticipation of receivingOnActivityResultwhen the activity's operation is completed.Finish: This will close the current activity and invokeOnDestroywhen it is completely closed and no longer displayed on the screen. Depending on what is currently on the back stack, the user will return to a previous activity or the home screen.SetContentView: This method sets the primary view to be displayed for an activity. It should be called within theOnCreatemethod prior to the activity being displayed on the screen.FindViewById: This is a method to locate the view displayed in your activity. It has a generic version to return a view of the appropriate type.
You can think of intent as an object that describes the transition from one activity to another. You can pass additional data through intents as well as modify how the activity is displayed and the user's navigation history.
In addition to activities, Android has the concept of a fragment. You can think of a fragment to be a miniature activity that is displayed inside a parent activity. Fragments are useful for reusing different pieces of a UI throughout your apps and can also help you implement split screen navigation on tablets.
The default template for Android projects has a little more built-in functionality than iOS. Android user interface layouts are defined in XML files that are readable by humans and editable. However, Xamarin Studio has provided an excellent design tool that allows you to drag and drop controls to define your Android layouts. Let's add some more features to your application and start using the Android designer.
Return to Xamarin Studio and carry out the following steps to add features to your app:
- Open the Android project you created earlier in this chapter in Xamarin Studio.
- Navigate to Resources | layout in your project and open
Main.axml. - You will see the Android designer open in Xamarin Studio.
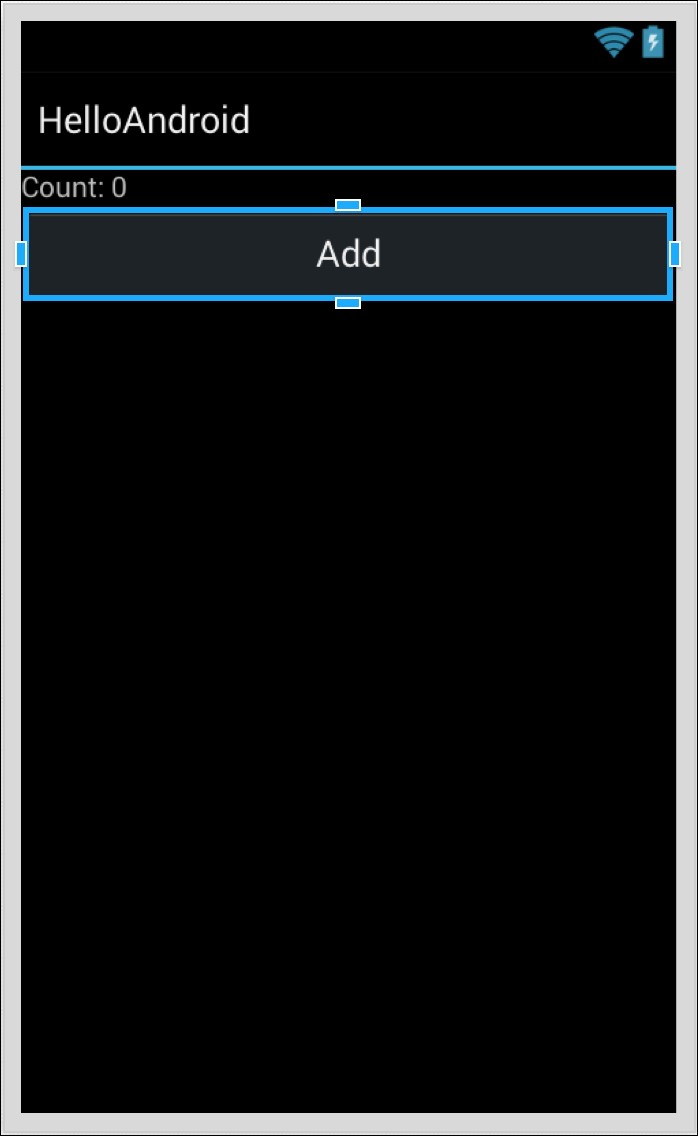
- Drag TextView from the Toolbox section on the right to the layout just above the button labeled Hello World, Click Me!
- Type some default text such as
Count: 0into the label. - In the Properties pane on the right, you'll see the id value is set to
@+id/textView1. Let's change it to@+id/myText, in order to be consistent with the button. - While we're here, go ahead and change the text on the button to something more appropriate such as
Add. - Click on the play button to compile and run the application. If you still have the Android emulator, you can simply switch to it. Otherwise, you will have to start it again.
Your Android application will now look identical to the changes you made in the designer as follows:
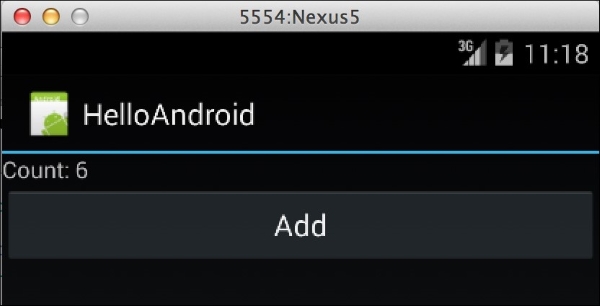
Now, let's interact with the new label from the code. Switch back to Xamarin Studio and open MainActivity.cs. Let's modify the activity to interact with the TextView field instead of the button. We use the FindViewById method to retrieve a view by the ID we set up in the layout file. Xamarin Studio has also auto-generated a static class named Resource to reference your identifiers.
So let's retrieve the instance of the TextView field by placing this code in OnCreate as follows:
TextView text = FindViewById<TextView>(Resource.Id.myText);
The Resource class is a static class that the Xamarin designer will populate for you. For future reference, you might have to build your Android project for new IDs and other resources to show up in your C# files in Xamarin Studio.
Next, let's update the Click event on the button:
button.Click += delegate
{
    text.Text = string.Format("Count: {0}", ++count);
};
This will rewire the button to update the text in TextView instead of on the button itself. Now if we run the application, we'll get an Android app that functions identically to the iOS one in the previous chapter. The Android app will look like what is shown in the following screenshot:
Since we added some of our own views to our layout, let's add a second activity to build on our understanding of activities in Android.
Return to Xamarin Studio and perform the following steps:
- If needed, open the Android project you created earlier in the chapter in Xamarin Studio.
- Create a new Android activity in the project under the Android section. Name it
SecondActivity.cs. - Navigate to Resources | layouts, and create a new Android layout named
Second.axml. - Open
SecondActivity.csand add the following code toOnCreate:SetContentView(Resource.Layout.Second);
- Open
MainActivity.csand add the following line of code to theClickevent of your button:StartActivity(typeof(SecondActivity));
- Open
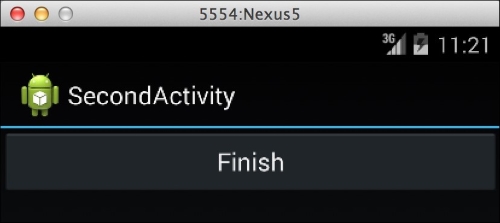
Second.axmland drag a button into the view. Set its text toFinish, for example, and set its ID to@+id/finish. - Finally, open
SecondActivity.csand add the following lines to itsOnCreatemethod:var finish = FindViewById<Button>(Resource.Id.finish); finish.Click += (sender, e) => Finish();
- Build and run your application.
Your application's button will now launch a new activity in addition to incrementing the count on the label. Once SecondActivity is visible, you can click on its button to finish the activity and return to the first activity. Down the road, if you need to pass information from one activity to another, you will need to create an Intent object to pass to StartActivity. The second activity of your app is shown in the following screenshot:
In this chapter, we created our first iOS application in Xamarin Studio. We covered Apple's MVC design pattern to better understand the relationship between UIViewController and UIView and also covered how to use the iOS designer in Xamarin Studio to edit storyboard files. Next, we created our first Android application in Xamarin Studio and learned the activity lifecycle in Android. We also used Xamarin's Android designer to make changes to Android XML layouts.
From the topics covered in this chapter, you should be fairly confident in developing simple apps for iOS and Android using Xamarin's tools. You should have a basic understanding of the native SDKs and design patterns to accomplish tasks on iOS and Android.
In the next chapter, we'll cover various techniques used to share code across platforms with Xamarin Studio. We'll go over different ways of architecting your cross-platform application and how to set up Xamarin Studio projects and solutions.