

Nowadays, Node Package Manager (npm) is one of the most demanded gadgets in the web developer tool belt. It's a command-line utility connected with the corresponding online repository of packages and is capable of package installation, version management, and dependency management. So, when we need a package (library, framework, and module), we will check whether it's available in the npm repository and run npm to bring it into our project. It not only downloads the package, it also resolves its dependencies and does it pretty smartly. Furthermore, npm is pretty handy as an automation tool. We can set various command-line tasks to refer any of the locally installed packages by name. The npm tool will find the executable package among installed packages and run it.
The npm tool is distributed together with Node.js. So, you can find an installer for Windows or for macOS on the Node.js download page (https://nodejs.org/en/download). It is also available as an APT package, so you can install it for Linux with the apt-get tools:
sudo apt-get install npm
If you have already installed npm, ensure that it's up to date:
sudo npm install npm@latest -g
As I have already said, we can install packages with npm-- for example, NW.js. If we want to do it globally, we will run the following command:
sudo npm install nw --global
Alternatively, we can run the following command:
sudo npm i nw -g
This will download the latest build of NW.js in {prefix}/lib/node_modules/ and place the executable file in {prefix}/bin. It adds the binary to the PATH environment variable, so one can call nw in any location in the shell.
npm config get prefix. On Linux/macOS it will be /usr/local. On Windows %APPDATA%npm
This way, we will have a single instance of NW.js across the system, but what if an application requires a specific version of NW.js? Luckily, with npm, we can also install a package locally, and therefore, rely on a particular version that addresses our application. In addition, we can manage local dependencies in the package.json file. With a single command, npm can install/update all the dependencies enlisted there at once.
Let's take a look at how it works on our project. We go to the project root (the file-explorer folder) and run the following command:
npm init -y
It produces a package.json file with the following content:
{
  "name": "file-explorer",
  "version": "1.0.0",
  "description": "",
  "main": "main.js",
  "scripts": {
   "test": "echo "Error: no test specified" && exit 1"
  },
  "keywords": [],
  "author": "",
  "license": "ISC"
}
Here, in the name field, we set our application name. Beware that NW.js will use the provided value to name the directory in a system-dependent path for the project persistent data (nw.App.dataPath). So, it shall be a unique, lowercase alpha-numeric, but may include a few special symbols, such as ., _, and -.
Field version expects the application version as a string, conforming to the Semantic Versioning standard (http://semver.org/). What it all boils down to is a composite product version out of three numbers separated with dots. The first number (MAJOR) increments when we make incompatible API changes, the second number (MINOR) increases when we introduce a new functionality, and the last one (PATCH) identifies bug fixes.
In the main field, we let NW.js know where to find our start page HTML. We have to edit the manifest to change its value with index.html:
./package.json
{
  ...
  "main": "index.html",
  ...
}
The field scripts accepts a key value object with automation scripts for the project. By default, it has a placeholder for tests. Now, run the following command:
npm run test
The Shell responds with an error message saying no test specified, as we have no test yet. However, we will need a script to start the application. So, we edit package.json again and add to scripts field the following lines:
package.json
{
  ...
  "scripts": {
    "start": "nw .",
    "test": "echo "Error: no test specified" && exit 1"
  },

  ...
}
Now, we can type npm run start or npm start to run NW.js on the project root, but we do not have the framework installed, yet. We are just about to bring it in.
Before telling npm to install the framework, we note that the standard version of NW.js doesn't include DevTools, which we definitely will need for development. So, we look for a specific version, the so-called SDK flavor. To find out the package versions that are available for the NW.JS package (nw), we run the following command:
npm view nw dist-tags
Alternatively, we can run the following command:
npm v nw dist-tags
This receives the following output:
{
  latest: '0.20.3',
  alphasdk: '0.13.0-alpha4sdk',
  alpha5sdk: '0.13.0-alpha5sdk',
  alpha6sdk: '0.13.0-alpha6sdk',
  alpha7sdk: '0.13.0-alpha7sdk',
  sdk: '0.20.3-sdk'
}
From this payload, we can assume that the latest version at the time of writing is 0.20.3 and that it is accompanied with 0.20.3-sdk. So, we can install the framework, as follows:
npm install [email protected] --save-dev
Alternatively,we can install it, as follows:
npm i [email protected] -D
Actually, since we know that the package has a dist-tag called sdk, we can also do it as follows:
npm i nw@sdk -D
Just after running any of these commands, we can find a new subdirectory named node_modules. There, npm installs local dependencies.
Have you noticed that we applied the --save-dev (-D) option? This way, we requested npm to save the package in our development dependency list. Observe that package.json is changed:
{
  "name": "file-explorer",
  "version": "1.0.0",
  "description": "",
  "main": "index.html",
  "scripts": {
    "start": "nw .",
    "test": "echo "Error: no test specified" && exit 1"
  },
  "keywords": [],
  "author": "",
  "license": "ISC",
  "devDependencies": {
    "nw": "^0.20.3-sdk"
  }
}
We installed the package as a development dependency because this SDK version is meant only for development. In Chapter 2, Creating a File Explorer with NW.js–Enhancement and Delivery we will examine the distribution and packaging techniques. So, you will see how we can bundle the application with a platform-specific NW.js production build.
Since we have reflected our dependency in the manifest file, we can update this and any further packages any time by running the following command:
npm update
If we lose node_modules(for example after cloning the project from remote GIT repository given the dependency folder is usually in the ignore list), we can install all the dependencies through the following command:
npm i
Have you noticed? In the package.json, we assigned nw package with version in, so called, caret range ^0.20.3-sdk. That means during the install/update process, npm will accept new versions with patch and minor updates, but no major versions.
npm i pkg-name: Installs the latest available version of a package
npm i pkg-name@version: Installs a concrete version of the package
npm i pkg-name -S: Installs package as a dependency and saves it in package.json
npm i pkg-name -D: Installs package as a development dependency and save in package.json
npm i: Installs all the dependencies (including development ones) enlisted in package.json
npm i --production: Installs dependencies but not development ones
npm list: Shows all the installed dependencies
npm uninstall nw --save: uninstalls a package and removes it from
npm un nw -S: shorter syntax
package.json
At this point, we have the framework instance and package.json pointing to index.html. So, we can run the only script we have defined in the manifest file so far:
npm start
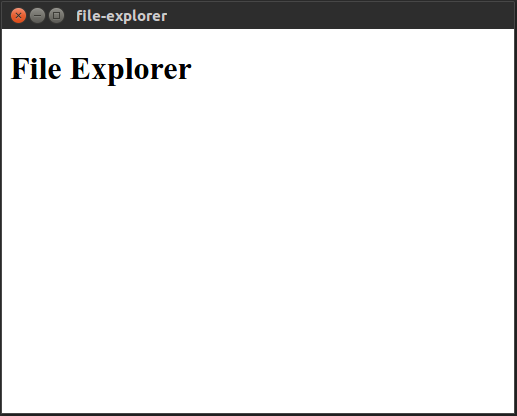
First, run it on NW.JS in Ubuntu:
Then, run it on NW.JS in windows:

Finally, we run it in macOS:
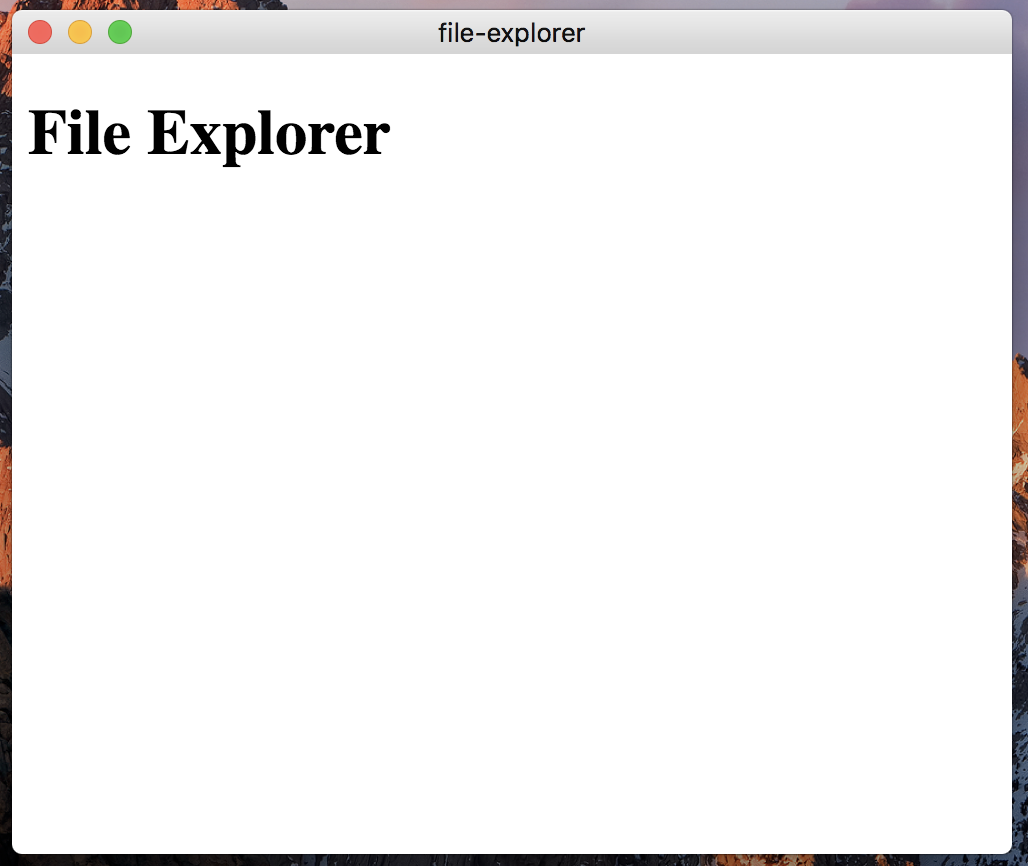
NW.js created a window and rendered index.html in it. It took the default Window parameters. If we want to customize them, we will need to edit package.json.
First, we will add the window field that accepts an object with the following properties:
- window.icon: This specifies a relative path to the window icon.
- window.show: This indicates whether the window is visible when the application starts or not. For instance, you can set it to false in the manifest and then change it programmatically with JavaScript (nw.Window.get().show( true )).
- window.frame: This makes the window frameless when set to false.
- window.width / window.height: This sets the window default size in pixels.
- window.min_width / window.min_height: This sets a minimal acceptable size to the window.
- window.position: This specifies where the window shall be placed. The value can be null, center, or mouse.
- window.resizable: When set to true, this property makes the window resizable.
We will also use the chromium-args field to specify the command-line arguments that we want to pass to chromium. Here, we set it to --mixed-context to switch NW.js into the corresponding mode. So, we could access the browser and the NW.js API directly from Node.js modules. NW.js introduces Node.js context in addition to the browser context and keep them separate. After extending it with NWJS meta-data the manifest looks as follows:
./package.json
{
  ...
  "chromium-args": "--mixed-context",
  "window": {
    "show": true,
    "frame": true,
    "width": 1000,
    "height": 600,
    "min_width": 800,
    "min_height": 400,
    "position": "center",
    "resizable": true
  }
}
These are just a few preferences set for our simple application. All the available options can be found at https://github.com/nwjs/nw.js/wiki/manifest-format.