

Composer is a dependency management tool for PHP that enables us to define dependencies for a PHP application, and Composer installs/updates them. Composer is completely written in PHP and is an application in the PHP Archive (PHAR) format.
Note
Composer downloads dependencies from https://packagist.org/. Any dependency for an application can be installed through Composer as long as it is available on Packagist. Also, complete applications can be installed through Composer if they are available at Packagist.
Composer is a command line tool and can be installed globally in the operating system, or the composer.phar file can be placed in the root of the application and then executed from the command line. For Windows, an executable setup file is provided, which can be used to install Composer globally. For this book, we will follow the instructions for Debian/Ubuntu globally. Perform the following steps:
Issue the following command to download the Composer installer. The file name is
installerand can only be executed with PHP once installed via the following code:Wget https://getcomposer.org/installerIssue the following command to install it globally on Debian or Ubuntu:
Php install --install-dir=/usr/local/bin --filename=composerThis command will download Composer and will install it in the
/usr/local/bindirectory with the file namecomposer. Now, we will be able to run Composer globally.Verify the Composer installation by issuing the following command in the terminal:
Composer --versionIf the Composer version is displayed, then Composer is successfully installed globally.
Now, Composer is installed successfully and is working; it's time to use it.
To use Composer in our project, we will need a composer.json file. This file contains all the dependencies required for the project and some other metadata. Composer uses this file to install and update different libraries.
Let's assume that our application needs to log different information in different ways. For this, we can use the monolog library. First, we will create a composer.json file in the root of our application and add the following code to it:
{
  "require": {
    "monolog/monolog": "1.0.*"
  }
}
After saving the file, execute the following command to install the dependencies of the application:
Composer install
This command will download the dependencies and place them in the vendor directory, as can be seen in the following screenshot:
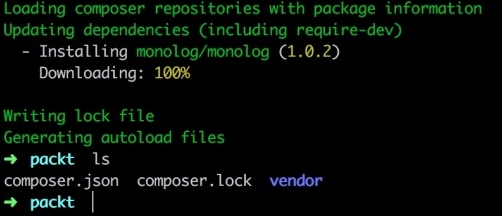
As can be seen in the preceding screenshot, monolog version 1.0.2 is downloaded, and a vendor directory is created. The monolog library is placed in this directory. Also, if a package has to autoload information, then Composer places the library in the Composer autoloader, which is also placed in the vendor directory. So, any new libraries or dependencies will be autoloaded automatically during the application's execution.
Also a new file can be seen, which is composer.lock. When Composer downloads and installs any dependencies, the exact version and other information is written to this file to lock the application to this specific version of dependencies. This ensures that all the team members or whoever wants to set up the application will use the exact same version of the dependencies, and thus, it will reduce the chances of using different versions of dependencies.
Nowadays, Composer is widely used for package management. Big open source projects such as Magento, Zend Framework, Laravel, Yii, and many others are easily available for installation through Composer. We will install some of these in the next appendix using Composer.