

Fundamentally, rooting is obtaining root access to the underlying Linux system, in order to perform operations such as mounting/unmounting filesystems; running SSH, HTTP, DHCP, DNS or proxy daemons; killing system processes; and so on.
Being able to run commands as the root user allows us to do anything on Linux and thus, by extension, on an Android system.
Jailbreaking is the process of privilege escalation, by which we can remove the hardware level restrictions imposed by Apple on iOS devices. Jailbreaking permits root access to the iOS filesystem and manager, allowing the downloading of additional applications, extensions, and themes that are unavailable through the official Apple App Store.
All that is needed to root an Android device is a USB cable; an unrooted Android device; and an exploit code to be run on the device, either through ADB, one-click-root programs/apps, or a modified ROM that can be flashed onto the device.
The requirements for an iOS jailbreak are a USB Cable, an iOS device, and a jailbreaking program.
Here we will go through two steps; rooting and jailbreaking.
The actual rooting process itself should only take a single click. However, you'll need to do a few quick things first:
Download and install the Java JDK and Android SDK on your computer before continuing. Java must be installed before the Android SDK.
Enable USB debugging on your Android. On the device, go into the Settings screen, tap Applications, tap Development, and enable the USB debugging checkbox:

After this, the rooting process essentially involves finding tested rooting methods for your specific device by searching the Internet. The rooting processes for most Android devices can be categorized into the following:
Using a rooting application: In this process you perform the following tasks:
Install the rooting application on your machine
Connect the Android device with USB debugging enabled
Follow the simple instructions to root your device
Using rooting apps: In this process you perform the following tasks:
Download the rooting APK
Enable USB debugging mode and allow installation from unknown sources, from the development settings of the Android device
Install the rooting APK using
adb install /path/to/apkFollow the onscreen instructions to root the Android device
Flashing a custom ROM: In this process you perform the following tasks:
Copy the modified ROM to the SD card of the Android device (as a
.zipfile)Reboot the device in recovery mode
Head to the install or install zip from sdcard section of the recovery menu
Navigate to the
.zipfile, and select it from the list to flash it
Before performing a jailbreak, you should back up your device. If for any reason the jailbreak fails, you can restore the backup.
The jailbreaking process involves downloading the program to a Mac/Windows machine, connecting our iOS device to our machine via a USB cable, and running the tool. One such tool is evasi0n:
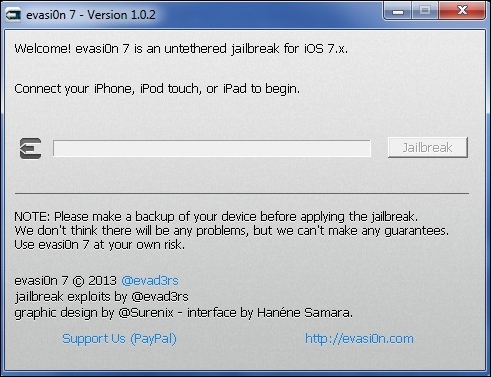
The instructions are mentioned along with the tool, and should be followed methodically.
As a part of the jailbreaking process, the tool installs Cydia on the target iOS device.
Cydia is an alternative App store containing iOS apps other than ones provided and usually approved by Apple. Most of these apps are developed by the jailbreaking community, such as tools for using custom themes and widgets, changing default apps, and so on.

Let's take a look at the details with reference to the processes individually.
Being able to run commands as the root user allows us to do anything on Linux and thus, by extension, on an Android system.
The process for rooting an Android device typically involves two steps:
Find an exploit that allows the execution of arbitrary code as
root.Use the exploit to install
su.
If the target device has an unlocked bootloader, the process is pretty easy. An unpackaged bootloader allows the flashing of arbitrary ROMs, so su can be added to a stock ROM and repackaged into a modified ROM. All the user needs to do is to reboot the device into flashing mode by pressing a combination of keys during bootup, and use the device's utilities to flash the modified ROM onto the device.
But, what about devices that have locked bootloaders? You can only interact with unprivileged programs on the system and they cannot help you execute any privileged code.
Many programs, such as system services, run as root on Android, to be able to access underlying hardware resources.
All one-click-root methods exploit vulnerabilities in one of these system processes running in privileged mode to execute a particular piece of code that mounts the system in read-write mode and installs the su binary on the system, thus gaining privileged access to the system.
The jailbreaking process differs from tool to tool, and different procedures are followed for different iOS versions. Here, we analyze the anatomy of one such tool, used to jailbreak an iPhone 5.
The jailbreaking program begins by running libimobiledevice to exploit a bug in iOS's mobile backup system in order to gain access to a normally restricted file containing the time zone settings.
Note
libimobiledevice is a cross-platform software library which "talks" the protocols that support iOS devices. It allows other software to easily access the device's filesystem; retrieve information about the device and its internals; back up and restore the device; manage installed applications; retrieve address books, calendars, notes and bookmarks; and synchronize music and video to the device.
More information can be found at http://www.libimobiledevice.org/.
It then inserts a "symbolic link" to a certain altered "socket," which allows programs to communicate with launchd, a master process which is loaded whenever an iOS device boots up and can launch applications that require "root" privileges.
So now, whenever an iOS mobile backup runs, all programs will automatically be granted access to the time zone file, and therefore access to launchd.
Pretty neat, huh?
iOS implements code-signing as a safeguard to prevent any "untrusted" application from gaining access to launchd.
So to defeat code signing, the jailbreaking tool launches a new, unsigned, seemingly benign app. But when the user is prompted to tap the app's icon, the app uses a technique called shebang to call up code from another signed application, which in this case was launchd.
A shebang is a character sequence consisting of the hash symbol and exclamation mark characters (that is, #!) at the beginning of a script.
In Unix, when a script with a shebang is run as a program, the program loader parses the rest of the script's initial line as an interpreter directive; the specified interpreter program is run instead, passing to it as an argument the path that was initially used when attempting to run the script.
For example, if a code has the path path/to/code, and it starts with #!/bin/sh, then the program loader is instructed to run the program /bin/sh instead, passing path/to/code as the first argument.
launchd is then used to run the remount command, which changes the memory settings of the read-only root file system to be writable.
To make the jailbreak "persistent", the launchd.conf file is called to alter the launchd configurations. The user now does not need to re-run the program on every reboot.
The jailbreaking tool then moves on to its last feat, removing restrictions at the kernel level. The iOS kernel uses Apple Mobile File Integrity Daemon (AMFID) to run unapproved apps from using a process. The jailbreaking program leverages launchd once again, to load a library of functions into AMFID in order to always approve all apps.
The second restriction posed by the kernel is Address Space Layout Randomization (ASLR), used to prevent the alteration of memory by randomizing or "hiding" the device's code every time it boots. This would prevent someone from write over a particular part of the code.
The jailbreaking tool then uses a neat trick to locate one particular area in memory; the ARM exception vector. This part handles app crashes, indicating the part of memory where the crash occurred.
A crash is simulated by the jailbreaking tool, checking the ARM exception vector to see where the crash occurred and collecting minimal information, enough to map out the rest of the kernel.
The tool, as its final step, uses a bug in iOS's USB interface that passes an address in the kernel's memory to a program and expects the program to return it untampered.
This allows the tool to write to the part of the kernel that restricts code changes, thus taking complete control, and fulfilling its purpose successfully!