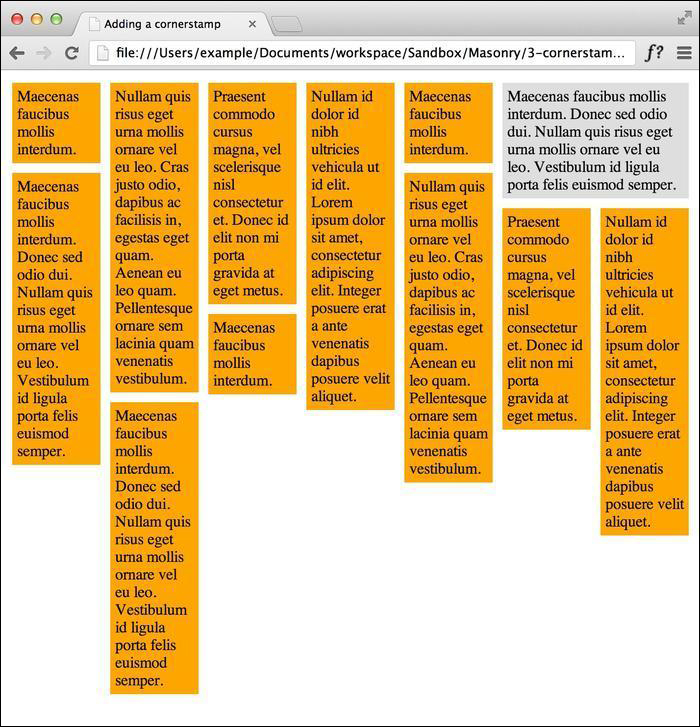

In Masonry, we can define a corner stamp, an element that will stay in the corner no matter where any of the other elements have moved. For example, a featured article in a list of blog posts or maybe a section about the author. Using the corner stamp is possible with a modification to Masonry.
In the code bundle for this book, open the 3-cornerstamp.html file in your preferred text editor to follow along.
Use the CSS properties that we have already defined in the Setting up a single-width column system recipe and make another class for the corner stamp.
<style>
   .masonry-item {
      background: #FFA500;
      float: left;
      margin: 5px;
      padding: 5px;
      width: 80px;
   }
   .cornerstamp {
      width: 180px;
      margin: 5px;
      padding: 5px;
      background: #DEDEDE;
      float: right;
   }
</style>
Add the standard Masonry HTML structure and then add an additional element with the
cornerstampclass.<div id='masonry-container'> <div class='cornerstamp'> Maecenas faucibus mollis interdum. </div> <div class='masonry-item '> Nullam quis risus eget urna mollis ornare vel eu leo. </div> <div class='masonry-item '> Praesent commodo cursus magna, vel scelerisque nisl consectetur et. Donec id elit non mi porta gravida at eget metus. </div>Before the Masonry script, add the following corner stamp modifications:
<script>
   // Masonry corner stamp modifications
   $.Mason.prototype.resize = function() {
      this._getColumns();
      this._reLayout();
   };
   $.Mason.prototype._reLayout = function(callback) {
      var freeCols = this.cols;
      if (this.options.cornerStampSelector) {
         var $cornerStamp = this.element.find(this.options.cornerStampSelector), cornerStampX = $cornerStamp.offset().left - (this.element.offset().left + this.offset.x + parseInt($cornerStamp.css('marginLeft')) );
         freeCols = Math.floor(cornerStampX / this.columnWidth);
      }
      // reset columns
      var i = this.cols;
      this.colYs = [];
      while (i--) {
         this.colYs.push(this.offset.y);
      }
      for ( i = freeCols; i < this.cols; i++) {
         this.colYs[i] = this.offset.y + $cornerStamp.outerHeight(true);
      }
      // apply layout logic to all bricks
      this.layout(this.$bricks, callback);
   };
Now add the standard Masonry script, with the
cornerstampclass assigned to thecornerStampSelectoroption.$(function() { $('#masonry-container').masonry({ itemSelector : '.masonry-item', columnWidth : 100, cornerStampSelector : '.cornerstamp' }); }); </script>
After specifying which element is the corner stamp, Masonry will keep the element in the corner while moving all other items around it. There are a couple of things that will break the corner stamp, which you need to take note of. The code for the corner stamp elements cannot have the class used to identify Masonry elements, in our case masonry-item, which is why we identify it separately. In this example, we put the corner stamp in the top-right corner by floating the element to the right, which can be seen in the following screenshot: