
At the end of this chapter, you will have all the necessary elements to begin programming with Django. A website developed with Django is a project that contains one or more applications. Indeed, when a website becomes more important, it becomes necessary to logically separate it into several modules. These modules are then placed in the project that corresponds to the website. In this book, we will not need to create many applications, but they can be very helpful in some cases. Indeed, if one day you create an application and you want to use it in another project, you will need to copy and adapt this application to the new project.
To be able to use Django, you need to install the following software:
- Python 3, to enjoy the third version innovations.
- setuptools is a module that simplifies the installation of the external Python module. However, it does not manage to uninstall the module.
- PIP extends the possibilities of setuptools by removing packages, using easier syntax, and providing other benefits.
- Django, which that we are going to install thanks to PIP.
These installations will be compatible with Windows, Linux, and Mac OS X.
To use all the tools that we have talked about so far, we first need to install Python 3. The following sections describe how we can install Python on different operating systems.
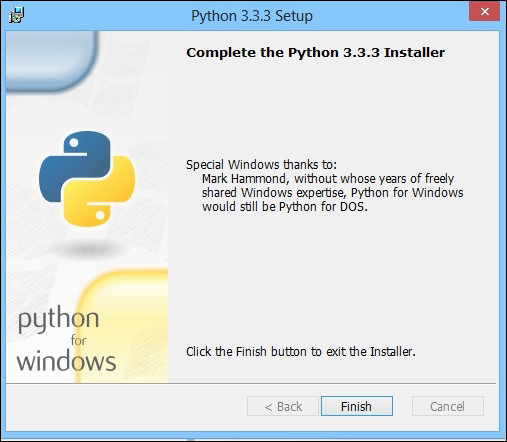
To download the Python executable, visit http://www.python.org/download/ and download the Python MSI file. Please make sure that you choose the right version concerning your platform. The Python installation may need an administrator account.
For all the stages of the Python installation, you can leave all the settings at their default values. If the installation has been done properly, you should see the following dialog window open:
To set up Python 3 on Linux, we can use the packet manager APT with the following command:
root@debian:apt-get install python3
Tip
Downloading the example code
You can download the example code files for all Packt books you have purchased from your account at http://www.packtpub.com. If you purchased this book elsewhere, you can visit http://www.packtpub.com/support and register to have the files e-mailed directly to you.
We need to confirm the modifications proposed by APT.
The latest version of Mac OS already has a version of Python. However, Version 2 of Python is installed, and we would like to install Version 3. To do this, visit https://www.python.org/download/ and download the right version. Then, open the file with the extension .dmp. Finally, run the file with the extension .mpkg. If you get an error such as Python cannot be opened because it is from an unidentified developer, perform the following steps:
- In Finder, locate the Python install.
- Press the ctrl key and then click on the app's icon.
- Select Open from the shortcut menu.
- Click on Open.
PIP is a dependence of setuptools. We need to install setuptools to use PIP. The following sections describe how we can install setuptools on different operating systems.
To download the setuptools executable, you have to go to the PyPI website at https://pypi.python.org/pypi/setuptools. Then, we need to click on Downloads and select the right version. In this book, we use Version 1.1, as shown in the following screenshot:

Installing setuptools for Windows
To download the setuptools executable, you have to go to the PyPI website at https://pypi.python.org/pypi/setuptools. Then, we need to click on Downloads and select the right version. In this book, we use Version 1.1, as shown in the following screenshot:
PIP is very popular among Python users, and using PIP is a Django community best practice. It handles the package installation, performs updates, and removes all the Python package extensions. Thanks to this, we can install all the required packages for Python.
If you have installed Python 3.4 or later, PIP is included with Python.
To install PIP, first download it from https://pypi.python.org/pypi/pip/1.5.4.
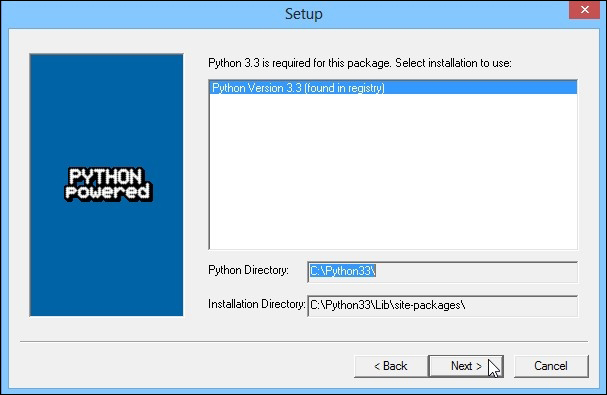
Then, we need to install PIP from the executable, but don't forget to define the right Python installation folder, as you can see in the following screenshot:
For the next set of steps, go with the default options and complete the installation. With PIP, we will be installing all the required Python packages.
Installing PIP for Windows
To install PIP, first download it from https://pypi.python.org/pypi/pip/1.5.4.
Then, we need to install PIP from the executable, but don't forget to define the right Python installation folder, as you can see in the following screenshot:
For the next set of steps, go with the default options and complete the installation. With PIP, we will be installing all the required Python packages.
We will then install the framework on which we will be working. The following sections describe how we can install Django on different operating systems.
To install Django with PIP, you have to open a command prompt and go to the Scripts directory that you can find in the Python folder. You can install Django with the following command:
C:\Python33\Scripts\pip.exe install django=="X.X"
PIP will download and install the Django packages in the site-packages repository of Python.
To facilitate the PIP utilization that we have just installed, we have to look for the version installed on the system and define an alias to refer to the PIP version installed. Do not forget to execute the following commands as root:
root@debian:compgen -c | grep pip
root@debian:alias pip=pip-3.2
root@debian:pip install django=="1.6"
The first command looks for a usable command containing the word pip. You will certainly find a line such as pip-3.2. It's on this command that we will define an alias with the second command.
The third command installs Version 1.6 of Django.
Installing Django for Windows
To install Django with PIP, you have to open a command prompt and go to the Scripts directory that you can find in the Python folder. You can install Django with the following command:
C:\Python33\Scripts\pip.exe install django=="X.X"
PIP will download and install the Django packages in the site-packages repository of Python.
To facilitate the PIP utilization that we have just installed, we have to look for the version installed on the system and define an alias to refer to the PIP version installed. Do not forget to execute the following commands as root:
root@debian:compgen -c | grep pip
root@debian:alias pip=pip-3.2
root@debian:pip install django=="1.6"
The first command looks for a usable command containing the word pip. You will certainly find a line such as pip-3.2. It's on this command that we will define an alias with the second command.
The third command installs Version 1.6 of Django.
Installing Django for Linux
To facilitate the PIP utilization that we have just installed, we have to look for the version installed on the system and define an alias to refer to the PIP version installed. Do not forget to execute the following commands as root:
root@debian:compgen -c | grep pip
root@debian:alias pip=pip-3.2
root@debian:pip install django=="1.6"
The first command looks for a usable command containing the word pip. You will certainly find a line such as pip-3.2. It's on this command that we will define an alias with the second command.
The third command installs Version 1.6 of Django.
Before you start using Django, you need to create an environment for your applications. We will create a Django project. This project will then contain our applications.
To create the project of our application, we need to run the following command using the django-admin.py file (you can find it in the Python33\Scripts folder):
django-admin.py startproject Work_manager
So as to facilitate the use of the Django commands, we can set the environmental variable of Windows. To do this, you must perform the following steps:
- Right-click on My computer on the desktop.
- Click on Advanced System Settings.
- Next, click on Environmental Variable.
- Add or update the
PATHvariable:- If it does not exist, create the
PATHvariable and set its value asC:\Python33/Scripts - If it exists, append
;C:\Python33\Scriptsto the existing value
- If it does not exist, create the
- Now, you can use the precedent command without the need to put yourself in the
Python33/Scriptsfolder.
Note
There are different ways to perform the previous command:
- The following command will be performed in all cases:
C:\Python33\python.exe C:\Python33\Scripts\django-admin.py startproject Work_manager - The following command will be performed if we have defined
C:\Python33\Scriptsin thePATHvariable:C:\Python33\python.exe django-admin.py startproject Work_manager - The following command will be performed if we have defined
C:\Python33\Scriptsin thePATHvariable and the.pyextension file is defined to run with Python:django-admin.py startproject Work_manager
This command creates a Work_manager folder in the folder from where you run the command. We will find a folder and a file in that folder:
- The
manage.pyfile will be used for actions performed on the project such as starting the development server or synchronizing the database with the models. - The
Work_managerfolder represents an application of our project. By default, thestartprojectcommand creates a new application.
The Work_manager folder contains two very important files:
- The
settings.pyfile contains the parameters of our project. This file is common to all our applications. We use it to define the debug mode, configure the database, or define Django packages that we will use. Thesettings.pyfile allows us to do more things, but our use will be limited to what has been previously described. - The
urls.pyfile contains all our URLs. It is with this file that we make the routing in Django. We will cover this in the next chapter.
We will not program our application in the Work_manager folder because we want to create our own Task_manager application.
For this, run the following command using the manage.py file created by the startproject command You must run the following command in the Work_manager folder which contains manage.py file:
Manage.py startapp TasksManager
This command creates a TasksManager folder in the folder of our project. This folder contains five files:
- The
__ init__.pyfile defines a package. Python needs it to differentiate between the standard folders and the packages. - The
admin.pyfile is not useful at this moment. It contains the models that need to be incorporated in the administration module. - The
models.pyfile contains all the models of our application. We use it a lot for the development of our application. Models allow us to create our database and store information. We will discuss this in Chapter 5, Working with Models. - The
tests.pyfile contains the unit tests of our application. - The
views.pyfile can contain views. This file will contain all the actions before sending the HTML page to the client.
Now that we know the most important files of Django, we can configure our project.
To configure our project or our application, we need to edit the settings.py file in the project folder.
This file contains variables. These variables are the settings that Django reads when initializing the web app. The following are a few of these variables:
DEBUG: This parameter must be set toTruethroughout the duration of development because it is the one that enables the errors to be displayed. Do not forget to set it toFalsewhen putting the project into production, because an error gives very sensitive information about the site security.TIME_ZONE: This parameter sets the region referring to which it must calculate dates and times. The default isUTC.DEFAULT_CHARSET: This sets the character encoding used. On thetask_managerapplication, we use UTF-8 encoding to simplify internationalization. To do this, you must add a line as follows:DEFAULT_CHARSET = 'utf-8'
LANGUAGE_CODE: This sets the language to be used on the website. This is the main useful parameter for internationalization.MIDDLEWARE_CLASSES: This defines the different middleware used.
Middleware are classes and methods, including the methods that are performed during the request process. To simplify the beginning of the development, we will remove a middleware from that parameter. This requires you to comment out the line by adding # in front of it:
# 'django.middleware.csrf.CsrfViewMiddleware',
We'll talk about this middleware in a later chapter to explain its operation and importance.
Now that we have seen the general settings of Django, we can start developing our application.
In this chapter, we have installed all the software needed to use Django. In this chapter, we learned how to create a Django project and an application. We also learned how to configure an application.
In the next chapter, we will start the Django development with an example of a web page containing the text Hello World!.