Using .NET for web development is a powerful way to build professional-grade websites and services. But moving from a basic project to a full-scale, production-ready system takes more than just business logic and views—it requires a deep understanding of architecture, maintainability, and scalability. Real-World Web Development with .NET 10 bridges that gap, guiding developers who want to build robust, secure, and maintainable web solutions using battle-tested .NET technologies.
You’ll start by designing structured websites using ASP.NET Core MVC, separating concerns, managing dependencies, and writing clean, testable code. From there, you’ll build RESTful services with Web API and use OData for rich, queryable endpoints. The book walks you through testing strategies and containerizing your applications. The final section introduces Umbraco CMS, showing you how to integrate content management into your site so end users can manage content independently.
By the end of the book, you'll be ready to build controller-based websites and services that are scalable, secure, and ready for real-world use while mastering Umbraco’s flexible, content-driven solutions—skills that are increasingly in demand across organizations and industries.
*Email sign-up and proof of purchase required
How should you structure your projects? In this book, we will build multiple projects using different technologies that work together to provide a single solution.
With large, complex solutions, it can be difficult to navigate through all the code. So, the primary reason to structure your projects is to make it easier to find components. It is good to have an overall name for your solution that reflects the application or solution.
We will build multiple projects for a fictional company named Northwind. We will name the solution MatureWeb and use the name Northwind as a prefix for all the project names.
There are many ways to structure and name projects and solutions, for example, using a folder hierarchy as well as a naming convention. If you work in a team, make sure you know how your team does it.
Structuring projects in a solution
It is good to have a naming convention for your projects in a solution so that any developer can tell what each one does instantly. A common choice is to use the type of project, for example, a class library, console app, website, and so on.
Since you might want to run multiple web projects at the same time, and they will be hosted on a local web server, we need to differentiate each project by assigning different port numbers for its endpoints for both HTTP and HTTPS.
Commonly assigned local port numbers are 5000 for HTTP and 5001 for HTTPS. We will use a numbering convention of 5<chapter>0 for HTTP and 5<chapter>1 for HTTPS. For example, for an ASP.NET Core MVC website project that we will create in Chapter 2, we will assign 5020 for HTTP and 5021 for HTTPS.
We will therefore use the following project names and port numbers, as shown in Table 1.2:
Name
Ports
Description
Northwind.Common
N/A
A class library project for common types, like interfaces, enums, classes, records, and structs, is used across multiple projects.
Northwind.EntityModels
N/A
A class library project for common EF Core entity models. Entity models are often used on both the server and client side, so it is best to separate dependencies on specific database providers.
Northwind.DataContext
N/A
A class library project for the EF Core database context with dependencies on specific database providers.
Northwind.UnitTests
N/A
An xUnit test project for the solution.
Northwind.Mvc
HTTP 5020,
HTTPS 5021
An ASP.NET Core project for complex websites that uses a mixture of static HTML files and MVC Razor Views.
Northwind.WebApi
HTTP 5090,
HTTPS 5091
An ASP.NET Core project for a Web API, a.k.a. HTTP service. A good choice for integrating with websites because it can use any .NET app, JavaScript library, or Blazor to interact with the service.
Table 1.2: Example project names for various project types
Structuring folders in a project
In ASP.NET Core projects, organizing the project structure is vital for maintainability and scalability. Two popular approaches are organizing by technological concerns and using feature folders.
Folder structure based on technological concerns
In this approach, folders are structured based on the type of components, such as Controllers, Models, Views, Services, and so on, as shown in the following output:
There are pros and cons to the technical concerns approach, as shown in the following list:
Pro – Familiarity: This structure is common and well-documented, and many sample projects use it, making it easier for developers to understand.
Pro – IDE support: SDKs and IDEs assume this structure and may provide better support and navigation for it.
Con – Scalability: As the project grows, finding related files can become difficult since they are spread across multiple folders.
Con – Cross-cutting concerns: Managing cross-cutting concerns like logging and validation can become cumbersome.
The .NET SDK project templates use this technological concerns approach to folder structure. This means that many organizations use it by default despite it not being the best approach for their needs.
Folder structure based on features
In this approach, folders are organized by features or vertical slices, grouping all related files for a specific feature together, as shown in the following output:
There are pros and cons to the feature folders approach, as shown in the following list:
Pro – Modularity: Each feature is self-contained, making it easier to manage and understand. Adding new features is straightforward and doesn’t affect the existing structure. Easier to maintain since related files are located together.
Pro – Isolation: It helps in isolating different parts of the application, promoting better testability and refactoring.
Con – Learning curve: It is less familiar to some developers, requiring a learning curve.
Con – Code duplication: There is a potential for code duplication if not managed properly.
Feature folders are a common choice for modular monolith architecture. It makes it easier to later split the feature out into a separate project for deployment.
Feature folders align well with the principles of Vertical Slice Architecture (VSA). VSA focuses on organizing code by features or vertical slices, each slice handling a specific business capability end-to-end. This approach often includes everything from the UI layer down to the data access layer for a given feature in one place, as described in the following key points:
Each slice represents an end-to-end implementation of a feature.
VSA promotes loose coupling between features, making the application more modular and easier to maintain.
Each slice is responsible for a single feature or use case, which fits well with SOLID’s Single Responsibility Principle (SRP).
VSA allows for features to be developed, tested, and deployed independently, which is beneficial for microservices or distributed systems.
Folder structure summary
Both organizational techniques have their merits, and the choice depends on the specific needs of your project. Technological concerns organization is straightforward and familiar, but can become unwieldy as the project grows. Feature folders, while potentially introducing a learning curve, offer better modularity and scalability, aligning well with the principles of VSA.
Feature folders are particularly advantageous in larger projects or those with distributed teams, as they promote better organization and isolation of features, leading to improved maintainability and flexibility in the long run.
Central package management
By default, with the .NET SDK CLI and most code editor-created projects, if you need to reference a NuGet package, you add the reference to the package name and version directly in the project file, as shown in the following markup:
Central Package Management (CPM) is a feature that simplifies the management of NuGet package versions across multiple projects and solutions within a directory hierarchy. This is particularly useful for large solutions with many projects, where managing package versions individually can become cumbersome and error-prone.
Features and benefits of CPM
The key features and benefits of CPM include:
Centralized control: CPM allows you to define package versions in a single file, typically Directory.Packages.props, which is placed in the root directory of a directory hierarchy that contains all your solutions and projects. This file centralizes the version information for all NuGet packages used across the projects in your solutions.
Consistency: It ensures consistent package versions across multiple projects. By having a single source of truth for package versions, it eliminates discrepancies that can occur when different projects specify different versions of the same package.
Simplified updates: Updating a package version in a large solution becomes straightforward. You update the version in the central file, and all projects referencing that package automatically use the updated version. This significantly reduces the maintenance overhead.
Reduced redundancy: It removes the need to specify package versions in individual project files (.csproj). This makes project files cleaner and easier to manage, as they no longer contain repetitive version information.
Good practice: It is important to regularly update NuGet packages and their dependencies to address security vulnerabilities.
Defining project properties to reuse version numbers
Microsoft packages usually have the same number each month, like 10.0.2 in February, 10.0.3 in March, and so on. You can define properties at the top of your Directory.Packages.props file, and then reference these properties throughout the file. This approach keeps package versions consistent and makes updates easy.
For example, in your Directory.Packages.props file, at the top of the file, within a <ProjectGroup> tag, define your custom property and then reference it for the package version, as shown in the following markup:
<Project><PropertyGroup><MicrosoftPackageVersion>10.0.2</MicrosoftPackageVersion></PropertyGroup><ItemGroup><PackageVersionInclude="Microsoft.EntityFrameworkCore"Version="$(MicrosoftPackageVersion)" /><PackageVersionInclude="Microsoft.Extensions.Logging"Version="$(MicrosoftPackageVersion)" /><!-- Add more Microsoft packages as needed. --></ItemGroup><!-- Other packages with specific versions. --><ItemGroup><PackageVersionInclude="Newtonsoft.Json"Version="13.0.4" /></ItemGroup></Project>
Note the following about the preceding configuration:
Define a property: In the <PropertyGroup> element, the line <MicrosoftPackageVersion>10.0.2</MicrosoftPackageVersion> defines the property. This value can be changed once at the top of the file, and all references will update automatically.
Reference the property: Use the syntax $(PropertyName) to reference the defined property. All occurrences of $(MicrosoftPackageVersion) will resolve to the version number that you set.
When the monthly update rolls around, for example, from 10.0.2 to 10.0.3, you only have to update this number once.
You might want separate properties for related packages if they differ in version number, such as:
This allows independent updates if packages diverge in their release cycles or versions later.
After making changes, at the terminal or command prompt, run the following command:
dotnet restore
This will verify the correctness of your references and quickly alert you if you’ve introduced errors. By adopting this pattern combined with CPM, you simplify version management, reduce redundancy, and make your projects easier to maintain over time.
Good practice: Choose clear and consistent property names, like MicrosoftPackageVersion or AspNetCorePackageVersion, to easily distinguish between different package ecosystems. Check your Directory.Packages.props file into source control. Regularly update and test after changing versions to ensure compatibility.
Configuring CPM for this book’s projects
Let’s set up CPM for a solution that we will use throughout the rest of the chapters in this book. We will define item groups for the following packages:
EF Core: SQLite for authentication and SQL Server for a fictional company database
Testing: .NET test SDK, xUnit, and Playwright for web UI testing
ASP.NET Core: EF Core, Identity, and testing integration
Caching: Hybrid cache
Web Services: OpenAPI, JWT bearer authentication
OData: For OData web services
FastEndpoints: For FastEndpoints web services
Umbraco: CMS
Let’s go:
Create a new folder named web-dev-net10 that we will use for all the code in this book. For example, on Windows, create a folder: C:\web-dev-net10.
In the web-dev-net10 folder, create a new folder named MatureWeb.
In the MatureWeb folder, create a new file named Directory.Packages.props. At the command prompt or terminal, you can optionally use the following command: dotnet new packagesprops
In Directory.Packages.props, modify its contents, as shown in the following markup:
<Project><PropertyGroup><ManagePackageVersionsCentrally>true</ManagePackageVersionsCentrally><Net10>10.0.0</Net10></PropertyGroup><ItemGroupLabel="For EF Core."><PackageVersionInclude="Microsoft.EntityFrameworkCore.SqlServer"Version="$(Net10)" /><PackageVersionInclude="Microsoft.EntityFrameworkCore.Sqlite"Version="$(Net10)" /><PackageVersionInclude="Microsoft.EntityFrameworkCore.Design"Version="$(Net10)" /><PackageVersionInclude="Microsoft.EntityFrameworkCore.Tools"Version="$(Net10)" /></ItemGroup><ItemGroupLabel="For testing."><PackageVersionInclude="coverlet.collector"Version="6.0.4" /><PackageVersionInclude="Microsoft.NET.Test.Sdk"Version="18.0.1" /><PackageVersionInclude="xunit"Version="2.9.3" /><PackageVersionInclude="xunit.runner.visualstudio"Version="3.1.6" /><PackageVersionInclude="Microsoft.Playwright"Version="1.56.0" /><PackageVersionInclude="NSubstitute"Version="5.3.0" /></ItemGroup><ItemGroupLabel="For ASP.NET Core websites."><PackageVersionInclude="Microsoft.AspNetCore.Diagnostics.EntityFrameworkCore"Version="$(Net10)" /><PackageVersionInclude="Microsoft.AspNetCore.Identity.EntityFrameworkCore"Version="$(Net10)" /><PackageVersionInclude="Microsoft.AspNetCore.Identity.UI"Version="$(Net10)" /><PackageVersionInclude="Microsoft.AspNetCore.Mvc.Testing"Version="$(Net10)" /></ItemGroup><ItemGroupLabel="For caching."><PackageVersionInclude="Microsoft.Extensions.Caching.Hybrid"Version="$(Net10)" /></ItemGroup><ItemGroupLabel="For ASP.NET Core web services."><PackageVersionInclude="Microsoft.AspNetCore.OpenApi"Version="$(Net10)" /><PackageVersionInclude="Scalar.AspNetCore"Version="2.10.3" /><PackageVersionInclude="Refit"Version="8.0.0" /><PackageVersionInclude="Refit.HttpClientFactory"Version="8.0.0/>
<PackageVersionInclude="Microsoft.AspNetCore.Authentication.JwtBearer"Version="$(Net10)" /><PackageVersionInclude="Asp.Versioning.Mvc"Version="8.1.0" /><PackageVersionInclude="Asp.Versioning.Mvc.ApiExplorer"Version="8.1.0" /></ItemGroup><ItemGroupLabel="For OData web services."><PackageVersionInclude="Microsoft.AspNetCore.OData"Version="9.4.1" /></ItemGroup><ItemGroupLabel="For FastEndpoints web services."><PackageVersionInclude="FastEndpoints"Version="7.1.0" /><PackageVersionInclude="FluentValidation"Version="12.1.0" /><PackageVersionInclude="Microsoft.AspNetCore.JsonPatch"Version="$(Net10)" /><PackageVersionInclude="Microsoft.AspNetCore.JsonPatch.SystemTextJson"Version="$(Net10)" /></ItemGroup><ItemGroupLabel="For Umbraco CMS."><PackageVersionInclude="Umbraco.Cms"Version="17.0.0" /><PackageVersionInclude="Microsoft.ICU.ICU4C.Runtime"Version="72.1.0.3" /></ItemGroup></Project>
Warning! The <ManagePackageVersionsCentrally> element and its true value must all go on one line. Also, you cannot use floating wildcard version numbers like 10.0-* as you can in an individual project. Wildcards are useful to automatically get the latest patch version, for example, monthly package updates on Patch Tuesday. But with CPM, you must manually update the versions.
For any projects that we add underneath the folder containing this file, we can reference the packages without explicitly specifying the version, as shown in the following markup:
You should regularly review and update the package versions in the Directory.Packages.props file to ensure that you are using the latest stable releases with important bug fixes and performance improvements.
Good practice: I recommend that you set a monthly event in your calendar for the second Wednesday of each month. This will occur after the second Tuesday of each month, which is Patch Tuesday, when Microsoft releases bug fixes and patches for .NET and related packages.
For example, in December 2025, there are likely to be patch versions, so you can go to the NuGet page for each of your packages. You can then update individual package versions if necessary, for example, as shown in the following markup:
<ItemGroupLabel="For EF Core."><PackageVersionInclude="Microsoft.EntityFrameworkCore.SqlServer"Version="10.0.1" />
Or, if you have defined custom properties referenced by multiple packages, update those version numbers, as shown in the following markup:
Before updating package versions, check for any breaking changes in the release notes of the packages. Test your solution thoroughly after updating to ensure compatibility.
Educate your team and document the purpose and usage of the Directory.Packages.props file to ensure everyone understands how to manage package versions centrally.
In each individual project file, you can override an individual package version by using the VersionOverride attribute on a <PackageReference /> element, as shown in the following markup:
This can be useful if a newer version introduces a regression bug, so you can force the use of an older version without the bug until the bug is fixed in a later patch version.
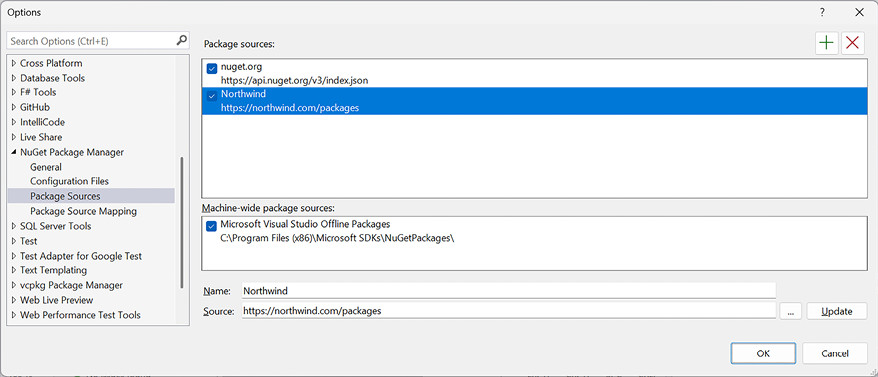
If you use CPM and you have more than one package source configured for your code editor, as shown in Figure 1.7, then you will see NuGet warning NU1507. For example, if you have both the default package source (https://api.nuget.org/v3/index.json) and a custom package source configured:
There are 2 package sources defined in your configuration. When using central package management, please map your package sources with package source mapping (https://aka.ms/nuget-package-source-mapping) or specify a single package source. The following sources are defined: https://api.nuget.org/v3/index.json, https://northwind.com/packages/.
Figure 1.7: Visual Studio with two NuGet package sources configured
Package Source Mapping (PSM) can help safeguard your software supply chain if you use a mix of public and private package sources, as in the preceding example.
By default, NuGet will search all configured package sources when it needs to download a package. When a package exists on multiple sources, it may not be deterministic which source the package will be downloaded from. With PSM, you can filter, per package, which source(s) NuGet will search.
PSM is supported by Visual Studio 2022, .NET 6 and later, and NuGet 6 and later. Older tooling will ignore the PSM configuration.
To enable PSM, you must have a nuget.config file.
Good practice: Create a nuget.config file at the root of your source code directory hierarchy.
In a PSM file, there are two parts: defining package sources and mapping package sources to packages. All requested packages must map to one or more sources by matching a defined package pattern. In other words, once you have defined a packageSourceMapping element, you must explicitly define which sources every package (including transitive packages) will be restored from.
For example, if you want most packages to be sourced from the default nuget.org site, but there are some private packages that must be sourced from your organization’s website, you would define the two package sources and set the mapping (assuming all your private packages are named Northwind.Something), as shown in the following markup:
<?xml version="1.0" encoding="utf-8"?><configuration><!-- <clear /> ensures no additional sources are inherited from another config file. --><packageSources><clear /><!-- key can be any identifier for your source. --><addkey="nuget.org"value="https://api.nuget.org/v3/index.json" /><addkey="Northwind"value="https://northwind.com/packages" /></packageSources><!-- All packages sourced from nuget.org except Northwind packages. --><packageSourceMapping><!-- key value for <packageSource> should match key values from <packageSources> element --><packageSourcekey="nuget.org"><packagepattern="*" /></packageSource><packageSourcekey="Northwind"><packagepattern="Northwind.*" /></packageSource></packageSourceMapping></configuration>
Let’s create a nuget.config file for all the solutions and projects in this book that will use nuget.org as the source for all packages:
In the MatureWeb folder, create a new file named nuget.config. At the command prompt or terminal, you can use the following command: dotnet new nugetconfig
In nuget.config, modify its contents, as shown in the following markup:
<?xml version="1.0" encoding="utf-8"?><configuration><!-- <clear /> ensures no additional sources are inherited from another config file. --><packageSources><clear /><!-- key can be any identifier for your source. --><addkey="nuget.org"value="https://api.nuget.org/v3/index.json" /></packageSources><!-- All packages sourced from nuget.org. --><packageSourceMapping><!-- key value for <packageSource> should match key values from <packageSources> element --><packageSourcekey="nuget.org"><packagepattern="*" /></packageSource></packageSourceMapping></configuration>
By default, compiler warnings may appear if there are potential problems with your code when you first build a project, but they do not prevent compilation, and they are hidden if you rebuild. Warnings are given for a reason, so ignoring warnings encourages poor development practices.
Some developers would prefer to be forced to fix warnings, so .NET provides a project setting to do this, as shown highlighted in the following markup:
I have enabled the option to treat warnings as errors in (almost) all the solutions in the GitHub repository.
If you find that you get too many errors after enabling this, you can disable specific warnings by using the <WarningsNotAsErrors> element with a comma-separated list of warning codes, as shown highlighted in the following markup:
Now that we have reviewed how to structure projects and manage packages in your projects, we will create some projects to define some sample data that we will then use throughout the rest of the book.
Read this chapter and the full book FREE of cost - No Credit card required!
Plus access over 9,000 other expert tech books and videos just by signing up - No commitment!
CONTINUE READING
83
Tech Concepts
36
Programming languages
73
Tech Tools
Unlimited access to the largest independent learning library in tech of over 8,000 expert-authored tech books and videos.
Innovative learning tools, including AI book assistants, code context explainers, and text-to-speech.
50+ new titles added per month and exclusive early access to books as they are being written.


 Free Chapter