

NetBeans is the IDE that we have used throughout this book. As mentioned in Chapter 1, Introduction to Data Analysis, it is comparable to the other popular IDEs, such as Eclipse, JDeveloper, and JCreator, and it functions mostly the same way.
Download NetBeans from https://netbeans.org/downloads/. Select your language, your OS platform, and one of the Download buttons. Unless your machine is short of storage space, you might as well select the All (right most Download button) version. It includes the Java Enterprise Edition (Java EE) along with support for HTML5 and C++.
The installation is straightforward: just follow the directions. Note that NetBeans includes Java, so you do not have to install Java separately.
The main window for NetBeans is shown in Figure A-8:
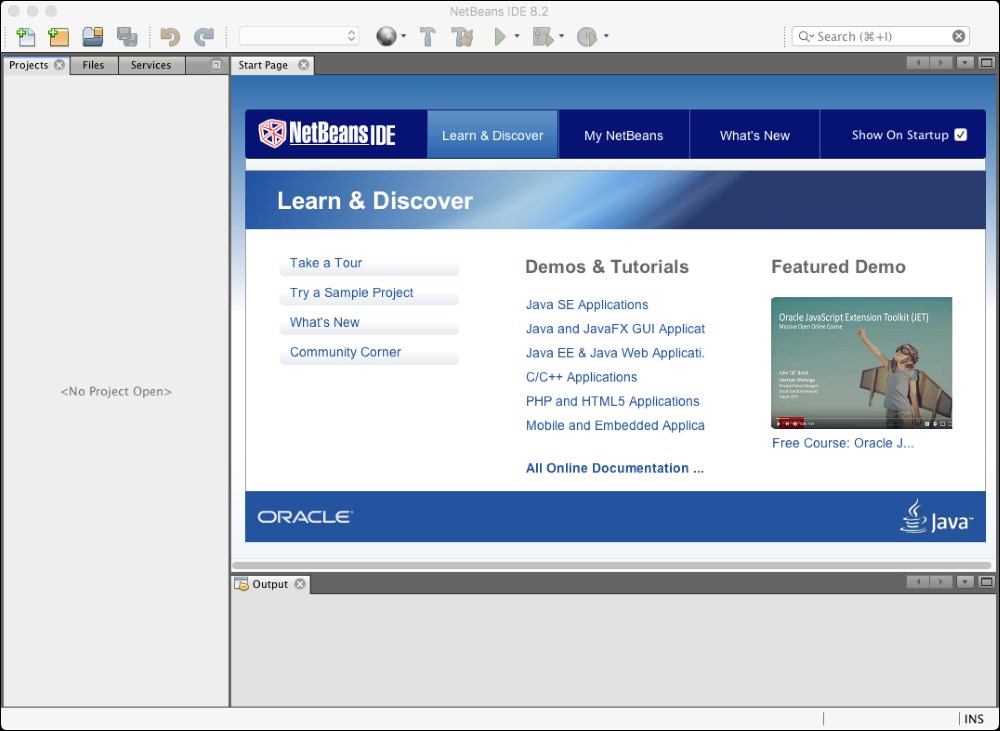
Figure A-8. The NetBeans IDE
It shows five main panels: Projects, Files, Services, Output, and the editing window. The Projects, Files, and Services panels are combined in the sub-window on the left. This configuration can easily be rearranged.
NetBeans wants you to compartmentalize all your Java work within the context of NetBeans projects. Although it may seem like an unnecessary extra step, it makes it much easier in the long run to keep track of all your work.
To create a project, just click on the New Project button ( ) on the toolbar (or select New Project… from the File menu). Then, in the New Project dialogue, select Java | Java Application, choose your Project Name, Project Location, and Main Class (for example,
 AppendixA, nbp/, and dawj.appA.Echo), and click Finish. Note that the Main Class name includes a package specification (dawj.appA).
After pasting in our Echo program, the setup looks like Figure A-9:
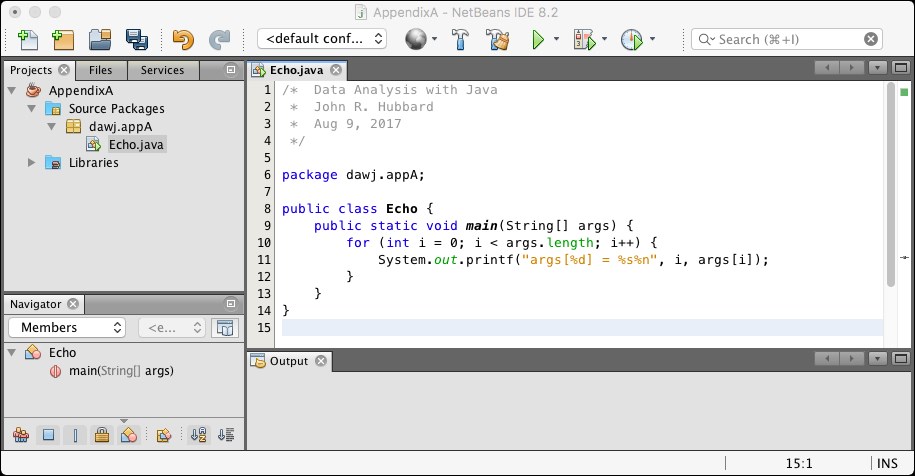
Figure A-9. The Echo program in NetBeans
We've added a header ID comment and moved some things around a bit. But it's the same program that we ran before on the command line.
Notice the project organization depicted graphically in the Projects tab and the logical structure of the Echo class shown in the Navigator tab (lower left). Also note the varied iconography: the golden coffee cup for a NetBeans project, the tan bundle cube for the package folder, the icon with the tiny green triangle indicating an executable (main) class, and the orange disk with a vertical bar indicating a static method. These clues can be quite helpful when the project grows to include many classes and methods.
To run the program, click on the green triangle button ( ) on the Toolbar (or press the F6 key, or select Run Project from the Run menu).
Note
Note that selecting the button will run the project. If your project has more than one class with a main() method, it will have designated one of them as its main class and will run that one. To run a program that is not so designated, select Run File from the Run menu, or press Shift+F6. To re-designate the main class for a project, right-click on the project's icon, and select Properties | Run.
Notice that this Echo program gets all its input from the command line. Without that input, it will produce no output. To provide command line arguments, right-click on the project's icon  in the Projects panel, select Properties | Run, and then insert them in the Arguments: field, just as you would on the command line (without any punctuation). See Figure A-10.
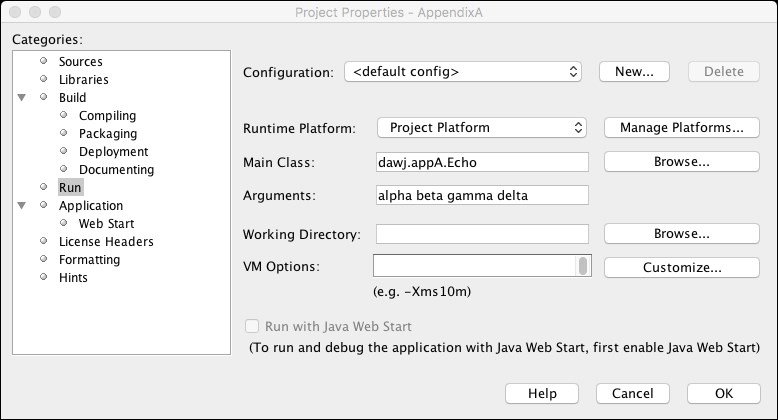
Figure A-10. The NetBeans project properties Run dialogue
Then, when you run it, you will get the expected output.
The NetBeans editor is very powerful. It uses different colors to distinguish reserved words (blue), class fields (green), and strings (orange) from other code. Syntax errors are caught immediately and marked with red tags. Recommendations are provided for correcting most errors. If you use a class, the IDE will give you a list of import statements from which to choose. If you right-click on a class or class member (field or method) name, you can select Show Javadoc from the pop-up menu and it will appear in your browser. You can select any part of your code and have it properly formatted with Ctrl+Shift+F (or right-click and choose Format).
The built-in debugger is also very powerful and very easy to use.
NetBeans comes with its own relational database system, which is illustrated in Chapter 5, Relational Databases.
NetBeans is excellent for developing Java software. It is also supports C, C++, Fortran, HTML5, PHP, JSP, SQL, JavaScript, JSON, and XML.