

Configuring Docker for Airflow
In this book, we will use Airflow to orchestrate data ingests and provide logs to monitor our pipelines.
Airflow can be installed directly on your local machine and any server using PyPi (https://pypi.org/project/apache-airflow/) or a Docker container (https://hub.docker.com/r/apache/airflow). An official and supported version of Airflow can be found on Docker Hub, and the Apache Foundation community maintains it.
However, there are some additional steps to configure our Airflow. Thankfully, the Apache Foundation also has a docker-compose file that contains all other requirements to make Airflow work. We just need to complete a few more steps.
Getting ready
Let’s start by initializing our Docker application on our machine. You can use the desktop version or the CLI command.
Make sure you are inside your project folder for this. Create a folder to store Airflow internal components and the docker-compose.yaml file:
my-project$ mkdir airflow-local
my-project$ cd airflow-local
How to do it…
- First, we fetch the
docker-compose.yamlfile directly from the Airflow official docs:my-project/airflow-local$ curl -LfO 'https://airflow.apache.org/docs/apache-airflow/2.3.0/docker-compose.yaml'
You should see output like this:

Figure 1.8 – Airflow container image download progress
Note
Check the most stable version of this docker-compose file when you download it, since new, more appropriate versions may be available after this book is published.
- Next, we create the
dags,logs, andpluginsfolders as follows:my-project/airflow-local$ mkdir ./dags ./logs ./plugins
- Then, we create and set the Airflow user as follows:
my-project/airflow-local$ echo -e "AIRFLOW_UID=$(id -u)\nAIRFLOW_GID=0" > .env
Note
If you have any error messages related to the AIRFLOW_UID variable, you can create a .env file in the same folder where your docker-compose.yaml file is and define the variable as AIRFLOW_UID=50000.
- Then, we initialize the database:
my-project/airflow-local$ docker-compose up airflow-init
After executing the command, you should see output similar to this:
Creating network "airflow-local_default" with the default driver
Creating volume "airflow-local_postgres-db-volume" with default driver
Pulling postgres (postgres:13)...
13: Pulling from library/postgres
(...)
Status: Downloaded newer image for postgres:13
Pulling redis (redis:latest)...
latest: Pulling from library/redis
bd159e379b3b: Already exists
(...)
Status: Downloaded newer image for redis:latest
Pulling airflow-init (apache/airflow:2.3.0)...
2.3.0: Pulling from apache/airflow
42c077c10790: Pull complete
(...)
Status: Downloaded newer image for apache/airflow:2.3.0
Creating airflow-local_postgres_1 ... done
Creating airflow-local_redis_1    ... done
Creating airflow-local_airflow-init_1 ... done
Attaching to airflow-local_airflow-init_1
(...)
airflow-init_1       | [2022-10-09 09:49:26,250] {manager.py:213} INFO - Added user airflow
airflow-init_1       | User "airflow" created with role "Admin"
(...)
airflow-local_airflow-init_1 exited with code 0
- Then, we start the Airflow service:
my-project/airflow-local$ docker-compose up
- Then, we need to check the Docker processes. Using the following CLI command, you will see the Docker images running:
my-project/airflow-local$ docker ps
These are the images we see:

Figure 1.9 – The docker ps command output
In the Docker Desktop application, you can also see the same containers running but with a more friendly interface:
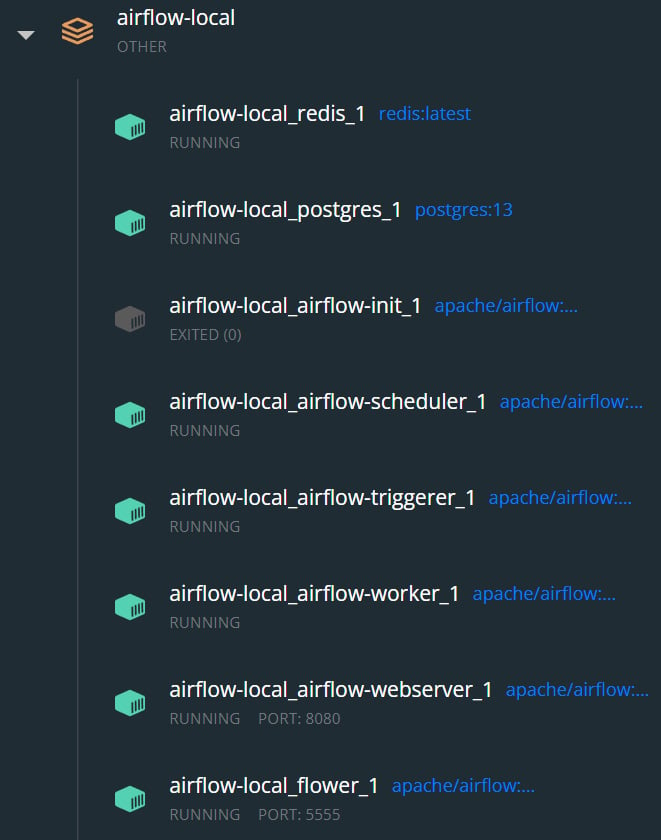
Figure 1.10 – A Docker desktop view of the Airflow containers running
- Then, we access Airflow in a web browser:
In your preferred browser, type http://localhost:8080/home. The following screen will appear:
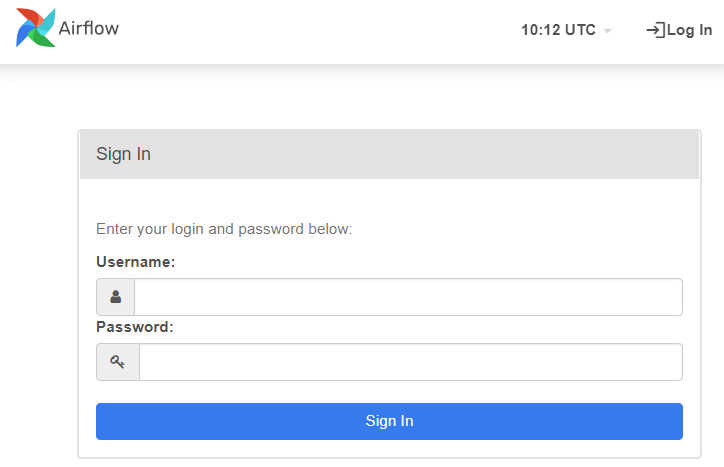
Figure 1.11 – The Airflow UI login page
- Then, we log in to the Airflow platform. Since it’s a local application used for testing and learning, the default credentials (username and password) for administrative access in Airflow are
airflow.
When logged in, the following screen will appear:
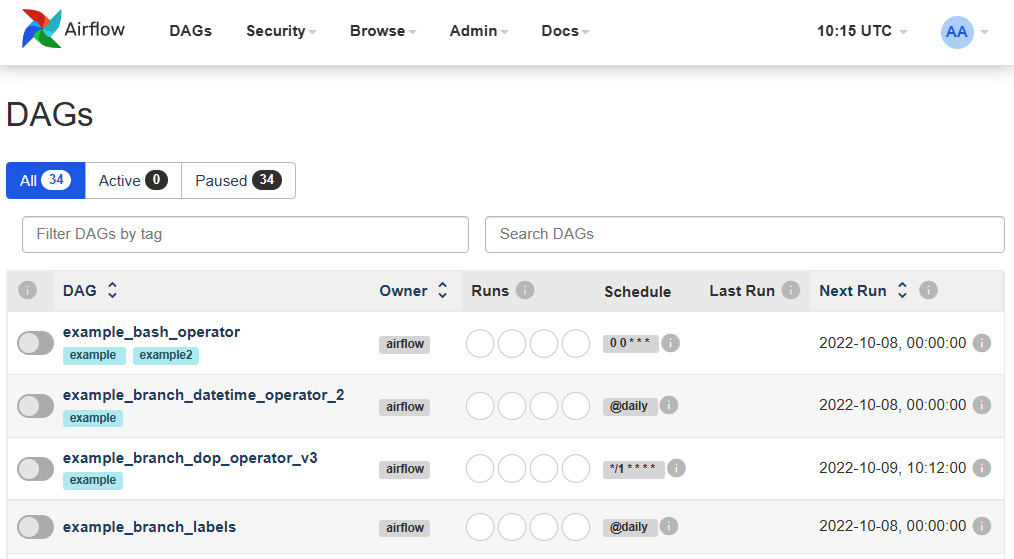
Figure 1.12 – The Airflow UI main page
- Then, we stop our containers. We can stop our containers until we reach Chapter 9, when we will explore data ingest in Airflow:
my-project/airflow-local$ docker-compose stop
How it works…
Airflow is an open source platform that allows batch data pipeline development, monitoring, and scheduling. However, it requires other components, such as an internal database, to store metadata to work correctly. In this example, we use PostgreSQL to store the metadata and Redis to cache information.
All this can be installed directly in our machine environment one by one. Even though it seems quite simple, it may not be due to compatibility issues with OS, other software versions, and so on.
Docker can create an isolated environment and provide all the requirements to make it work. With docker-compose, it becomes even simpler, since we can create dependencies between the components that can only be created if the others are healthy.
You can also open the docker-compose.yaml file we downloaded for this recipe and take a look to explore it better. We will also cover it in detail in Chapter 9.
See also
If you want to learn more about how this docker-compose file works, you can look at the Apache Airflow official Docker documentation on the Apache Airflow documentation page: https://airflow.apache.org/docs/apache-airflow/stable/howto/docker-compose/index.html.