-
Book Overview & Buying
-
Table Of Contents

How to Build Android Apps with Kotlin - Second Edition
By :
How to Build Android Apps with Kotlin
By:
Overview of this book
Looking to kick-start your app development journey with Android 13, but don’t know where to start? How to Build Android Apps with Kotlin is a comprehensive guide that will help jump-start your Android development practice.
This book starts with the fundamentals of app development, enabling you to utilize Android Studio and Kotlin to get started with building Android projects. You'll learn how to create apps and run them on virtual devices through guided exercises. Progressing through the chapters, you'll delve into Android's RecyclerView to make the most of lists, images, and maps, and see how to fetch data from a web service.
You'll also get to grips with testing, learning how to keep your architecture clean, understanding how to persist data, and gaining basic knowledge of the dependency injection pattern. Finally, you'll see how to publish your apps on the Google Play store.
You'll work on realistic projects that are split up into bitesize exercises and activities, allowing you to challenge yourself in an enjoyable and attainable way. You'll build apps to create quizzes, read news articles, check weather reports, store recipes, retrieve movie information, and remind you where you parked your car.
By the end of this book, you'll have the skills and confidence to build your own creative Android applications using Kotlin.
Table of Contents (24 chapters)
Preface

Part 1: Android Foundation
 Free Chapter
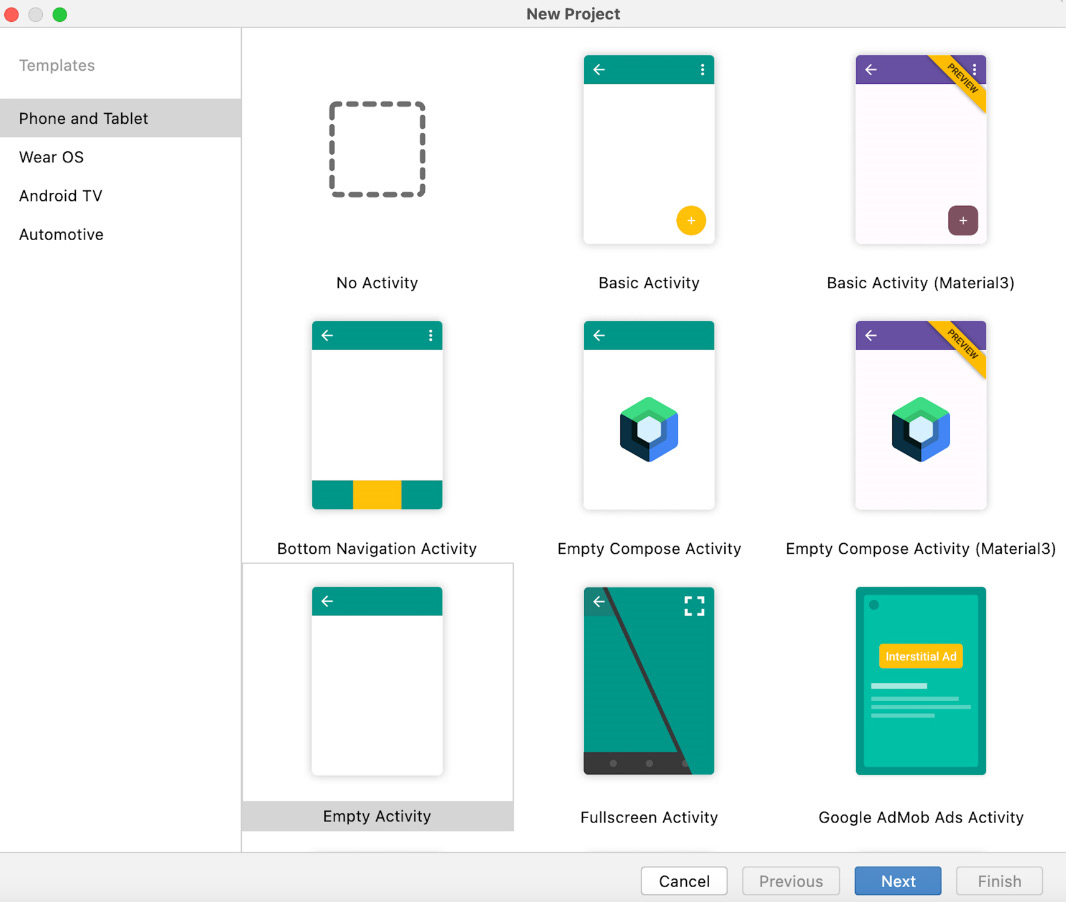
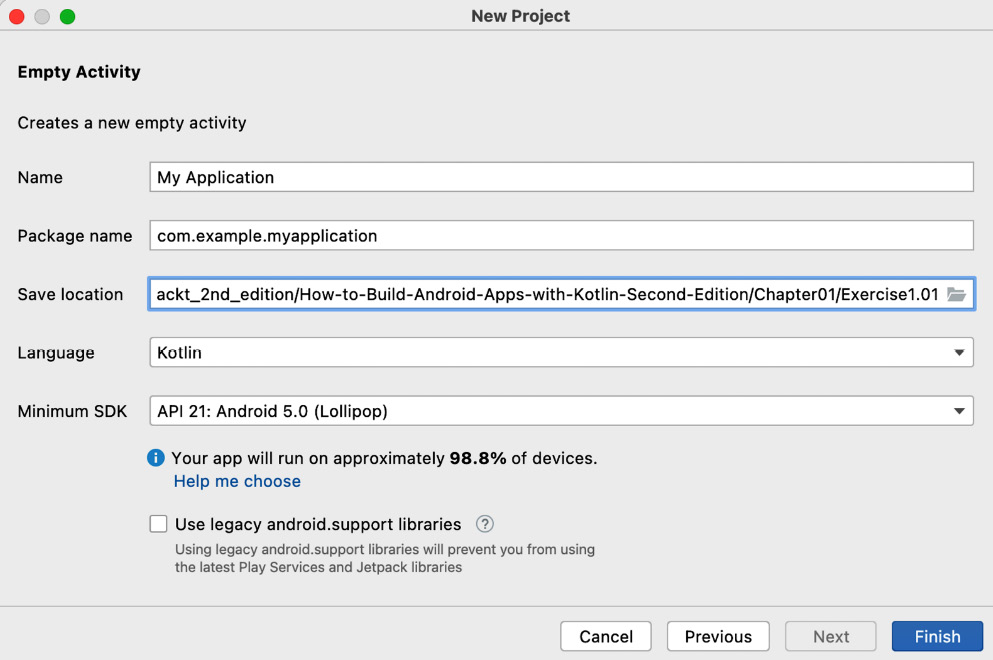
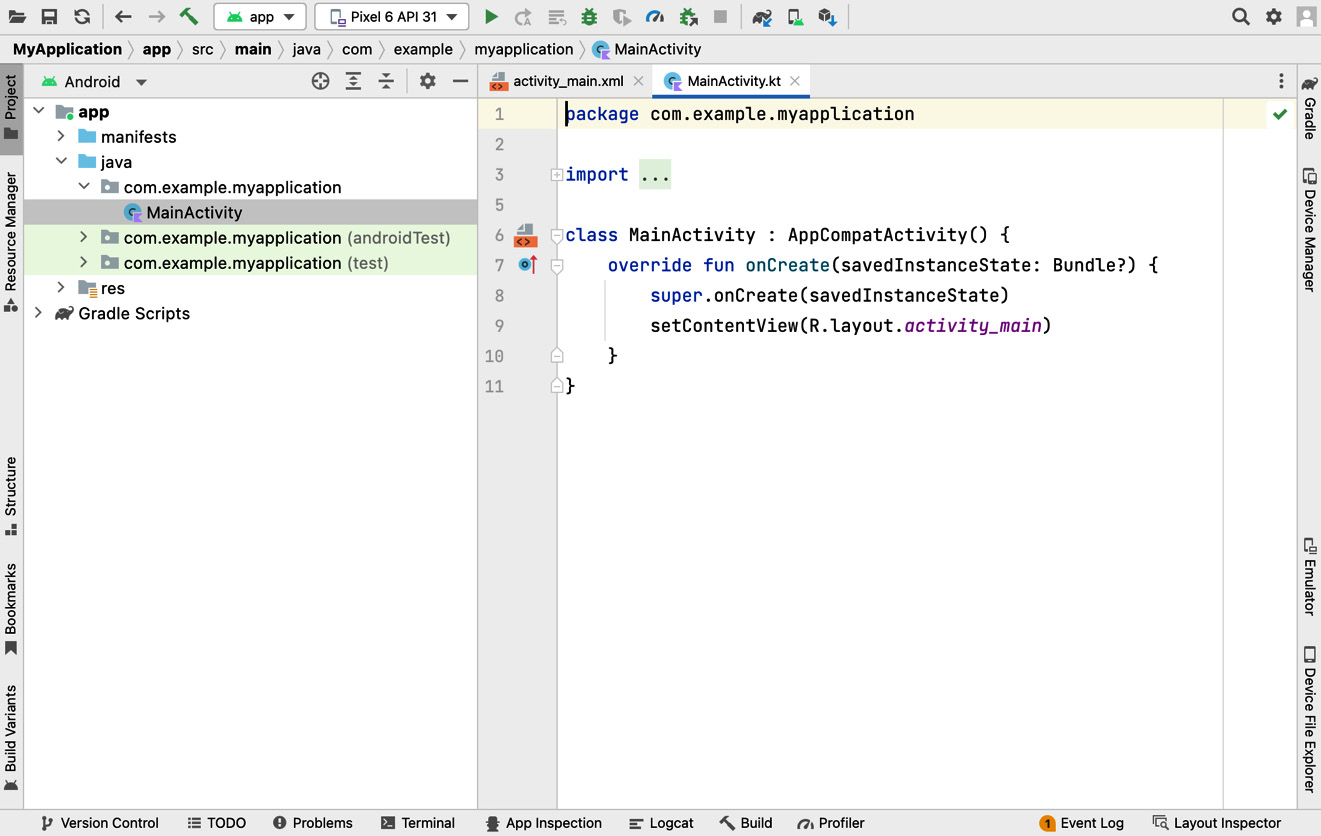
Chapter 1: Creating Your First App
Chapter 2: Building User Screen Flows
Chapter 3: Developing the UI with Fragments
Chapter 4: Building App Navigation
Part 2: Displaying Network Calls
Chapter 5: Essential Libraries: Retrofit, Moshi, and Glide
Chapter 6: Adding and Interacting with RecyclerView
Chapter 7: Android Permissions and Google Maps
Chapter 8: Services, WorkManager, and Notifications
Chapter 9: Building User Interfaces Using Jetpack Compose
Part 3: Testing and Code Structure
Chapter 10: Unit Tests and Integration Tests with JUnit, Mockito, and Espresso
Chapter 11: Android Architecture Components
Chapter 12: Persisting Data
Chapter 13: Dependency Injection with Dagger, Hilt, and Koin
Part 4: Polishing and Publishing an App
Chapter 14: Coroutines and Flow
Chapter 15: Architecture Patterns
Chapter 16: Animations and Transitions with CoordinatorLayout and MotionLayout
Chapter 17: Launching Your App on Google Play
Index