
What is Dark Mode?
In this section, we'll start by taking a look at what exactly Dark Mode is, how we can use it, and what it can do not only for the end user but also for developers. We'll cover everything from enabling it on our devices to using environment overrides in Xcode and developer options in the simulator.
Understanding why we would need Dark Mode
As I covered in the introduction of this chapter, most of us have been craving dark mode in iOS for a very long time now. Us developers got our Xcode fix back in 2018 – but one of the burning questions I've been asked many times (especially in the past 12 months) is…why?
It could be down to something as simple as the time of the day. Satellite navigation systems have been doing it in our cars for years – as soon as the sun goes down, our system switches, and a more relaxing, subtle version of our road home pops up on our screen – so why not do that for our apps?
Well, it turns out that some apps have already been doing that for a while (to a degree), while not necessarily offering an automatic nocturnal mode. The Twitter app for iOS offered a "dark mode" option long before the WWDC 19 announcement.
Let's stop for a moment and think about the logic behind such a control, along with everything you'd need to change to achieve this. I'm sure a company as big as Twitter has written their own internal framework to handle this, but under the hood, it's basically going look a lot like the following:
var isDarkMode = false
var profileLabel: UILabel? {
    didSet {
        profileLabel?.textColor = isDarkMode ? .white : .black
    }
}
var profileBackground: UILabel? {
    didSet {
        profileBackground?.textColor = isDarkMode ? .black : .white
    }
}
Everything will have to be taken into consideration, from the text color to the drop shadows that you might have decorating your UIButton or UIViews.
The background is a massive change to consider too. One common pattern that a lot of iOS developers follow is to quite simply develop a brand-new app on top of a white canvas; from here, we don't need to worry about controlling the background color or keeping track of it with an IBOutlet – it's simply the tablecloth for the rest of our app to sit on.
With implementing a dark mode feature, everything needs to be changed – even asset images that sit proudly on one style of background could be lost in another. Let's take a look at some of the developer features that come bundled with Xcode when implementing Dark Mode.
Core developer concepts of Dark Mode
Let's start by taking a look at how we go about developing with Dark Mode by switching to it on our device. If you've not already done this, you can simply toggle it by going to Settings | Display & Brightness, and you should be presented with the following screen:
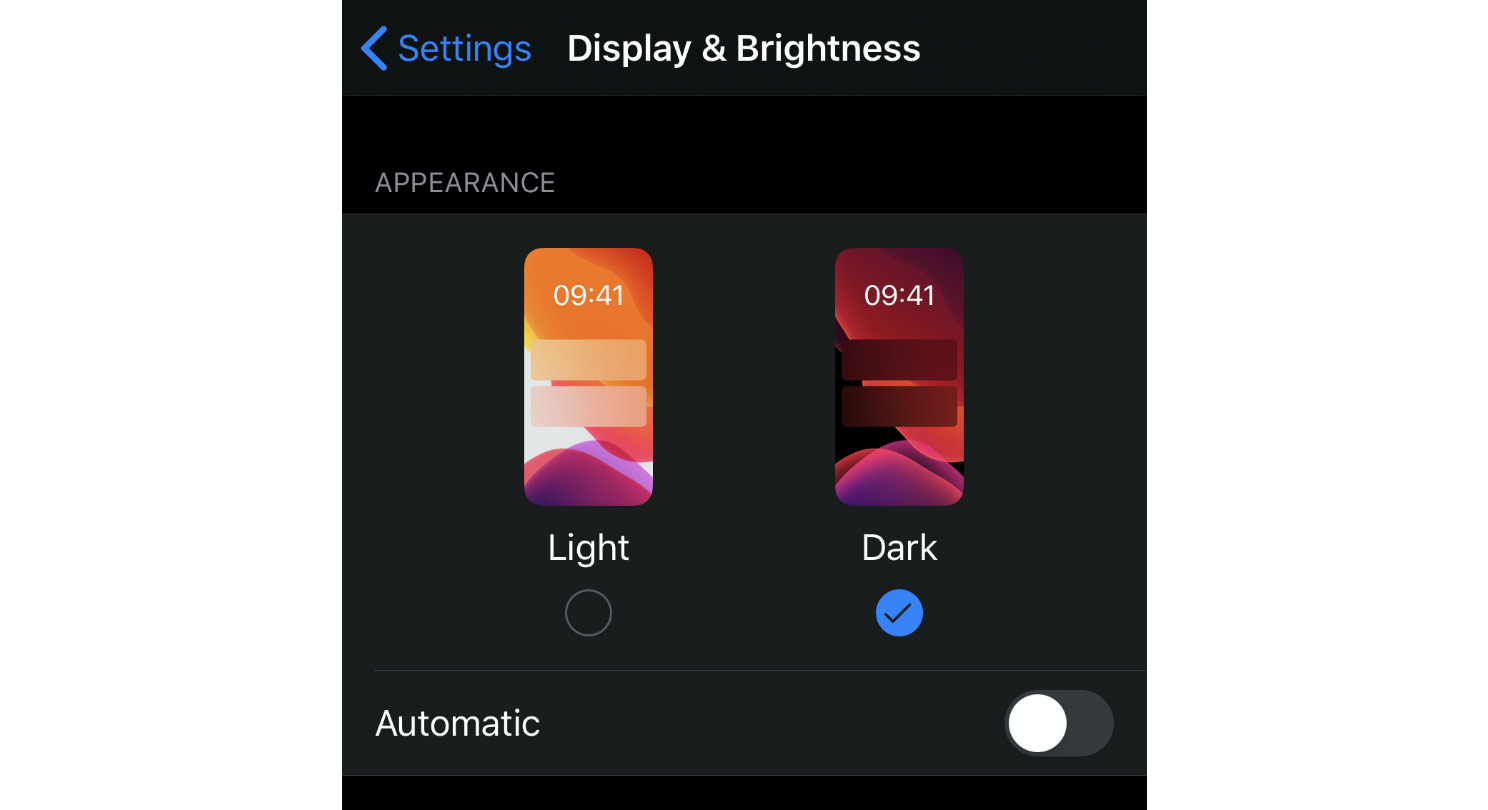
Figure 2.1 – Display and brightness
You'll also notice the Automatic toggle option too, giving us the ability to use either Sunset to Sunrise or a custom schedule, which will automatically switch between light and dark appearance (just like our sat nav).
Now that we've got that covered, let's take a look at some options given to developers in the iOS simulator. Let's start by taking the following steps:
- Open up Xcode.
- Launch the simulator (Xcode | Open Developer Tool | Simulator).
In a slightly different location than the end user's version of iOS, you'll find the dark toggle under the developer settings (Settings | Developer | Dark Appearance):
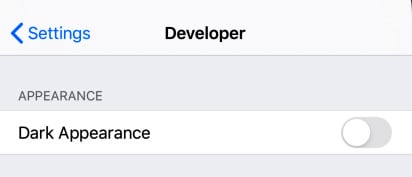
Figure 2.2 – Dark mode developer settings
Rather than a fancy interface like we saw earlier, we're presented with just the standard toggle. Let's take a look now at what we can do as developers with Dark Mode.
Dark mode from inside Xcode
Now that we've taken a look at how iOS handles switching to dark mode, let's have a look at how we, the developer, can do the same in Xcode.
Out of the box, all new projects building against the iOS 13 SDK will automatically support dark mode; however, building against any earlier SDKs won't.
This helps out a little as your existing app may not have all the necessary tweaks to support dark mode yet and you don't want to release an update to find you have broken your app for those now running dark mode.
However, if you update your project to the iOS 13 SDK, then you could potentially run into this problem, but don't worry, we'll cover getting your existing app ready for dark mode later, in the Migrating existing apps to Dark Mode section in this chapter.
Let's start by having a look at storyboards – we all love them (or hate them) but the one thing they have done over the years is present themselves on a whiter-than-white canvas.
Let's get started:
- Launch Xcode and create a new Single View - Storyboard project.
- Call this anything you want (I'll call mine
Chapter 2 - Dark Mode).You can either follow along throughout this chapter or download the sample code from GitHub.
Once created, click on Main.Storyboard and you should be presented with the following:
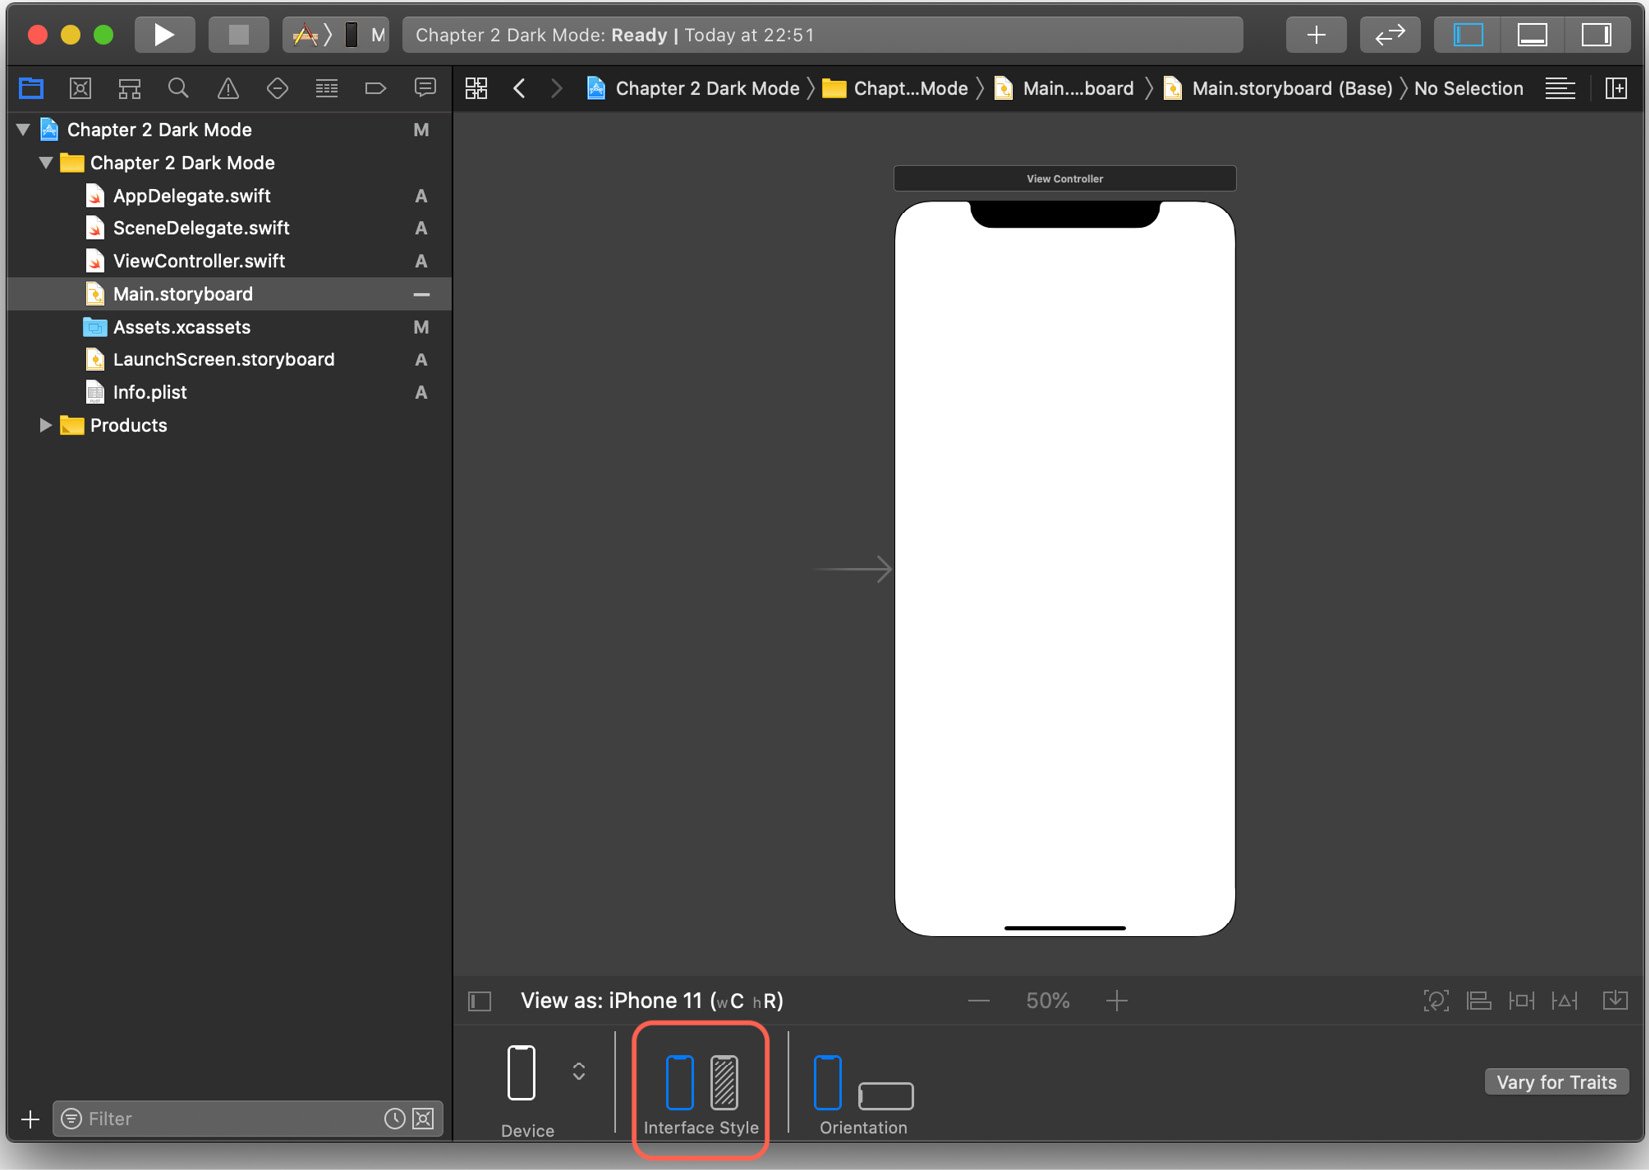
Figure 2.3 – Xcode interface style
I've highlighted in the preceding screenshot our area of interest – here, we have a preview toggle for both light and dark appearances from within the storyboard, so at a quick glance, we can see what the objects we've added to our canvas look like without the need to launch the simulator.
Now, this won't always help us as some of our UILabels or UIButtons could be decorated programmatically. However, it's a great start and will most definitely come in useful during the development cycle of any app.
Let's take a look at our labels in action. Here, we've added a UILabel straight out of the box. Light Appearance is selected, and the label looks just how we are used to seeing things at this stage:
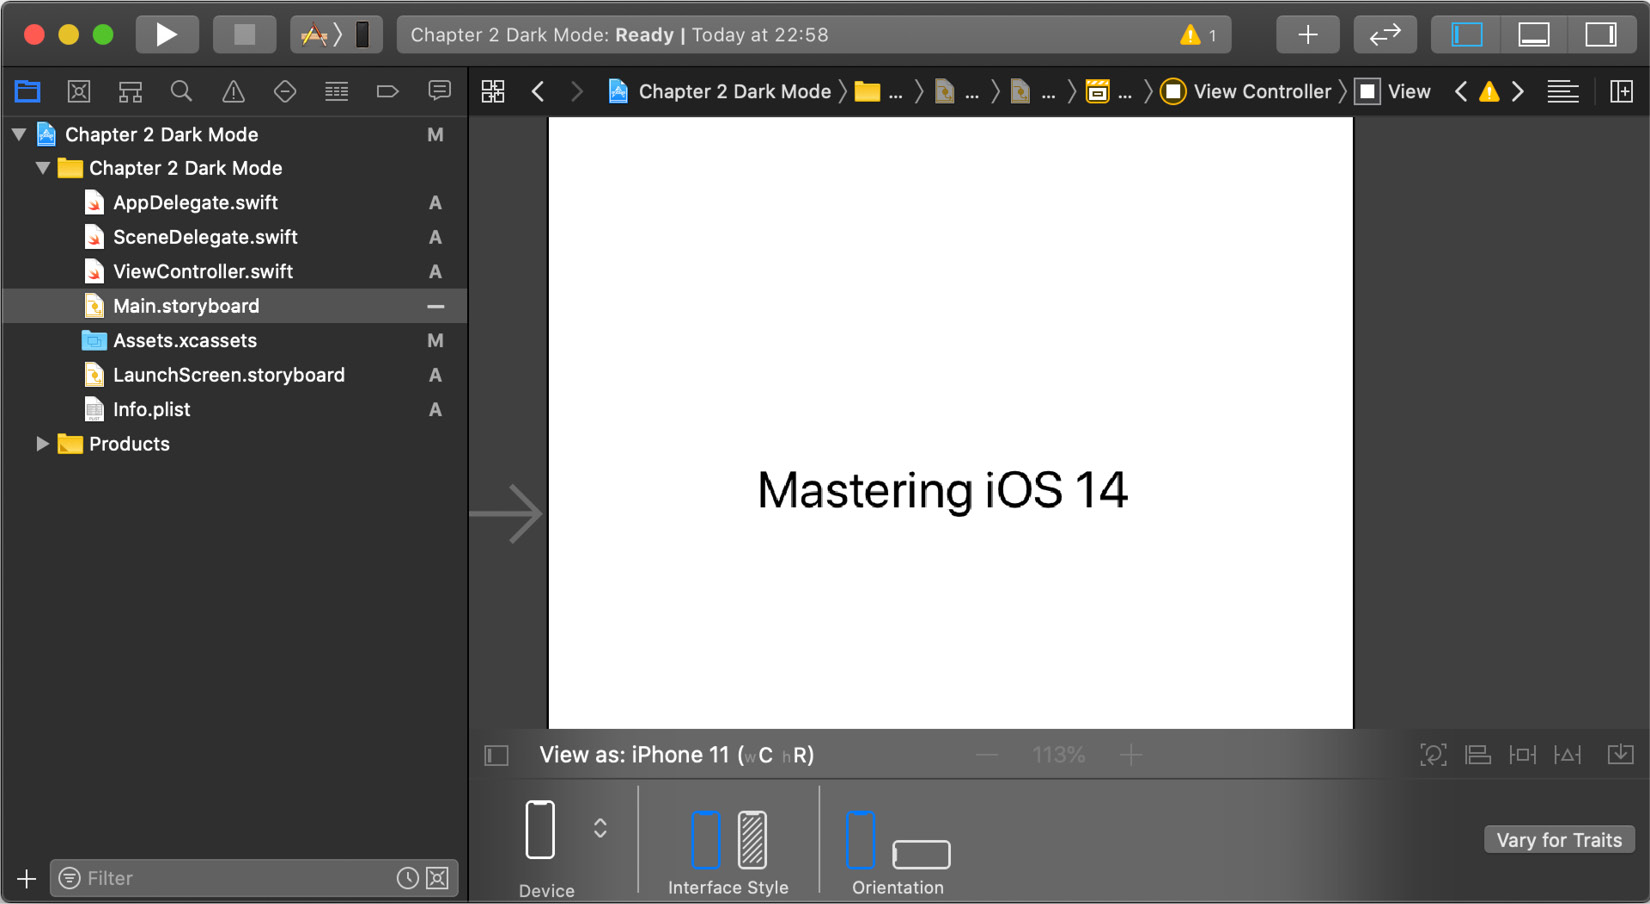
Figure 2.4 – Main storyboard
Now, let's switch the toggle to Dark Appearance and see what happens:
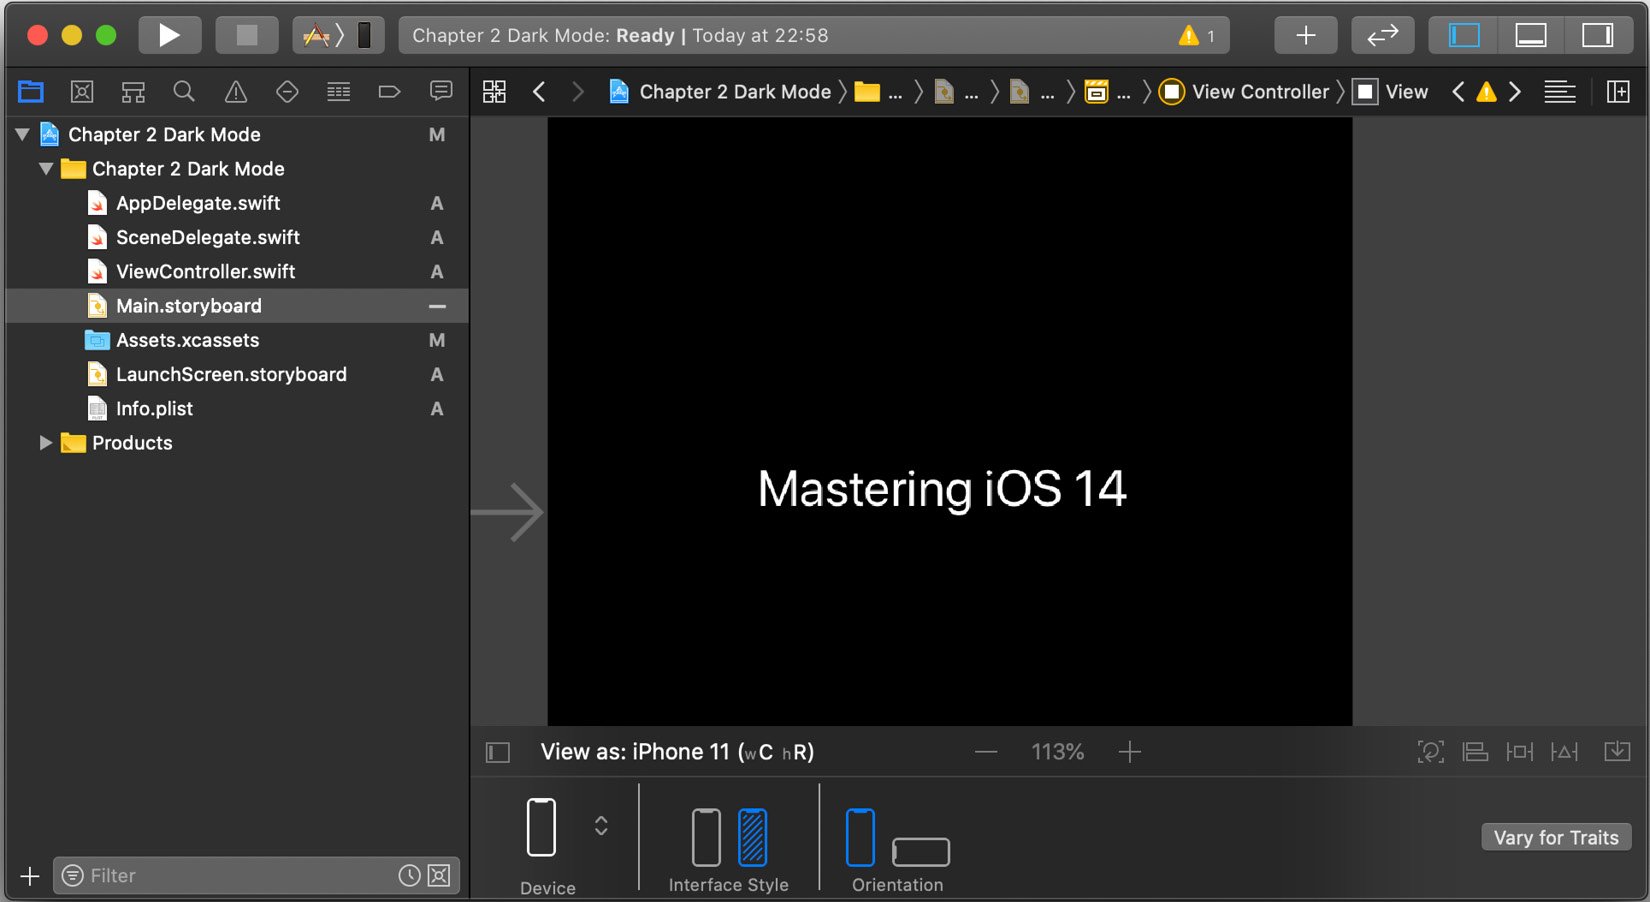
Figure 2.5 – Main storyboard – dark mode
As if by magic, our canvas enters dark mode, and the color of our UILabel is automatically adjusted. We can see straight away, without the need to compile or run the app on a device or in the simulator, how it will look with each interface style.
I guess the million-dollar question is how did iOS know to switch the color of the UILabel's font? Good question, and we'll cover that in more detail in the Working with views and Dark Mode section later in this chapter.
However, as I mentioned earlier, there are going to be occasions where you'll need to test your app in the simulator. Labels and views will not always be static and could be generated dynamically – this is where environment overrides come in.
We'll start by launching our app in the simulator. Once successfully launched, you should see the following highlighted option available in Xcode:
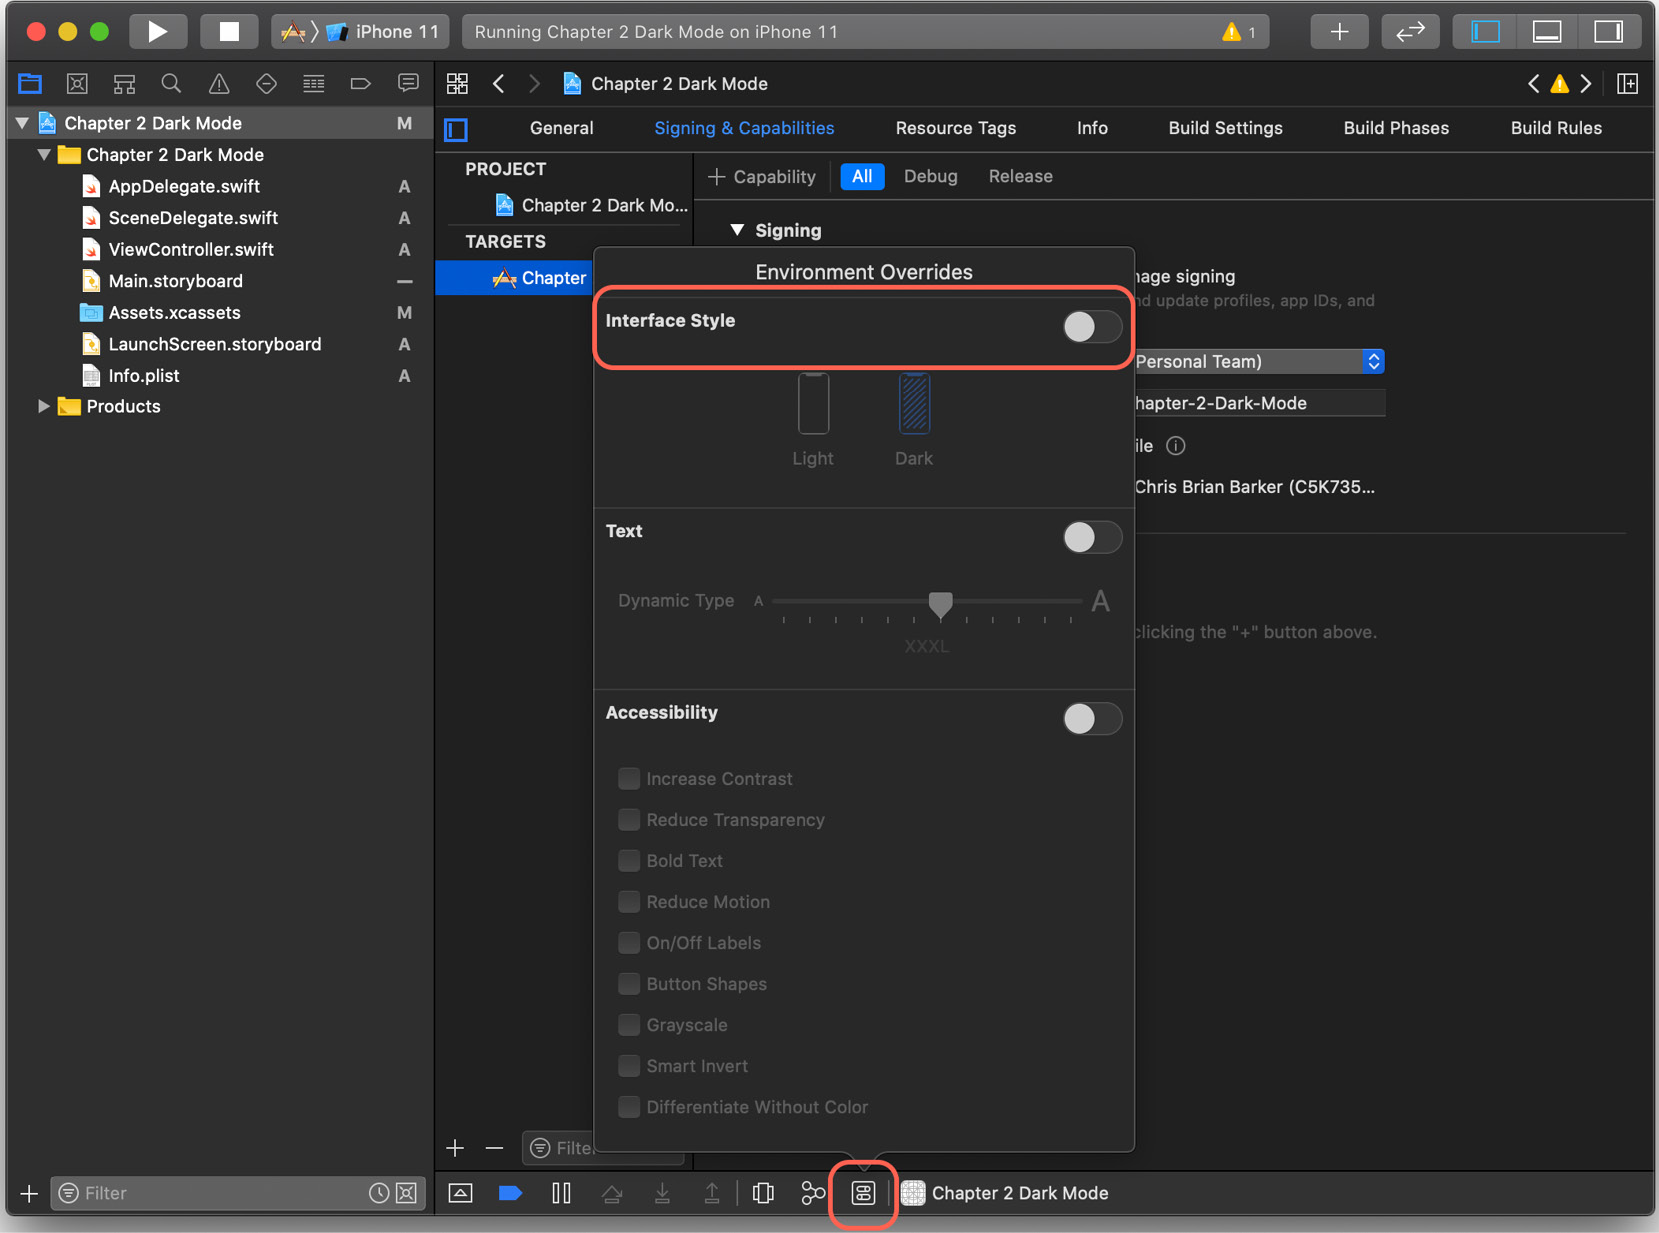
Figure 2.6 – Environment Overrides
Click on this icon and you'll be presented with the Environment Overrides popup. Here, you'll have the option to toggle the Interface Style overrides, which in turn will allow you to choose between light and dark appearance.
If you flick the toggle and switch between each option, you'll see your app in the simulator automatically update without the need to close your app, change the settings, and re-launch. Very nice indeed – thanks, Xcode!
One last little thing to point out before we move on: we mentioned previously that existing apps built with previous iOS SDKs won't be affected by dark mode, but should you choose to update your app to the iOS 13 SDK, you may run into a couple of issues.
Tight deadlines and urgent bug fixes might not necessarily give you the chance to adopt dark mode in your app, so Xcode gives you the option to force light appearance regardless of the user's preference.
In Info.plist (or the Info tab under our project settings), add the following key with the value Light:
UIUserInterfaceStyle

Figure 2.7 – Info.plist – User Interface Style
You'll now see that even with the environment overrides, you won't be able to switch to dark mode.
In this section, we got up and running with Dark Mode in iOS and, more importantly, Xcode, and learned about the little things that Xcode does to get us ready for developing our apps in both light and dark appearance. In the next section, we'll begin to look at how Xcode handles views and introduce ourselves to semantic "dynamic" colors.