

Welcome to the future. We have been waiting for a long, long time but it is finally here. The book you hold in your hands would not have been possible half a decade ago. Well, that is not quite true; it was possible, but it would have been placed in the science fiction area, but not anymore. The fact that you are reading this right now is proof that changes are taking place at a tremendous pace, and before you know it you will be in a place you never thought possible.
Take a look at the famous quote by Arthur C. Clarke:
Any sufficiently advanced technology is indistinguishable from magic.
This is true for HoloLens as well. Nobody was able to predict this device a decade ago, and now you have it within your reach.
However, no matter how cool the device itself is, it needs a bit of magic to come alive, and that piece of magic is the software that we are going to write. The software and the software your peers think of is going to be the lifeblood of the device. Without it, the device is just a nice looking piece of hardware. With it, the device is capable of changing the world view for a lot of people. That being said, it is also a lot of fun to write software for the device, so why not get started?
Before we delve globally into the code, let's first examine what we are talking about. I assume you have the machine somewhere near. If you do not have access to one, I suggest that you try to get it. Although the software we are going to build will run on the emulator, you will find that the experience is below par. It just is not the same as developing your software on a real device. Of course, we will use the emulator quite extensively in real-world scenarios; a typical company will have a team of somewhere between 5 and 15 professionals working on the software. It would be rather expensive to buy a device for all of them. One device per team or maybe two devices per team would be enough to make sure that the software does what it should do and that the experience is as magical as it can be.
Let's examine the hardware for a bit. What are we talking about? What is a HoloLens? What parts does it consist of?
In case you have never seen a HoloLens before, this is what it looks like:
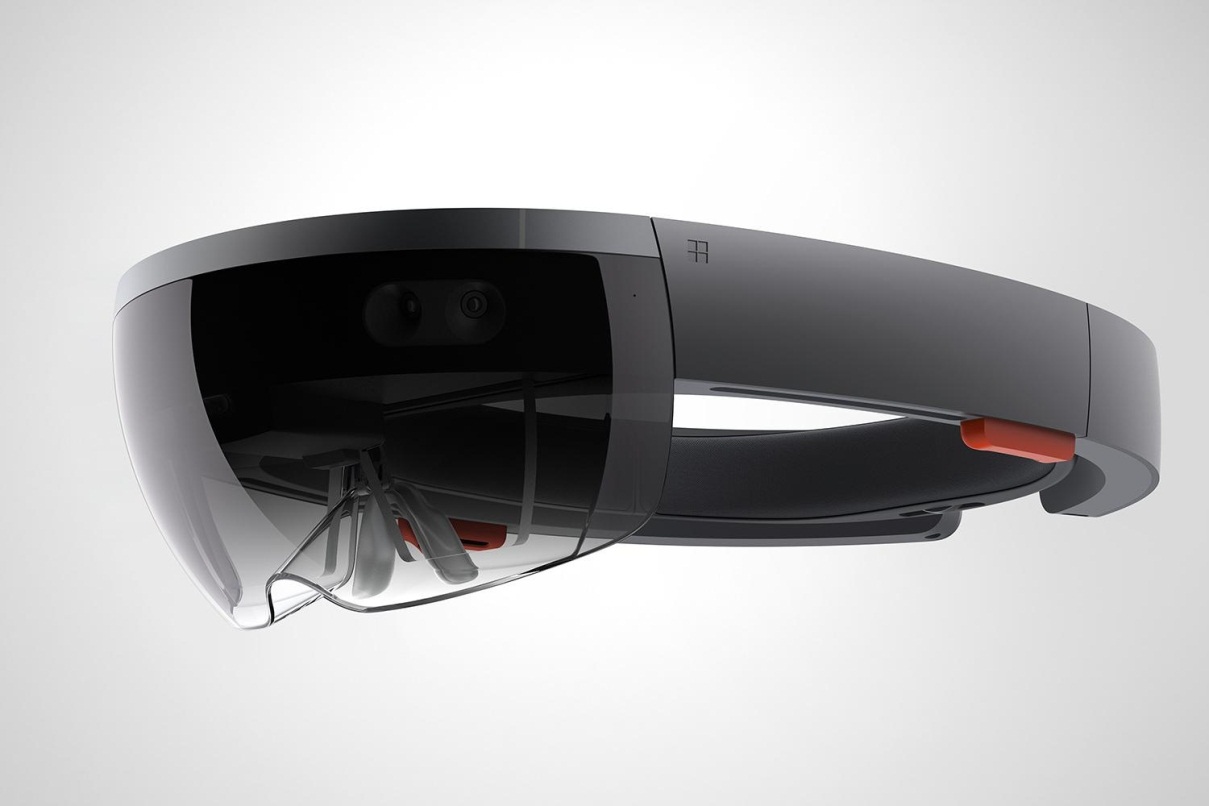
The device
The HoloLens is a wearable computer. That is something that we have to keep in mind all the time when we write software--people will walk around with the device on their head, and we need to take that into account. It is not only wearable, it is also head mounted.
The device works without any cables attached to it, and the six built-in (non-replaceable unfortunately) batteries make sure that you can use it for 3-4 hours. They designed it like this because the device is meant to be worn on the head and be walked around with. I know, I just said that but this is so fundamentally different from what you are used to that I cannot stress this enough. If you have developed applications for mobile platforms, such as mobile phones or tablets, you might argue those are wearable as well. Well, technically they are, but those devices generally do not interact with their environment. They are location-agnostic. They might know where they are, but they do not really care, but the HoloLens does and so your software should care about the location as well.
The HoloLens communicates with the environment and with its user using a whole lot of sensors and output devices. Let's go through them.
How does the HoloLens know its location? If you look at the device and take a closer look at its front, you will see five tiny cameras. These are the eyes of the device; these are what make the device aware of its surroundings.
The camera you see in the middle is a normal, 2 megapixel RGB style camera, like the ones you will find in your mobile phone. The four cameras to the sides, two to the right and two to the left, are the environment cameras. They look at the area around you and are partially responsible to produce the knowledge the device needs to know what the room you are in looks like. I said partially, because there is another camera in the middle and front of the device. You cannot really see it since it is hidden behind the see-through visor. This camera is the IR camera. The device emits infrared light that is detected by this piece of hardware. By calculating the time it takes for the light to return, the HoloLens can measure depth and thus create a 3D image of your room. If you are familiar with Microsoft Kinect, you will recognize this; essentially, you will be wearing a tiny Kinect controller on your head. If you are not familiar with that amazing device, I suggest you look at https://developer.microsoft.com/en-us/windows/kinect for more information. It is worth getting to know the background of a lot of the principles described in this book.
Next to vision-based input devices, there is also a microphone. Actually, there are four of these in a microphone array. This means that you can give the device spoken commands. The device itself listens to what you are saying, but we can also use this capability in our own software.
So, we have all the input parts. Now, we also need to get data out to the user. The most obvious part of this is the way the HoloLens displays the images. Since the HoloLens is a see-through device, meaning that it is transparent, the device only needs to provide you with the graphics the game or application needs to perform. This is done by the use of what Microsoft calls Holographic lenses. These two lenses are basically two tiny transparent computer screens in front of your eyes, where the device projects its images. Yes, I said transparent screens; these tiny computer screens are almost completely see-through. The resolution of the screens is 1268 x 720 pixels per eye, which seems low, but in reality is enough to generate good-looking graphics. Remember that the screens are tiny, so a lot more pixels will not make a lot of difference. In my experience, the graphics are just great and I noted that this low resolution was not a problem.
Next to the graphics part, there are also some speakers on the device. Microsoft calls them spatial sound speakers, meaning that they are capable of placing sounds in a three dimensional world. The speakers are quite obvious when you look at the device; they are the two red bars in the middle of the headband that will be just above your ears when you wear it. The effect is remarkably good--even with the use of just two tiny speakers, the sound quality is great, and you really feel the sound coming from a place in the room around you. Of course, this can be something we can use in our software. When we place items in our scene that we want the user to look at, we can have it make some noise and people will instinctively turn in the direction the sound is coming from, and this works even if we place the sounds behind the users. In practice, this works really well, and we will use this later on. The reason they decided to place the speakers in this location is that by putting them in front of your ears instead of on top of them, you will not be able to hear the actual real world around you anymore. This way, the virtual sounds blend in nicely with the real-world sounds.
All these input and output devices have to be connected to some sort of computer. With competing products in the virtual reality world, this is done by hooking up the device to some sort of an external computer. This could be a mobile phone, desktop, or laptop computer. Of course, with that last option, you lose the possibility of walking around, so the engineers at Microsoft have not gone down that route. Instead, they put all computing parts inside the device. You will find a complete Windows 10 computer and a special piece of hardware that Microsoft calls the Holographic Processing Unit, or HPU in short, inside the device. So, the computer consists of a CPU, a GPU, and an HPU, making it quite powerful.
The HPU is there for a reason--the computer itself is not that powerful. The machine basically is a 32-bit machine with 2GB of memory (the HPU has 1GB of its own), so the computing power is somewhat limited. If the CPU or the GPU would also have to do the processing of all the raw camera data it receives, it would be too slow to be practical. Having a more powerful general-purpose CPU will help of course, but that would mean the batteries will have to be bigger as well. Next, there would be a problem with heat--a faster computer generates more heat. At some point, it will need active cooling instead of the passive cooling the HoloLens currently has. By having a dedicated processing unit that decodes all the data before passing the results on to the rest of the device, Microsoft is able to have a relatively lightweight, but still fast machine, an impressive piece of engineering, if you ask me.
The power for all of this comes from three nonreplaceable batteries, located at the back of the device. The reason that they are in the back is so that they can act as a counter weight to all the hardware in front, thus delivering a nicely balanced device that is comfortable to wear. The batteries are good for 2-3 hours of usage, depending on the applications you run on it. Recharging is done by plugging a micro-USB cable attached into a power source in it, and takes about 4 hours to complete.
There is a lot we know about the device. However, this is the state of the hardware as it is at the time of writing this book. This might change without notice. However, let me sum up the device for you anyway:
Computing power:
- A 32-bit Intel processor
- 2 GB RAM
- Microsoft Holographic Processing Unit
Sensors:
- Four environment-understanding cameras (two left and two right)
- Depth camera (center front)
- 2-megapixel photo or high-definition video camera (center front)
- Four microphones
- Ambient light sensor
Input and output:
- Two spatial sound speakers
- An audio 3.5 mm jack for headphones
- Volume up and down buttons
- Brightness up and down buttons
- A power button
- Battery status LEDs (five in total, each representing 20% of the charge)
- Wi-Fi 802.11ac
- Bluetooth 4.1
- Micro USB 2.0 (used for power and debugging)
Optics:
- Two see-through Holographic lenses
- Two HD 16:9 light engines, running 1268 x 720 pixels each
- Automatic pupillary distance calibration
- Holographic Resolution, 2.3 million total light points
- Holographic Density, more than 2,500 radiants
Miscellaneous:
- Weight: 579 grams
- Storage: 64 GB flash memory
Let's dive more deeply into the last three points in the optics part.
First is the automatic pupillary distance calibration. Let's be honest--no device except for a 3D printer can generate true 3D objects. It will always be a two-dimensional graphic, but presented in such a way that our brain gets tricked into seeing the missing third dimension. To achieve this, the device creates two slightly different images for each eye. We will get into that in later chapters, but for now let's just take this for granted. Our brain will see the difference between those two images and deduce the depth from that. However, the effect of this depends on one big factor--the images have to be exactly right. The position of each pixel has to be at exactly the right spot.
This means that we cannot just put a pixel in a X-Y coordinate on the display--a pixel that is meant to be in the middle of our view has to be presented right at the center of our pupils, and since no two eyes are the same, the device has to shift the logical center of the display a bit. In the early prototypes of the HoloLens, this was done manually by having a person look at a dot on the screen and then adjust the dials to make sure that the subject only sees on a single, sharp defined point. The automatic pupillary distance calibration in HoloLens now takes care of this, ensuring that every user has the same great experience.
The holographic resolution and density also need a bit more explaining. The idea here is that the actual number of pixels is not relevant. What is relevant is the number of radiants and light points. A light point is a single point of light that the user can see. This is a virtual point we perceive floating somewhere in mid-air. In reality, pixels are made out of these light points. There are many more light points than pixels. This makes sure that the device has enough power to produce pixels the person can actually see. The higher the number of light points you have, the brighter and crisper each pixel seems. The radiant is the number of light points per radian. As you probably know, a radian is a measure of angles, just like degrees. One radian is about 57.2958 degrees. Then, 2,500 radiants mean that for each radian, or 57.2958 degrees angles, we will have 2,500 light points. From this, you can deduce that objects closer by will have a better density of light points than objects far away.
Wearing the device is something that needs some love and attention. The displays I mentioned earlier are actually pretty small. In practice, that is okay. Since they are so close to your eyes, you will not notice their size, but it does mean that a user has to position them fairly precisely in order to have a great experience. The best way to do this is to adjust the band so that is big enough to fit over your head. There is a cogwheel at the back of the head strap that you can turn to make the band wider or narrower. Place the band over your head and make sure that the front of the band is in the middle of your forehead. Then, turn the wheel to make it as tight as you can without making it uncomfortable. The reason that it has to be this tight is that the device--although it is nicely balanced, will shift around when you move about the room. When you move, the display will be unaligned and that can cause a narrower field of view and even can lead to nausea.
When you have balanced the device, you can move the actual visor about. It can move forward and backward to accommodate people wearing glasses and can also tilt up and down a bit. Make sure that your eyes are in the center of the screen, something that is easily done since you will notice images being cut off.
Let's turn the device on--at the back, you will find the power button. Next to that are five LEDs that indicate whether the device is active and the state of the batteries. Each LED stands for 20% of the remaining power; so, assuming your device is fully charged, you will see five LEDs that are switched on. When you wear the device and press the power button, you will be greeted by a friendly "Hello", followed by either a "Scanning your environment" message or the start menu. The "Scanning your environment" message means that the device is looking at the environment. It will map all surfaces and will see if it recognizes them. If it does, it will load the known environment and use that, otherwise it will store a new one.
If this is the first time you have turned on the device, you have to personalize it. The steps necessary are simple, and the wizard will walk you through it, I will not go into that here. However, it is important to note that one step really should not be skipped--the network configuration. The device does not have a built-in GPS receiver and will rely on the network to identify the place it is in. It will store the meshes that make up the rooms and identify those with the network identifier. This way, it will know whether you are using it in your house or in your office, for instance. Next to that, applications, such as Cortana, need network connectivity to run, so the device can only really reliably be used in areas with a decent Wi-Fi reception.
One of the steps required is entering your Microsoft account. If you do not have one, I advise you to set one up before starting the device.
The usage of the device takes some getting used to. In the center of your view, you will see a tiny bright dot--this is your pointer. This dot will remain in the center of your view, so the only way to move it about is to move your head. A lot of first-time users of HoloLens will move their hands in front of the device as if they are trying to persuade the dot to move but that will not work. You need to look at something in order to interact with it.
There are two sorts of pointers in the default HoloLens world--one is the aforementioned dot, the other one is a circle. When the device sees your finger or hand in front of the sensors, it will let you know this and inform you that it is ready to receive commands--the dot will turn into this circle. Now, you can use one of the two default gestures. One is the air tap. Some people struggle with this one, but it is fairly straightforward.
You make a fist, point an index finger toward the sky and then move that finger forward without bending it, all the time leaving the rest of your hand where it is; that is it, tapping with a finger. Ensure that you don't bend the finger, do not move the whole hand, do not turn the hand, or just use one finger. It does not really matter if you use your right or left hand; the device will pick it up.
Next to the air tap gesture, we have the bloom gesture. Although this is slightly more complicated, people seem to have fewer issues with this one. Start with a closed fist in front of the device, palm upward. Next, open your hands and spread your fingers wide--just imagine your hand is a flower opening up.
This gesture is used to go back to the Start menu or the main starting point of an application.
That is it! There are no more gestures. Well, there is the tap-and-hold gesture (move your finger down and keep it there while moving your hand up and down, right and left or back and forth to move stuff about) but that is just a variation of the airtap.
The first time someone puts on the device, it should be calibrated. Calibration means that the screens need to be aligned to the center of the wearer's pupils. Obviously, each person has a different number for this; this number is called the interpupillary distance (IPD). Mine, for instance, is 66.831 millimeters, meaning that my pupils are almost 67 millimeters apart. This is important since this determines how effective the three dimensional effect is. A lot of people skip this step or do it only once for the initial user, but that is a big mistake. If this number is not correctly set, you will have a slightly offset image that just doesn't feel right.
The calibration is done with the calibration tool, one of the applications preinstalled on the device. This application will guide you through the process. The tool first shows a blue rectangle and asks whether you can see all corners. Ensure that the rectangle is in the center of your view by adjusting the device on your head. If you got it right, you can say the word next to move to the next stage. Yes, this is voice controlled, which makes sense--the device is still calibrating your vision, so it cannot rely on airtaps. The next phase consists of showing you outlines of a finger in a circle; you are supposed to place your finger in that outline. You have to do this five times for each eye, with the other eye closed. This process should not take very long, but it is extremely important that you do this for every new user.
The resulting IPD number is not visible in the device, but can be read out in the device portal. The number is unique for the combination of this user for this device--you cannot use that number for the same user on another device. I suggest that you write down that number for users who will be using the device more than once. That way, you can enter it in the device portal without having to go through the calibration process every time.
Note
One word of warning--the device is not meant to be used by children under the age of 13 years. The reason for this is that their eyes tend to be rather close to each other and thus need IPD values too small to work. There are limits to what this number can be, although Microsoft has not yet disclosed these numbers. Having a wrong IPD could result in motion sickness during its use, so it is recommended that you have this set right and prevent children from playing with the device.