Book Image

concrete5: Beginner's Guide - Second Edition - Second Edition

Book Image

concrete5: Beginner's Guide - Second Edition - Second Edition

Overview of this book

concrete5 is an open source content management system (CMS) for publishing content on the World Wide Web and intranets. concrete5 is designed for ease of use, and for users with limited technical skills. It enables users to edit site content directly from the page. It provides version management for every page and allows users to edit images through an embedded editor on the page. concrete5 Beginner's Guide shows you everything you need to get your own site up and running in no time. You will then learn how to change the look of it before you find out all you need to add custom functionality to concrete5. concrete5 Beginner's Guide starts with installation, then you customize the look and feel and continue to add your own functionality. After you've installed and configured your own concrete5 site, we'll have a closer look at themes and integrate a simple layout into concrete5. Afterwards, we're going to build a block from scratch which you can use to manage a news section. We're also going to add a button to our site which can be used to create a PDF document on the fly. This book also covers some examples that show you how to integrate an existing jQuery plugin. concrete5 Beginner's Guide is a book for developers looking to get started with concrete5 in order to create great websites and applications.
Table of Contents (19 chapters)
Credits
About the Author
About the Reviewers
www.PacktPub.com
Preface
Pop Quiz Answers
Index

Time for action – adding file attributes to our slideshow


Include the file attributes in the gallery by following these steps:

  1. In the intelligent search box, type Attributes and select the entry next to Files. You should see the two default attributes, width and height. We are going to add two more attributes, one for the title and one for a short description.

  2. Select Text in the drop-down at the bottom and hit Go. Enter title for Handle and Title for Name. Click on Add to add the new attribute.

  3. Select Text Area in the drop-down and click on Go again. Enter
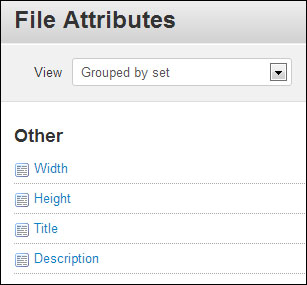
 description for Handle and Description for Name. Leave the type as Plain Text and add the new attribute.

  4. You should now see four attributes as shown in the following screenshot:

  5. Go back to the File Manager and select the first file in your gallery set. Open the Properties dialog. Scroll down and look for Other Properties. Click on the label Title and enter a title for the current picture, and click on the little icon with the pen when done...