

Almost every application has an authentication screen. Here, we will examine the root application page of a Xamarin.Forms application by creating a login screen where the user can set his username, password and tap the login button to get access.
You can create a new solution or continue from the previous section.
In our core PCL project:
Open the
FormsCookbook.csfile.Replace the code in the constructor with the following code snippet:
var userNameEntry = new Entry {
  Placeholder = "username"
};
var passwordEntry = new Entry {
  Placeholder = "password",
  IsPassword = true
};
var loginButton = new Button {
  Text = "Login"
};

loginButton.Clicked += (sender, e) => {
  Debug.WriteLine(string.Format("Username: {0} - Password: {1}", userNameEntry.Text, passwordEntry.Text));
};

MainPage = new ContentPage {
  Content = new StackLayout {
    VerticalOptions = LayoutOptions.Center,
    Children = {
      userNameEntry,
      passwordEntry,
      loginButton
    }
  }
};
Run the application for each platform; you should get the two native default text input controls and a button.
Set your username and password in the corresponding textboxes.
Click the Login button and watch the application output printing the message we set up in the Clicked delegate event handler.
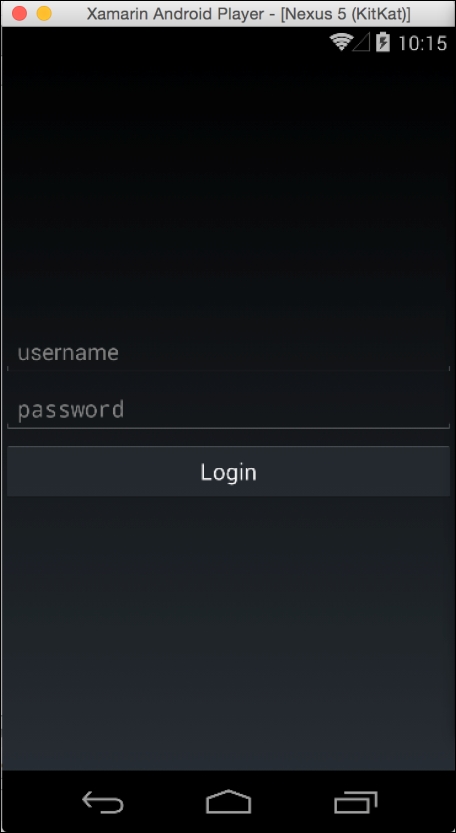
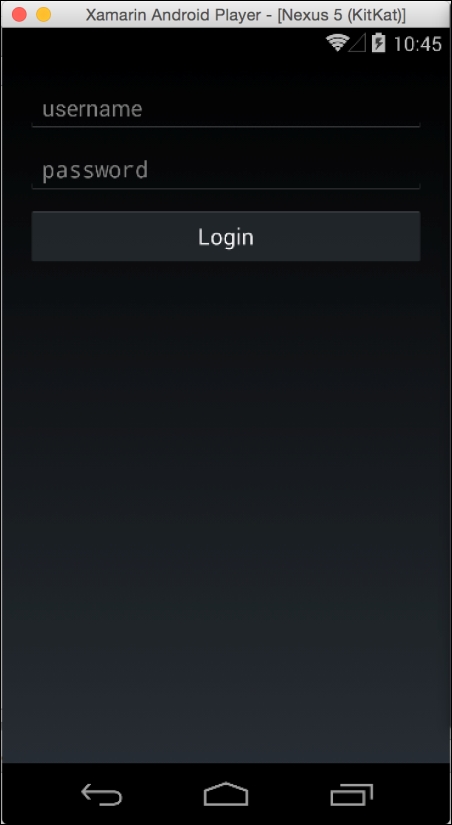
You should see something similar to the following screenshot:
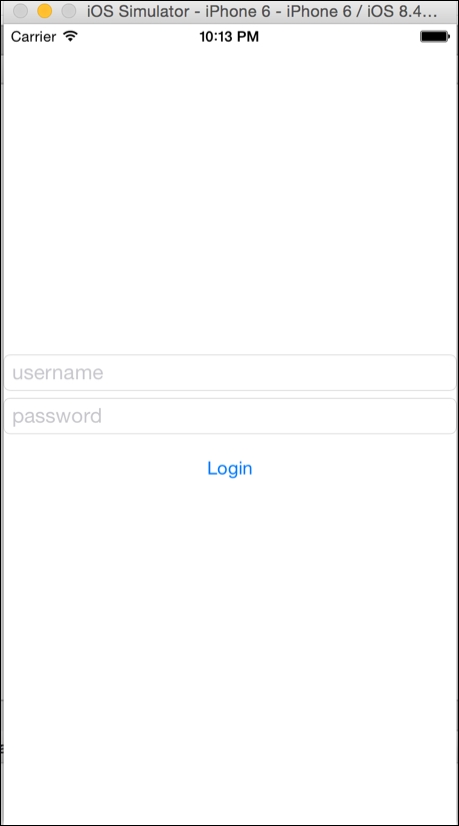
In Android:
This is all great: the default layout looks OK and everything is aligned in the middle of the screen and to the edge of the screen. Of course, every view and layout container has properties that will align and add spacing between controls. Let's try to change things up a little bit. It's good to start organizing our code better too.
Right-click in the core PCL project and Add | New Folder; name it
Custom Pages.Right-click in the Custom Pages folder and Add | New File; choose Empty Class, set the name to
MainPage, and click New.In the constructor of the new class, write or paste the following code:
public class MainPage: ContentPage {
  Entry userNameEntry;
  Entry passwordEntry;
  Button loginButton;
  StackLayout stackLayout;

  public MainPage() {
    userNameEntry = new Entry {
      Placeholder = "username"
    };
    passwordEntry = new Entry {
      Placeholder = "password",
      IsPassword = true
    };
    loginButton = new Button {
      Text = "Login"
    };

    loginButton.Clicked += LoginButton_Clicked;

    this.Padding = new Thickness(20);

    stackLayout = new StackLayout {
      VerticalOptions = LayoutOptions.FillAndExpand,
      HorizontalOptions = LayoutOptions.FillAndExpand,
      Orientation = StackOrientation.Vertical,
      Spacing = 10,
      Children = {
      userNameEntry,
      passwordEntry,
      loginButton
      }
    };

    this.Content = stackLayout;
  }

  void LoginButton_Clicked(object sender, EventArgs e) {
    Debug.WriteLine(string.Format("Username: {0} - Password: {1}",
    userNameEntry.Text, passwordEntry.Text));
  }
}
Make the
MainPageclass a subclass ofContentPage.public class MainPage : ContentPage
Replace the
FormsCookbook.csconstructor with the following code:MainPage = new MainPage ();
Run the application for each platform to see the results.
You should see something similar to the following screenshot:
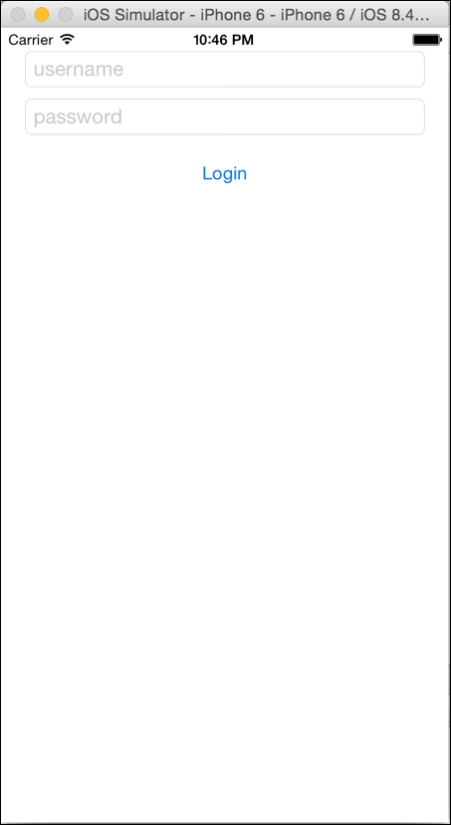
In Android:

FormsCookbook.cs is the main application entry that contains a MainPage property where we assign the application initial page.
For the Content of the MainPage we create a StackLayout, and for its children we add our three Views: userNameEntry, passwordEntry, and loginButton with VerticalOptions, HorizontalOptions, Orientation, Spacing.
We assigned a delegate handler for the Clicked event of the loginButton to respond to our finger tap. Nothing fancy here, just printing a message to the Application Output window.
The Xamarin.Forms UI hierarchy is based on a more adaptive layout; we don't specify positions with coordinates, but rather with layout containers, which we add child elements and specific rules.
To fine-tune our login screen, we used the StackLayout's container properties, VerticalOptions and HorizontalOptions, to determine how the child content is positioned, spacing for the space between the controls and padding for around the element.
Note
When it comes to width and height, there is no straightforward way to set these properties in Xamarin.Forms views. What we actually do is request the width and height, and with no guarantee that it will happen the layout will try to complete your request. The Width and Height are read-only properties.
When it comes to a native cross-platform application like Xamarin.Forms, don't forget that we are running in different platforms, and different platforms have different screen sizes with different measurement systems: iOS units, Android and Windows Phone, device-independent pixels.
How does Xamarin.Forms deal with that? For example, if you say Spacing=10 then it will be 10 in the specific platform's measurement system, 10 units in iOS, and 10 dpi in Android and Windows Phone.