Information is key to the productivity of any CAD shop. The ability to capture, organize, and present your AutoCAD object data means that you can provide real intelligence with your drawing package. This project scans all block references in a drawing and writes the block name and attribute names and values to a text file. This idea could be expanded and improved by adding better formatting, different output types, reading xdata in addition to attributes, and so on (feel free to borrow code from the previous exercises).
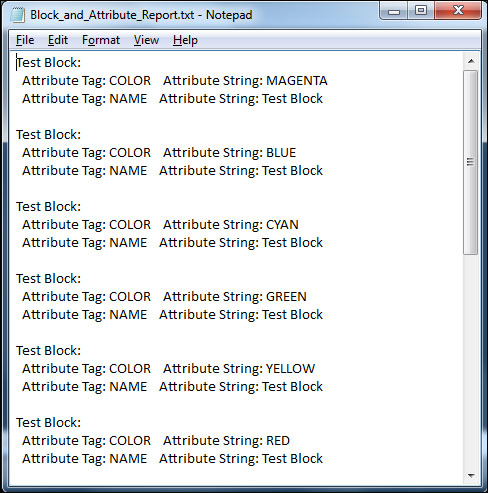
This program creates a blank text file, C:\ Block_and_Attribute_Report.txt, if it doesn't already exist. There is no drawing provided for this chapter. Either create a drawing with a variety of block references and attributes, or use an existing drawing.
You will also need to add some additional system references to your myCommands.cs file:
using System;
using System.IO;
using System.Text;
using System.Windows.Forms;
using Microsoft.VisualBasic.Devices;

using Autodesk.AutoCAD.Runtime;
using Autodesk.AutoCAD.ApplicationServices;
using Autodesk.AutoCAD.DatabaseServices;

using Autodesk.AutoCAD.Geometry;
using Autodesk.AutoCAD.EditorInput;
using AcadApp = Autodesk.AutoCAD.ApplicationServices.Application;
Add a static property to the project for the text file object, and a string constant to hold the filename:
namespace Ch6AcadPlugin {
   public class MyCommands {
      private static FileInfo oDatFile { get; set; }
      const string sFilename =
         "C:\\Block_and_Attribute_Report.txt";
Add a new command, WData. Get the current drawing
DatabaseandEditorobjects. Add a function call toCreateDatFile(). We'll add the function itself shortly. Use try...catch blocks to catch any exceptions:[CommandMethod("WData")] public void WriteData() { Document doc = AcadApp.DocumentManager.MdiActiveDocument; Editor ed = doc.Editor; //Get the current database Database currDb = doc.Database; //Create the data file, to be updated later. try { CreateDatFile(); } catch (System.Exception ex) { ed.WriteMessage((System.Environment.NewLine + "Problem creating data file. " + ex.Message)); return; }Inside the transaction, add a filter to build a selection set of all the block references in the drawing. Create an array of all the block reference ObjectIDs:
using (Transaction tr =
   currDb.TransactionManager.StartTransaction()) {
   try {
      // Filter only the block references
      TypedValue[] filList = new TypedValue[1] {
         new TypedValue((int)DxfCode.Start, "INSERT") };
      SelectionFilter filter = new SelectionFilter(filList);
      PromptSelectionResult res = ed.SelectAll(filter);
      SelectionSet selSet = res.Value;
      ObjectId[] idArray = selSet.GetObjectIds();
      string sBlk = "";
      string sAtt = "";
Now, if the text file exists, iterate thorough the block reference IDs. Get the block name as well as the attribute tags and their values (build a string with all of the attribute tags and values):
      if (oDatFile.Exists) {
        FileStream fs = File.Create(sFilename);
        foreach (ObjectId blkId in idArray) {
          BlockReference blkRef =
          (BlockReference)tr.GetObject(blkId,OpenMode.ForRead);
          BlockTableRecord btr =
          (BlockTableRecord)tr.GetObject (blkRef.BlockTableRecord,
             OpenMode.ForRead);
          sBlk = btr.Name.ToString();
          sAtt = "";
          btr.Dispose();
          AttributeCollection attCol = blkRef.AttributeCollection;
          foreach (ObjectId attId in attCol) {
             AttributeReference attRef =
               (AttributeReference)tr.GetObject (attId,
                  OpenMode.ForRead);
             string str = ("  Attribute Tag: " + attRef.Tag
            	   + "   Attribute String: " + attRef.TextString);
             sAtt = sAtt + str + System.Environment.NewLine;
          }
Write the block and attribute data to the text file, and close it (it will be automatically saved). And that's it! In step 6, we'll write the function to create the text file:
            //Write data text to the data file.
            byte[] info = new UTF8Encoding(true).GetBytes(sBlk
               + ":::" + sAtt + System.Environment.NewLine);
            fs.Write(info, 0, info.Length);
         }
         fs.Close(); //Close the file
      }
      else {
         MessageBox.Show("Unable to update data file.",
           "Ch6AcadPlugin", MessageBoxButtons.OK,
           MessageBoxIcon.Error);
         throw new ApplicationException();
      }
      tr.Commit();
   }
   catch (Autodesk.AutoCAD.Runtime.Exception ex) {
      ed.WriteMessage(("Exception: " + ex.Message));
   }
   finally {
      tr.Dispose();
   }
}
Add a function,
CreateDatFile(). The function will create the blank data file or overwrite the previous one://Create the data file, to be updated later. private static void CreateDatFile() { // Create or overwrite the data file. try { oDatFile = null; Computer myComputer = new Computer(); oDatFile = myComputer.FileSystem.GetFileInfo(sFilename); if (oDatFile.Exists == false) { FileStream fs = File.Create(sFilename); oDatFile = myComputer.FileSystem.GetFileInfo(sFilename); fs.Close(); } } catch (System.Exception ex) { MessageBox.Show("Unable to create data file." + System.Environment.NewLine + ex.Message, "Ch6AcadPlugin", MessageBoxButtons.OK, MessageBoxIcon.Error); throw new ApplicationException(); } }
After using some System IO calls to create the new file, we use a filter to build a selection set made up of only the block references in the drawing. From the selection set, we derive an array of the block reference ObjectIds. We open each block reference for read, get the block name, and check for attributes. If attributes exist, we build a string containing all of the attribute tags and values. Once we've iterated through all of the attributes, we write the data we've captured to the text file we've designated for this purpose.