

Amazon replicates data across the region in multiple servers located in Amazon's data centers. Data replication benefits include high availability and durability. More specifically, when you create a new object in S3, the data is saved in S3; however, the change needs to be replicated across the Amazon S3 regions. Overall, replication may take some time, and you might notice delays resulting from various replication mechanisms. Please consider the following when performing the indicated operations.
After deleting an object, replication can cause a lag time that allows the deleted data to display until the deletion is fully replicated. Creating an object and immediately trying to display it in the object list might be delayed as a result of a replication delay.
S3's native interface is a Representational State Transfer (REST) API. It is recommended to always use HTTPS requests to perform any S3 operations. The two higher-level interfaces that we will use to interact with S3 are the AWS Management Console and the AWS Command-Line Interface (CLI). Accessing objects with the API is quite simple, and includes the following operations for the respective entity:
Bucket: Create, Delete, or List keys in a Bucket
Object: Write, Read, or Delete
In this exercise, we will import a text file into our S3 Bucket. To import a file, you need to have access to the Amazon S3 console:
Press the Ctrl key while clicking https://console.aws.amazon.com/console/home to open the AWS Management Console in a new browser tab.
Click inside the search bar located under AWS services:
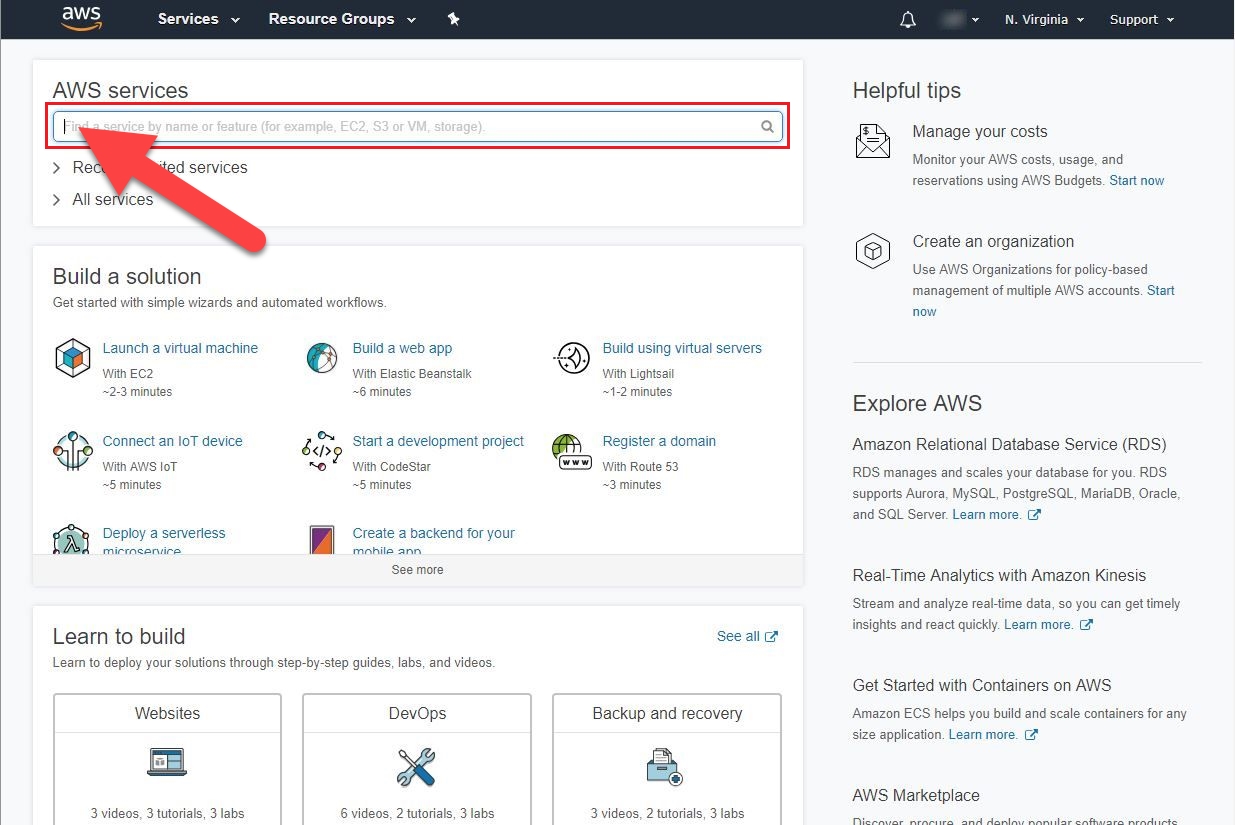
Figure 1.4: Searching AWS services
Type S3 into the search bar, and an auto-populated list will display. Then, click on the S3 Scalable Storage in the Cloud drop-down option:
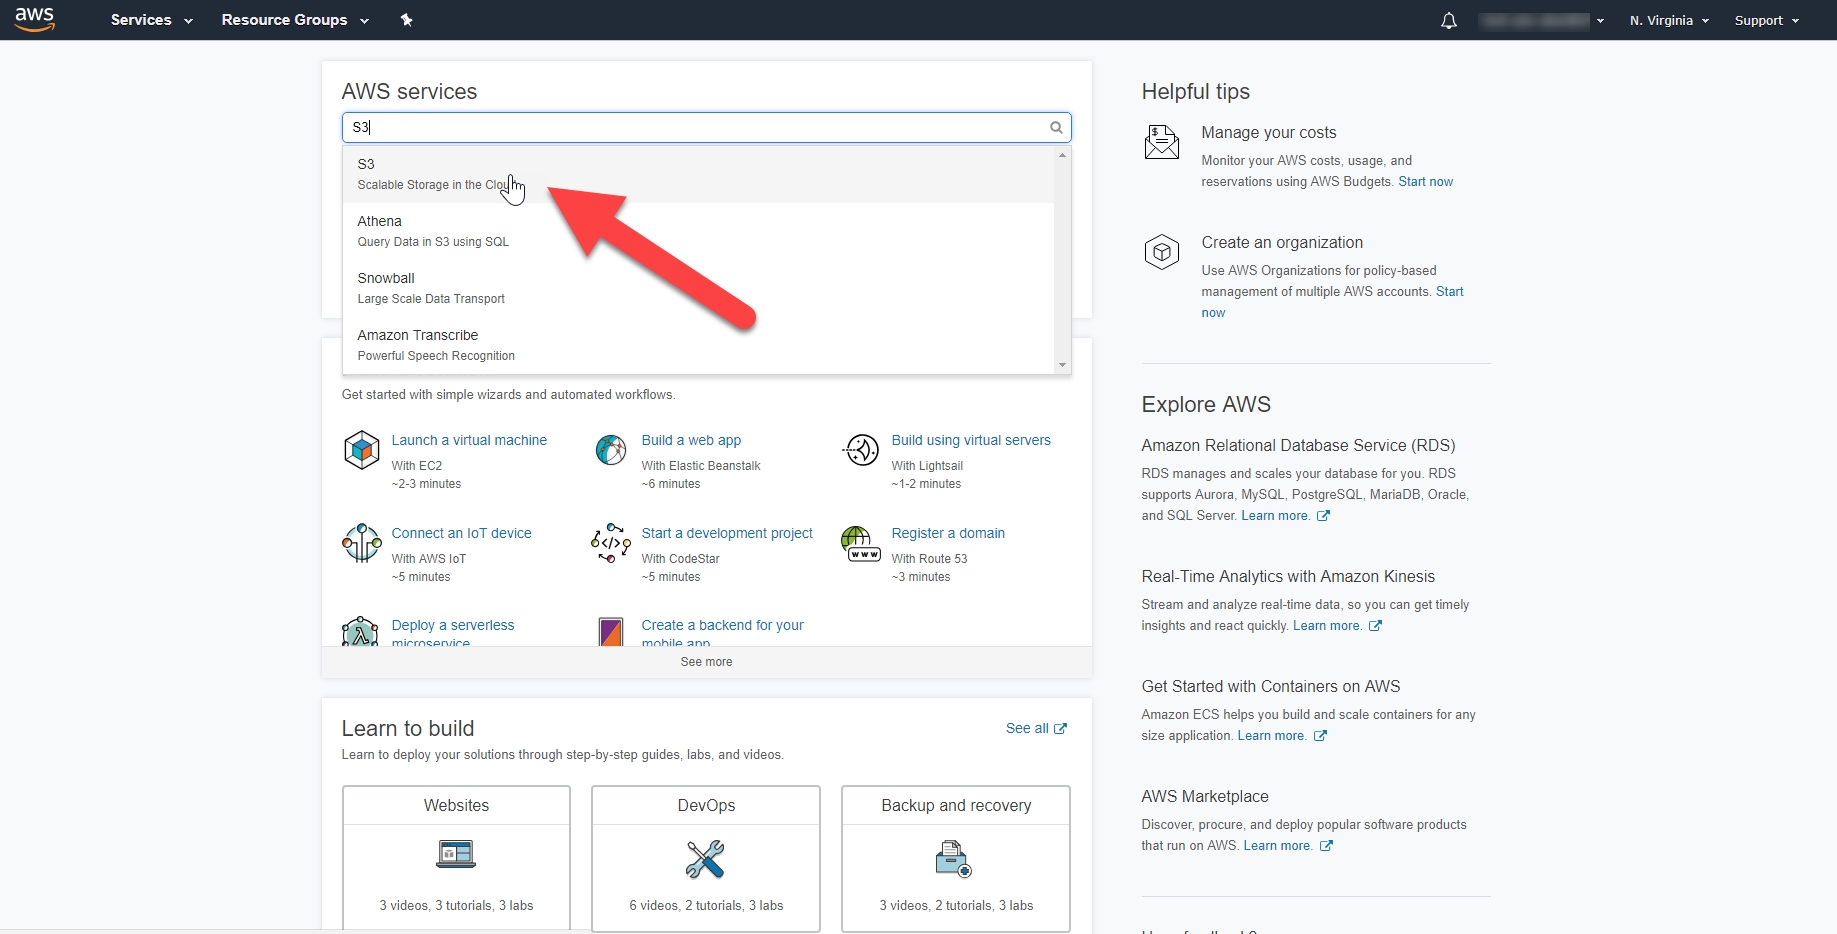
Figure 1.5: Selecting the S3 service
Now, we need to create an S3 Bucket. In the S3 dashboard, click the Create Bucket button.
If this is the first time that you are that you are creating a bucket, your screen will look as follows:

Figure 1.6: Creating the Bucket
Enter a unique Bucket name: Bucket names must be unique across all existing Bucket names in Amazon S3. That If you encounter a naming issue, please refer to https://docs.aws.amazon.com/AmazonS3/latest/dev/BucketRestrictions.html.
Region: If a default region is auto-populated, then keep the default location. If it is not auto-populated, select a region near your current location.
Click the Next button to continue for the creation of bucket:
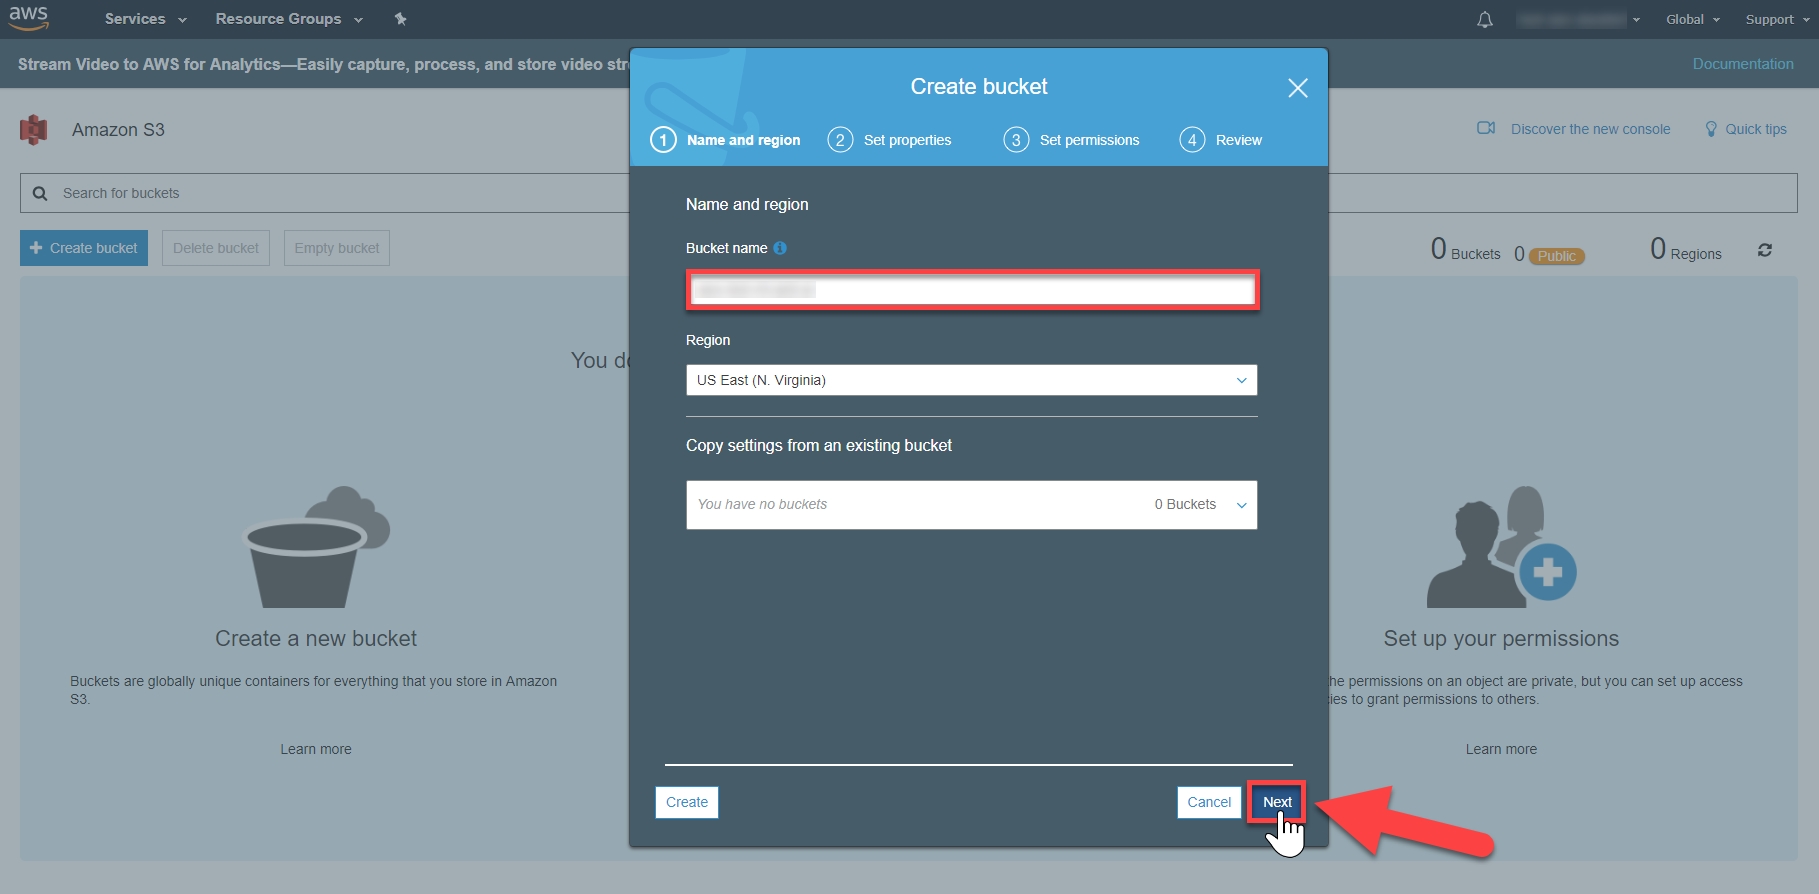
Figure 1.7: The Create Bucket window
An S3 Bucket provides the property options Versioning, Server Access Logging, Tags, Object-Level Logging, and Default Encryption. However, we will not enable them.
Your Bucket will be displayed in the bucket list, like so:
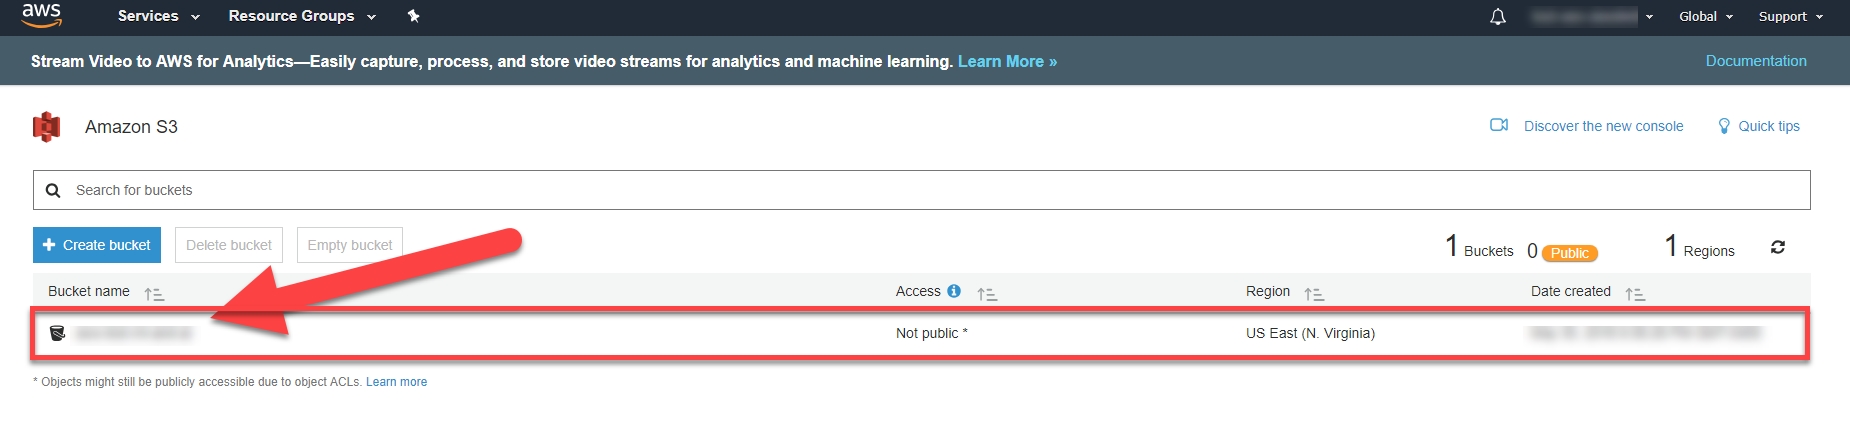
Figure 1.8: The Bucket has been created
In this exercise, we will import and export the file with the S3 Bucket. The following are the steps for completion:
Importing a File:
You will import a file to your Amazon S3 Bucket.
Click the Bucket's name to navigate to the Bucket:
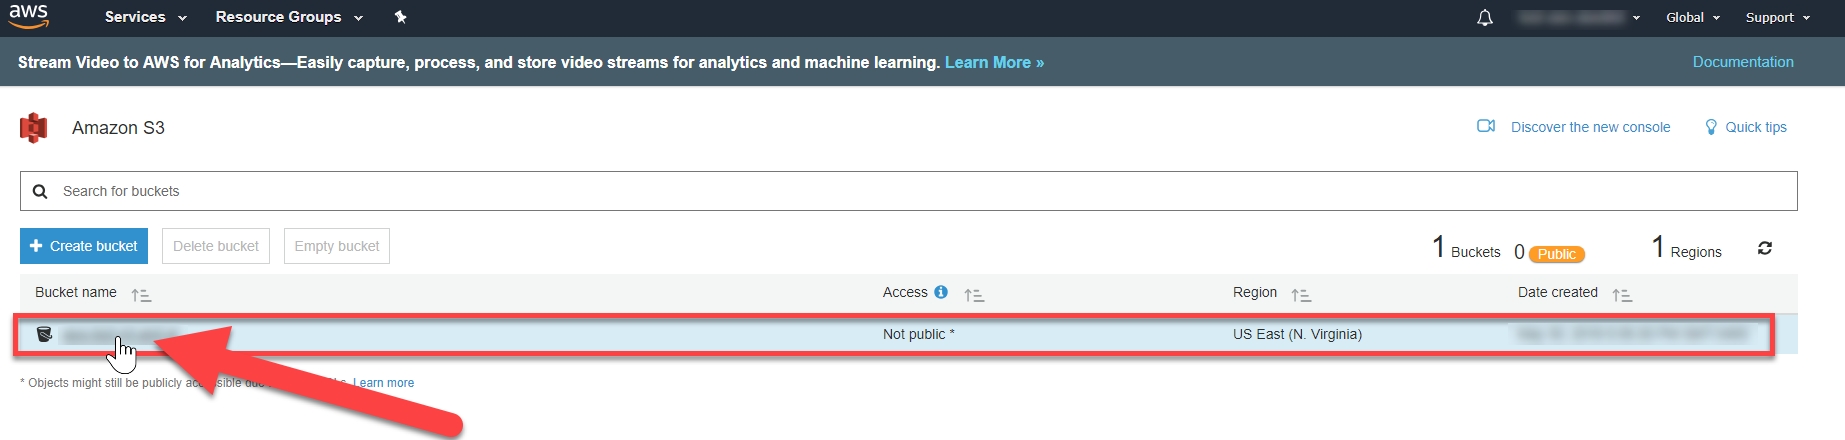
Figure 1.9: Navigate to Bucket
You are in the Bucket's home page. select Upload:

Figure 1.10: Uploading the file into the Bucket
To select a file to upload, click Add files. Navigate to the pos_sentiment__leaves_of_grass.txt location and select the sample file that you want to store:
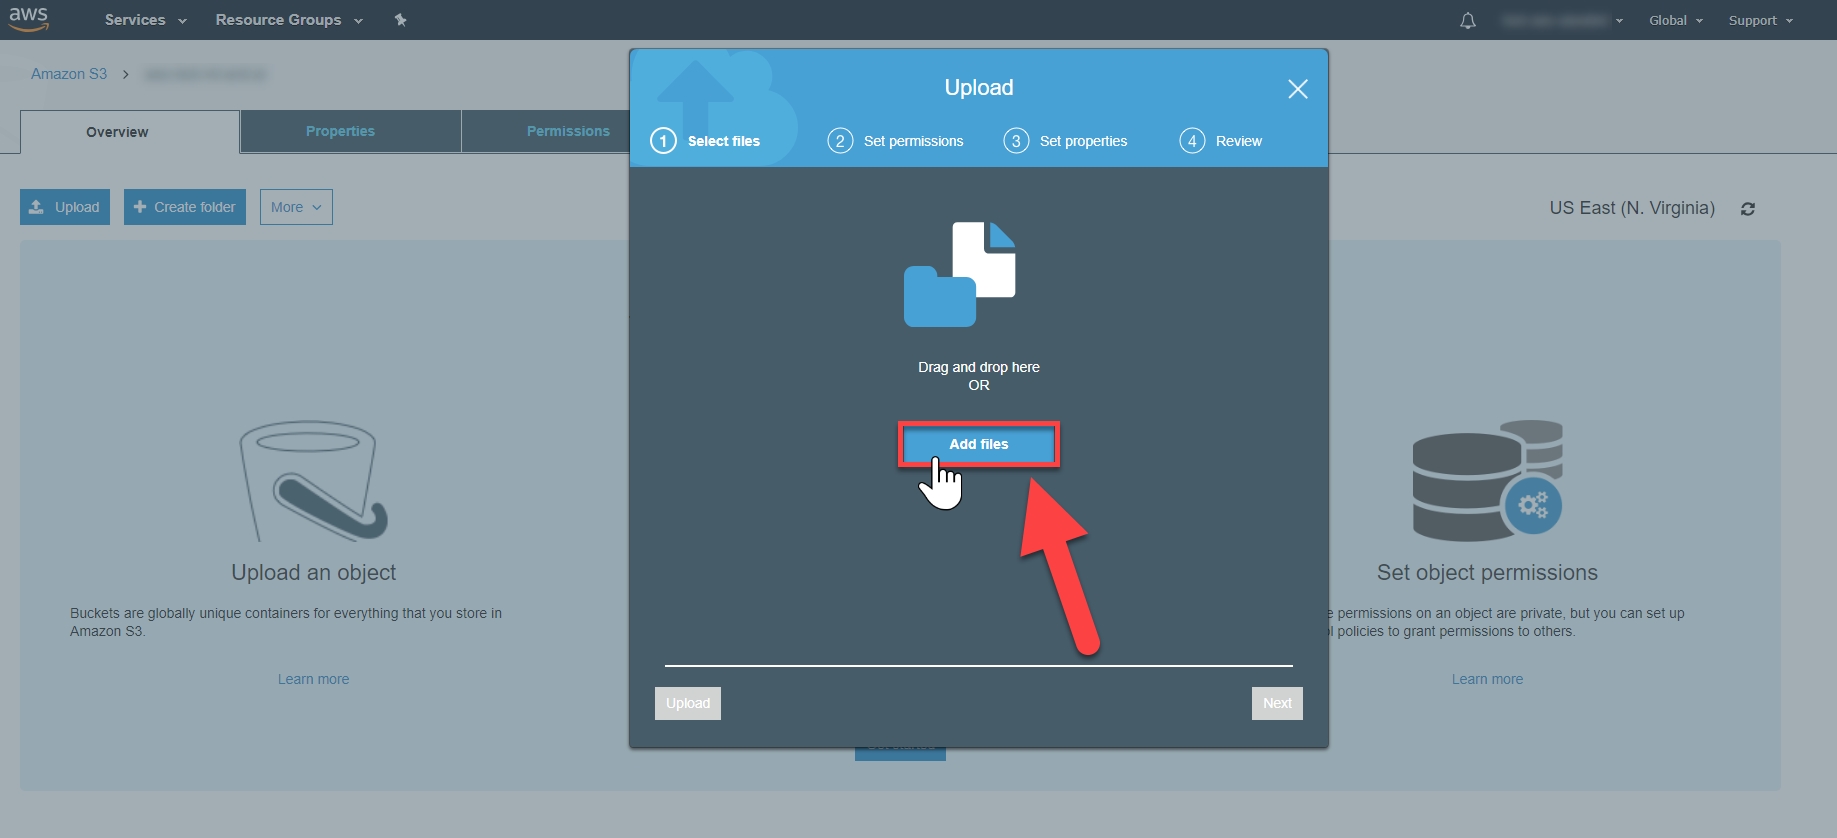
Figure 1.11: Adding a new file to the Bucket
After selecting a file to upload, select Next:

Figure 1.12: Select the file to upload to the Bucket
Click on the Next button and leave the default options selected:

Figure 1.13: Default Options page while uploading the file
You have the ability to set property settings for your object, such as storage class, encryption, and metadata. However, leave the default values as-is, and then click on the Next button:
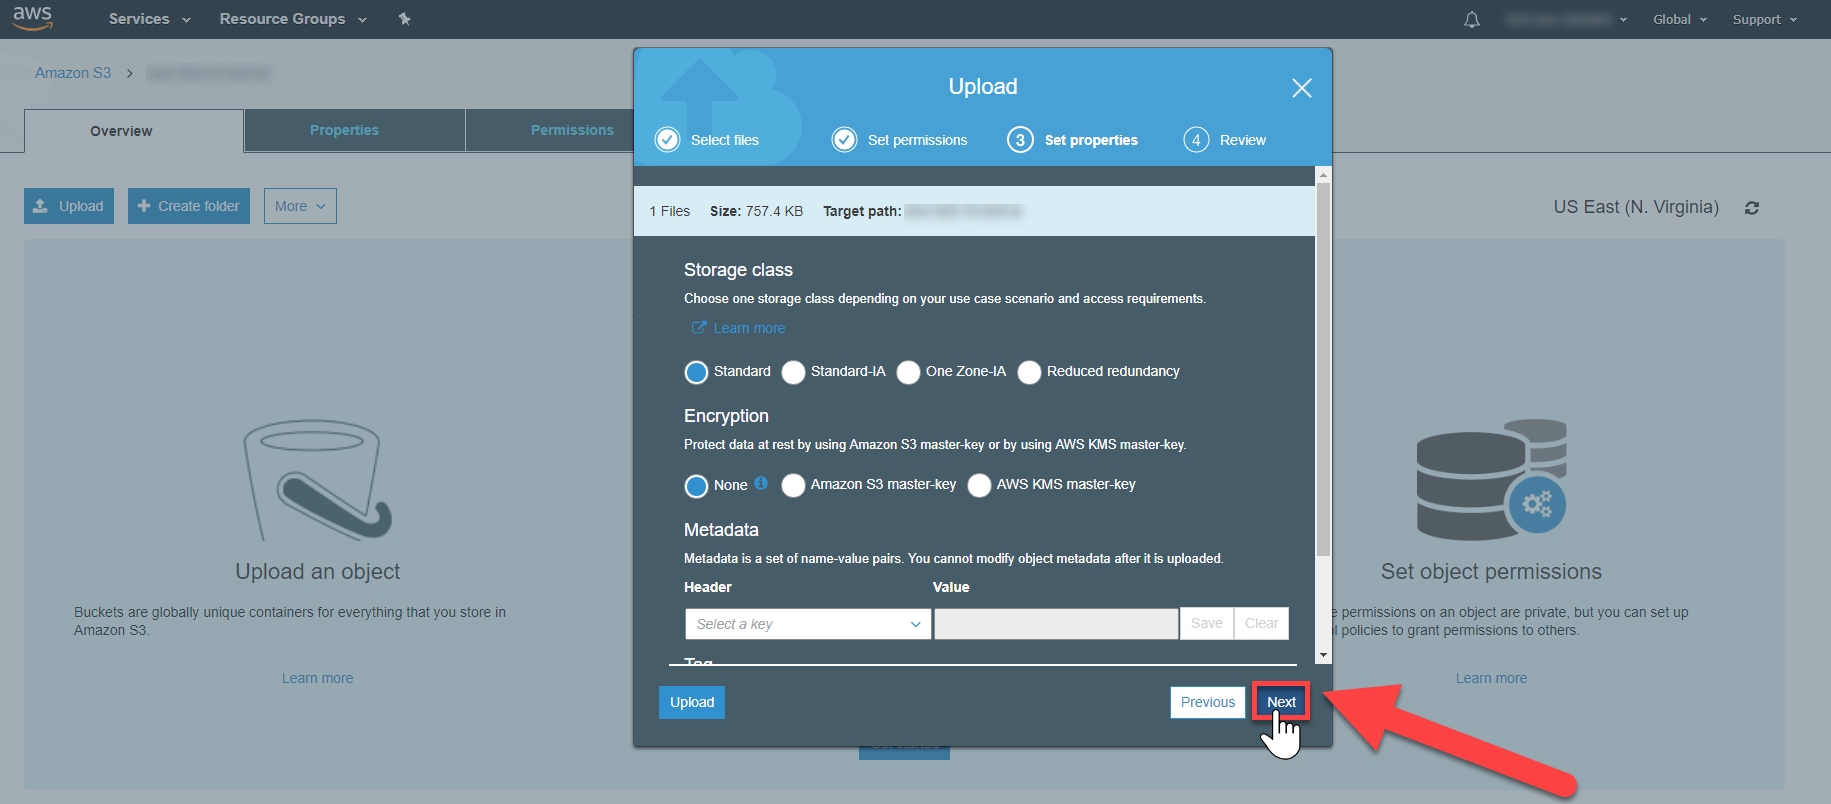
Figure 1.14: Setting properties
Click on the Upload button to upload the files:

Figure 1.15: Uploading the files
You will be directed to your object in your bucket's home screen:

Figure 1.16: Files uploaded to the Bucket
Export File:
Select the checkbox next to the file to export (Red Marker #1 – see the following screenshot). This populates the file's information display screen. Click on Download (Red Marker #2 – see the following screenshot) to retrieve the text file:

Figure 1.17: Exporting the file
The file will download, as shown in the lower left-hand corner of the screen:

Figure 1.18: Downloading the file to export