

Creating a presentation
At a conference or a seminar, speakers often use a projector or screen to present written information in addition to the talk. Such a presentation document requires a specific kind of layout and features.
In our recipe, we will use the beamer class, which has been designed specifically for this purpose and provides the following features:
- A typical landscape slide format, here 128 mm x 96 mm
- Structured frames with dynamic information, such as sectioning
- Support for overlays and transition effects
- Pre-designed themes for easily changing the look
- An intelligent interface for customizing
How to do it...
We will start with a sample presentation document, which we can extend. Follow the next steps:
- Start with the beamer document class:
\documentclass{beamer} - Choose a theme. Here, we take the theme called Warsaw:
\usetheme{Warsaw} - Begin the document:
\begin{document} - Provide a title, a subtitle, the author’s name, the institute, and a date:
\title{Talk on the Subject} \subtitle{What this is about} \author{Author Name} \institute{University of X} \date{June 24, 2015} - Make a slide using the frame environment. The first one will contain the title page:
\begin{frame} \titlepage \end{frame} - Make a frame for the table of contents titled Outline. Add the pausesections option so that the table of contents will be shown stepwise, section by section:
\begin{frame}{Outline} \tableofcontents[pausesections] \end{frame} - Start a section and a subsection within:
\section{Introduction} \subsection{A subsection} - All visible content goes into a frame environment. So also do lists, which are visually better than normal text in a presentation:
\begin{frame}{Very Informative Title} \begin{itemize} \item First thing to say. \item There is more. \item Another short point. \end{itemize} \end{frame} - This frame will show an emphasized block with a title:
\begin{frame}{Another Title With Uppercased Words} Text \begin{alertblock}{A highlighted block} Some important information put into a block. \end{alertblock} \end{frame} - We add another subsection, with a frame with another titled block, and another section with a slide containing a list. We highlight some words using the \alert command. Finally, end the document:
\subsection{Another subsection} \begin{frame}{Informative Title} \begin{exampleblock}{An example} An example within a block. \end{exampleblock} Explanation follows. \end{frame} \section{Summary} \begin{frame}{Summary} \begin{itemize} \item Our \alert{main point} \item The \alert{second main point} \end{itemize} \vfill \begin{block}{Outlook} Further ideas here. \end{block} \end{frame} \end{document} - Compile and have a look at the produced slides:
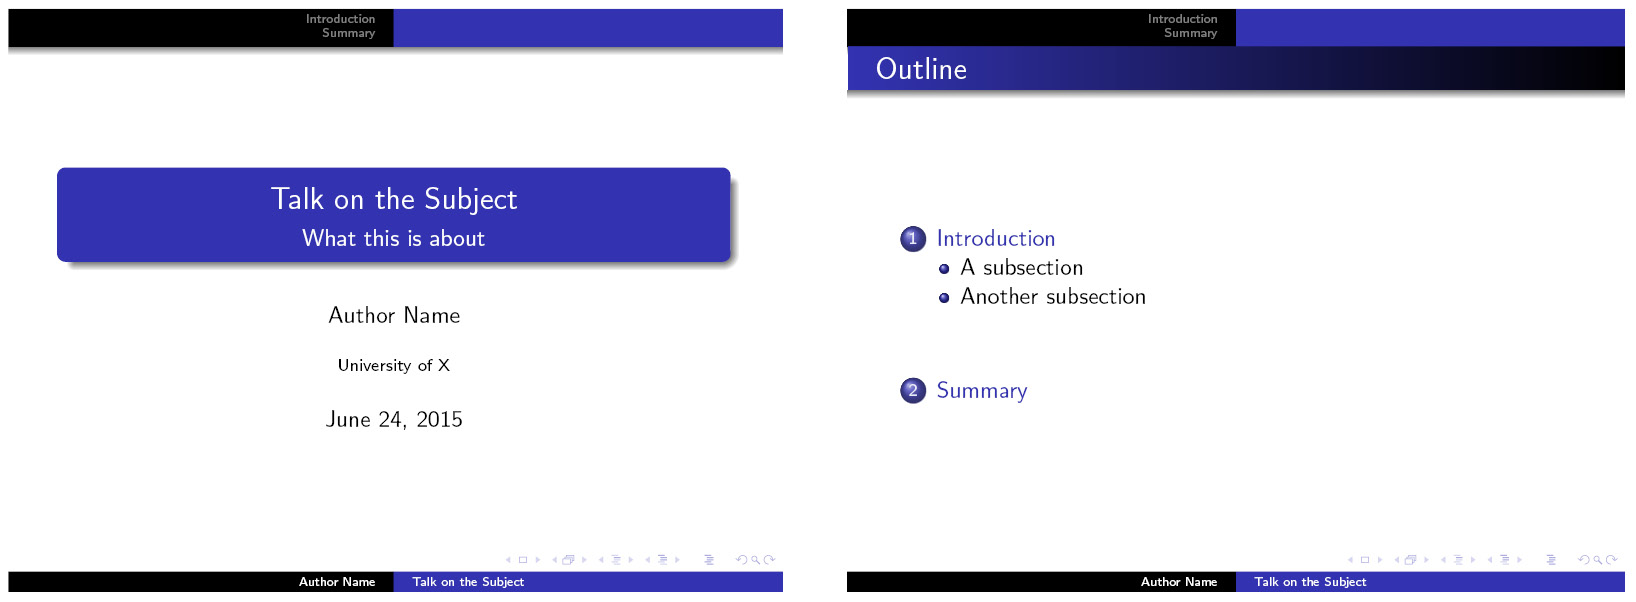
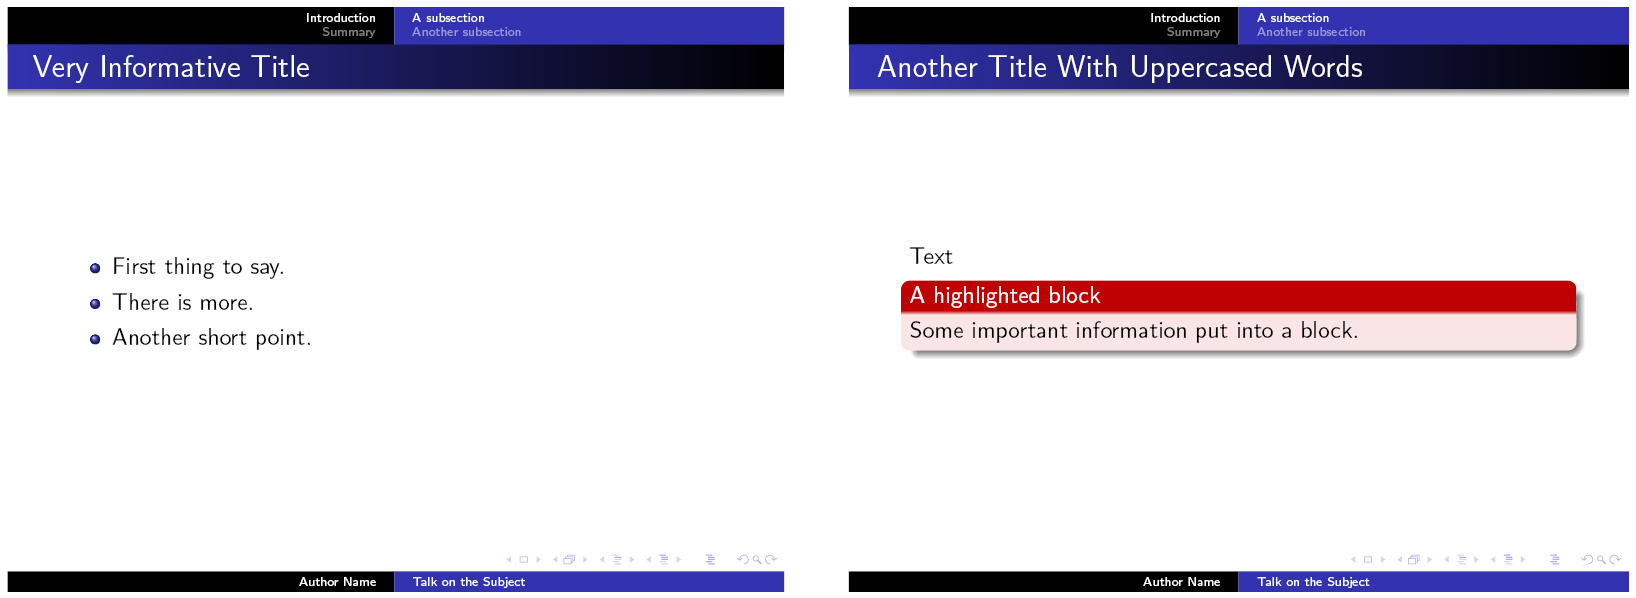
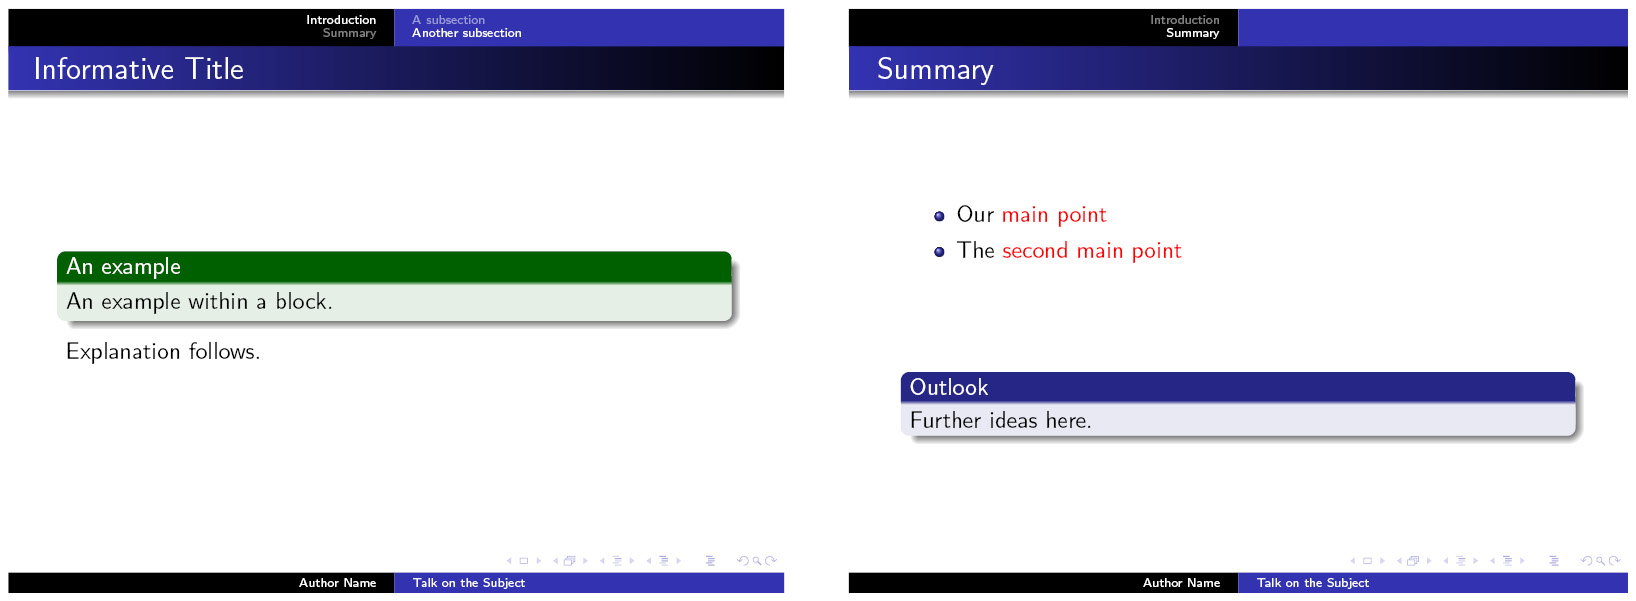
Figure 1.4 – Presentation slides
Now, you can adjust the title, author, and date and edit the text in the frames. Then, you can add your own frames with titles and text.
How it works...
We loaded the beamer class and chose the theme with the name Warsaw. You could easily replace it with another theme’s name, compile, and cycle through the themes until you find the best for your occasion. Pre-installed themes are as follows:
- AnnArbor
- Antibes
- Bergen
- Berkeley
- Berlin
- Boadilla
- boxes
- CambridgeUS
- Copenhagen
- Darmstadt
- default
- Dresden
- EastLansing
- Frankfurt
- Goettingen
- Hannover
- Ilmenau
- JuanLesPins
- Luebeck
- Madrid
- Malmoe
- Marburg
- Montpellier
- PaloAlto
- Pittsburgh
- Rochester
- Singapore
- Szeged
- Warsaw
We specified the title, subtitle, author, and talk date, which is then printed by \titlepage. We used a frame environment, which we will do for each slide.
The next frame contains the table of contents. We provided an Outline frame title as an argument to the frame in curly braces. For the \tableofcontents command, we added the pausesections option. By doing this, section titles are printed individually with a pause in between. This allows us to explain what the auditory will hear before they read further.
As in a standard LaTeX document, we used the \section and \subsection commands. The heading is not directly printed. The sections and subsections are printed in the frame margin with the current position highlighted.
We used an itemize environment as in a standard LaTeX document to get a bulleted list. The enumerate environment for numbered lists and description environment for descriptive lists also work in beamer frames.
To highlight information, we used so-called block environments. Besides the standard block environment, we can use exampleblock and alertblock to get a different style or color. The chosen theme determines the appearance of those blocks.
A more subtle kind of emphasizing is achieved using the \alert command, as seen in the last frame.
Now, you have a template and tools to build up your presentation.
Here are some more quick tips:
- Keep time constraints in mind; a frame per minute is a good rule of thumb
- Use a few sections, logically split into subsections; it’s better to avoid sub-subsections
- Use self-explaining titles for sectioning and frames
- Bulleted lists help to keep things simple
- Consider avoiding numbering things; one rarely cares about a reference to theorem 2.6 during a talk
- Don’t disrupt the reading flow by footnotes
- Graphics, such as diagrams, help the auditory in visualizing
Note
Slides should support your talk, not the other way around. Did you already bear up with a presentation where the speaker just read out aloud text from the slides and used fancy transition effects? You can do it better by focusing on well-crafted content.
There’s more...
The beamer class has unique capabilities and extraordinary design. We will explore it further.
Using short titles and names
Besides the title page, the title of the presentation and the author’s name are additionally printed at the bottom of each frame. The exact position depends upon the chosen theme.
However, the space might need to be increased for long titles or names. You can give short versions used at such places, such as by specifying the following text:
\title[Short title]{Long Informative Title}\author[Shortened name]{Author's Complete Name}\date[2024/01/24]{Conference on X at Y, January 24, 2024}
The same is possible for the \institute and \subtitle commands if used.
In the same way, you can provide short names for sections and subsections so that they better fit into their field within the frame margin. Just use the optional argument in square brackets. The \part and \subsubsection commands work similarly if needed.
Uncovering information piecewise
Showing a complete slide at once may be distracting. People may read ahead instead of listening to you. You can take them by the hand by showing the content step by step.
The simplest way is by inserting a \pause command. It can go between anything, such as text, graphics, and blocks. It also works between two \item commands in a bulleted list, though consider not to pause between items but between whole lists. Use it as in the following line of code:
Text\pause more text\pause\includegraphics{filename}
Such a frame is then layered – that is, divided into overlays. They are internally numbered. If you would like to show something at a certain overlay, you can tell the beamer class when to uncover it:
\uncover<3->{Surprise!}
This shows your text on slide 3 of the current frame, and it will stay on the following slides on that frame. Omit the dash for restricting it only to slide 3. You could also list slides (for example, <3,5>), give ranges such as <3-5>, and mix slides (<3,5->).
That syntax works with overlay specification-aware commands. Among them, there are \item, \includegraphics, and even \renewcommand, so you can use them with an overlay specification such as the following:
\includegraphics<3->{filename}
It should not be too fancy. A presentation still needs a linear structure. Complicated overlays may be handy for showing and hiding annotation to an object while you explain that.
Refer to the beamer manual for further information about using overlays.
Splitting frames into columns
You can arrange text and images in multiple columns on a frame. It’s convenient for images with explaining text. Let’s take a look at a sample:
\begin{frame} Some text which can use whole frame width \begin{columns}[t] \begin{column}{0.45\textwidth} Sample text in\\ two lines \end{column} \begin{column}[T]{0.45\textwidth} \includegraphics[width=3cm]{filename} \end{column} \end{columns}\end{frame}
We started the multi-column area using the columns environment. You can specify t, b, or c alignment options for the column’s top, bottom, or centered alignment. Centered is the default. While t aligns at the baseline of the first line, as usual in LaTeX, there’s a handy additional option, T, which aligns at the very top.
Each column has been made with the column environment. The column width has been given as an argument. It understands the same positioning options, so you can override what you set in the surrounding columns environment. We added [T] here because an image has its baseline at its bottom, and we wanted to change it to the very top.
Showing an outline for each section
You can tell the beamer class to give an outline at the beginning of each section by specifying the following code:
\AtBeginSection{ \begin{frame}{Outline} \tableofcontents[currentsection] \end{frame}}
You can also use the \AtBeginSection command for inserting different code. If something should happen for a starred \section* command too, you can insert the corresponding code within an optional argument in square brackets.
Removing navigation symbols
By default, every slide shows small navigation symbols; here, at the bottom of a frame. If you don’t need them, you can save that space and reduce distraction by specifying the following line of code:
\setbeamertemplate{navigation symbols}{}
Changing the font
The default font set with the beamer class is Computer Modern. You can change it to other fonts, as explained in the Writing a short text recipe.
The default shape is sans-serif. Even the math formulas are sans-serif. It can be more readable with a low projector resolution or at some distance than with a serif font.
However, if you would like to change to a serif font, you can load the corresponding font theme in the preamble:
\usefonttheme{serif}
Another available font theme is professionalfonts, which doesn’t change fonts but simply uses the set you bought. Furthermore, there are structurebold, structureitalicserif, and structuresmallcapsserif, which change the font in the structure – that is, in headlines, footlines, and sidebars – to such a shape combination.
Changing the color
The quickest way to change colors is by loading a theme with a thoughtful selection of colors for the various structural elements. Use a single command, such as the following:
\usecolortheme{dolphin}
Outer color themes provide a color set for the headline, footline, and sidebar. The author then gave sea-animal names: dolphin, whale, and seahorse. Then, there are inner color themes for elements such as color blocks with names of flowers: lily, orchid, and rose. Combine inner and outer color themes as you like.
Finally, there are complete themes covering all structure aspects: albatross, beaver, beetle, crane, dove, fly, monarca, seagull, spruce, and wolverine. They are named after flying animals, except beaver and spruce as external additions.
That’s a lot of names; just cycle through them using the \usecolortheme command to find the color set you like most.
Loading a theme from the internet
With some labor, you can create your very own theme. The extensive beamer manual will guide you. However, you may save much time: beamer is very popular among academic users who already use LaTeX for their papers. So, you can find many themes prepared for universities and institutes but also designed by various beamer users.
You can find an overview at https://latex-beamer.net.
Explore the gallery there, download a theme you like, add your logo, and tweak it. Instructions are on that website.
Providing a handout
You can give your auditory a printed version of slides. Just create a version of your document with the handout option so that no overlays will be used:
\documentclass[handout]{beamer}
Slides are commonly small, so it’s good to print several slides on a single page:
\usepackage{pgfpages}\pgfpagesuselayout{4 on 1}[a4paper, border shrink=5mm, landscape]
This prints four slides on one A4 page in landscape. You can get bigger prints, two slides on each page, in portrait mode by specifying the following line of code:
\pgfpagesuselayout{2 on 1}[a4paper,border shrink=5mm]
We used the pgfpages package, a utility package coming with the pgf package.
See also
For best quality with included graphics, refer to Chapter 5, Working with Images. In Chapter 6, Creating Graphics, you can find recipes for quickly creating diagrams and charts, which are excellent tools for visualizing data in a presentation.
Beyond common academic documents such as a thesis, papers, books, and slides, you may need to present yourself in the working world. The following recipe will prepare you for applying for a job with style.