

Designing a CV
Tabular layouts are prevalent today for a CV. When applying for a job, inform yourself about typical requirements for the content of a CV. You can then create a simple document with tables that are consistent and readable.
You can use a template if it needs to be quick or you would like to base it upon a proven modern layout. We will use the moderncv class and its template in this recipe to quickly produce a CV.
Getting ready
If it’s not already installed on your computer, download and install the moderncv class from CTAN at https://ctan.org/pkg/moderncv. The easiest is to download it as a .zip file from https://mirrors.ctan.org/macros/latex/contrib/moderncv.zip.
If your TeX installation provides a package manager, use it for the installation.
There’s a directory of examples containing templates that you can use. Either locate it in the documentation branch of your TeX directory tree or visit the preceding CTAN link: https://ctan.org/tex-archive/macros/latex/contrib/moderncv.
How to do it...
We will start using a sample file provided by the moderncv bundle. Follow these steps:
- Copy the template.tex file into your document directory, rename it, and choose your own name, such as MyCV.tex.
- Open that document, MyCV.tex, and look around to understand the template. Luckily, it is full of comments on how to use it. Compile it to ensure that this document works.
- Review and edit the class and package options in MyThesis.tex.
- Remove the filler text and type in your own data. At the beginning, your document may look like this:
\documentclass[11pt,a4paper,sans]{moderncv} \moderncvstyle{classic} \moderncvcolor{blue} \usepackage[scale=0.75]{geometry} \name{John}{Doe} \title{CV title} \address{street and number}{postcode city}{country} \phone[mobile]{+1~(234)~567~890} \phone[fixed]{+2~(345)~678~901} \email{[email protected]} \homepage{www.johndoe.com} \photo[64pt][0.4pt]{picture.jpg} \begin{document} \makecvtitle \section{Education} \cventry{year--year}{Degree}{Institution}{City}% {\textit{Grade}}{Description} \cventry{year--year}{Degree}{Institution}{City}% {\textit{Grade}}{Description} \section{Experience} \subsection{Vocational} \cventry{year--year}{Job title}{Employer}{City}{}% {General description\newline{}% Detailed achievements:% \begin{itemize}% \item Achievement 1; \item Achievement 2, with sub-achievements: \begin{itemize}% \item Sub-achievement (a) \item Sub-achievement (b) \end{itemize} \item Achievement 3. \end{itemize}} \cventry{year--year}{Job title}{Employer}{City}{} {Description line 1\newline{}Description line 2} \subsection{Miscellaneous} \cventry{year--year}{Job title}% {Employer}{City}{}{Description} \section{Languages} \cvitemwithcomment{Language 1}{Skill level}{Comment} \cvitemwithcomment{Language 2}{Skill level}{Comment} \end{document} - Compile and have a look at the following result:
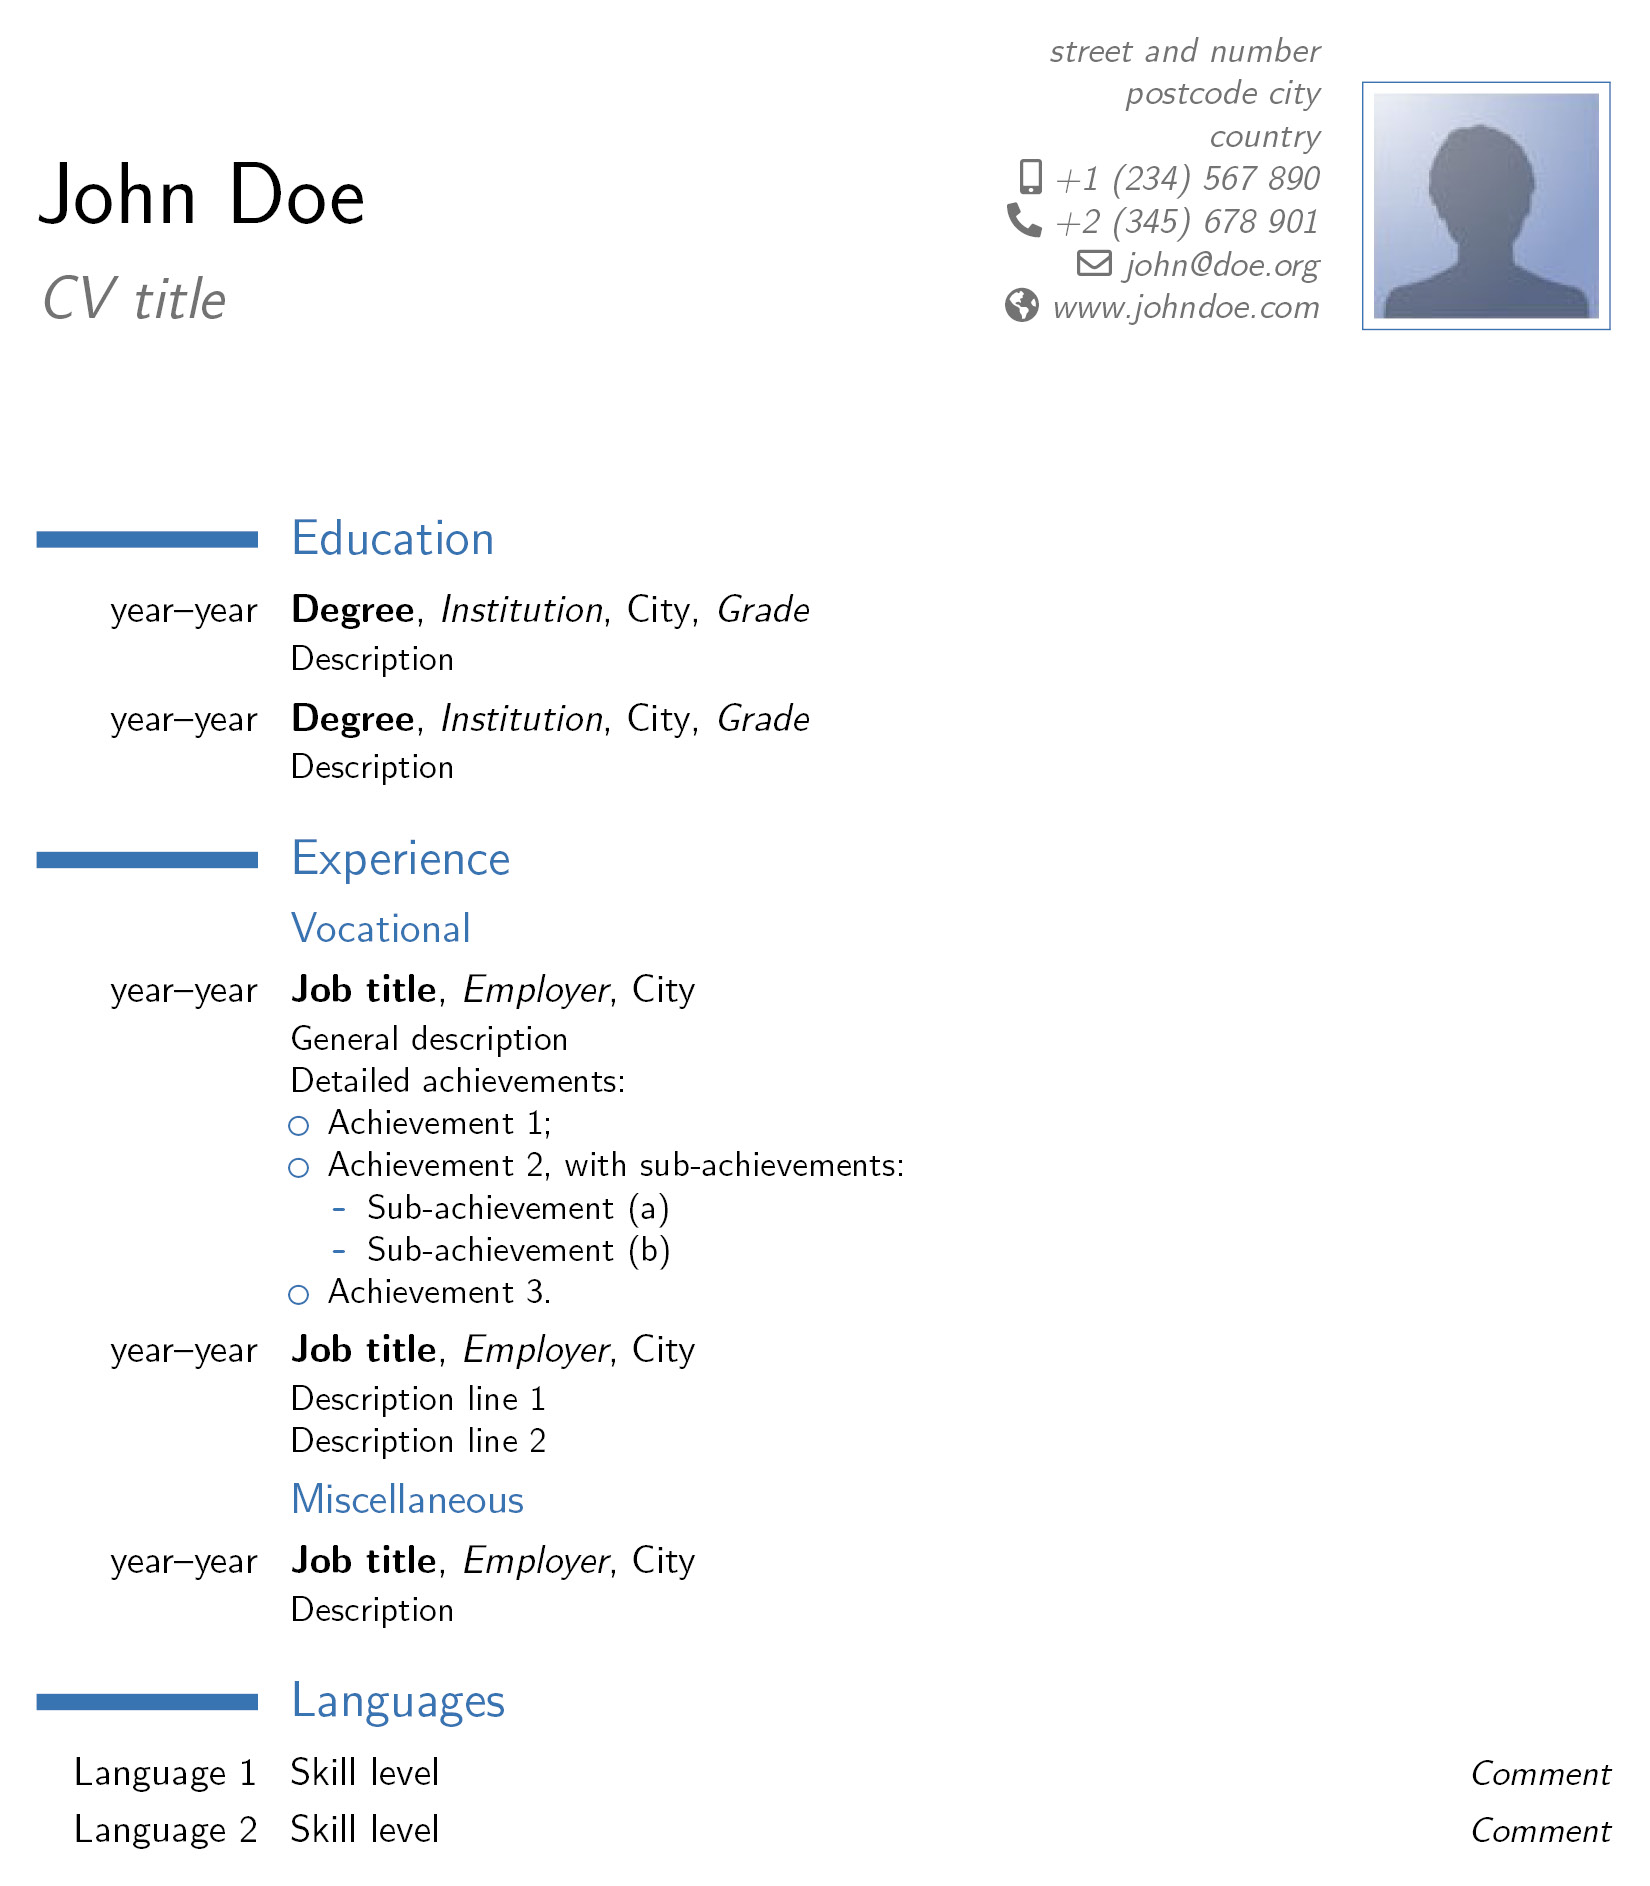
Figure 1.5 – A CV
How it works...
We loaded the moderncv package. We used an 11 pt base font size; 10 pt and 12 pt are also supported. We selected A4 paper; further paper size options are a5paper, b5paper, letterpaper, legalpaper, and executivepaper. You can also add landscape as an option. We chose a sans-serif font, which is fine for such a kind of list; alternatively, you could write roman for a serif font.
We selected the classic style. Other available styles are casual, oldstyle, and banking.
Our color style is blue. Other color options are orange, green, red, purple, gray, and black.
We loaded the geometry package with a scaling factor for reducing the margins.
Using commands such as \name and \address, we entered our personal data.
The \photo command includes our photo; the size options are the height to which it is scaled and the thickness of the frame around the photo. In this recipe, we used the picture.jpg dummy photo contained in the moderncv bundle.
The document body is divided into sections and subsections with a unique design.
Then, the \cventry command makes a typical resume entry for a job or education. Use it as follows:
\cventry[spacing]{years}{job title} {employer}{localization}{detail}{job description}
You can alternatively use this:
\cventry[spacing]{years}{degree} {institution}{localization}{grade}{comment}
You can leave the last four arguments empty if you don’t need them.
A simpler line is done using the \cvitem command as follows:
\cvitem[optional spacing length{header}{text}
The \cvitemwithcomment command works similarly, just with another argument printed at the right.
Some more commands and options are explained in the well-documented template.tex file and the moderncv.cls class file itself if you look for deeper information beyond this quick start guide.