

Building a large poster
We know, for example, informational or scientific posters seen at conferences or on walls in universities or institutes.
They mostly have specific characteristics in common:
- They are large, such as A2, A1, or even A0
- People may look at them from far away but also very close
In consequence, we have some requirements for typesetting:
- Page layout dimensions should work with such an enormous size.
- We need a wide range of font sizes. We should be able to read while standing close, but we also need large, catchy headings.
- The poster should be partitioned into digestible blocks. Specifically, each block should be at most the usual line width we know from body texts. Too wide lines would make it hard to focus and skip back to the start of the following line. So, block lines should not be much wider than 40 or 50 characters long.
- Blocks should have distinct headings.
- Graphic elements such as colors and lines can divide the text into parts.
- Images should be vector graphics or should have a high resolution.
In this recipe, we would like to create a poster of A0 size in landscape orientation. It will show some blocks containing dummy text as a placeholder, math, and images. As sample images, we will take a flowchart from Chapter 6, Creating Graphics, and a plot from Chapter 10, Writing Advanced Mathematics. There, you can find the source code. You can later replace the dummy text and other parts with your own content.
How to do it...
We will use the tikzposter class. The document is structured in columns and blocks. Follow these steps:
- Begin with the document class. A0 is the default paper size. We state landscape orientation as an option:
\documentclass[landscape]{tikzposter} - Choose a theme that provides a set of colors and decorations. We chose the blue Wave theme:
\usetheme{Wave} - Load the lipsum package to generate dummy text:
\usepackage{lipsum} - For dividing wider blocks into text columns, we load the multicol package. Because of the large paper, we set the column separation and the separation line width to high values:
\usepackage{multicol} \setlength{\columnsep}{4cm} \setlength{\columnseprule}{1mm} - Start the document:
\begin{document} - Declare the author and title, and print it out:
\title{\LaTeX\ in Use} \author{John Doe} \maketitle - Begin a set of columns:
\begin{columns} - Start a column with a width of 65% of the available text width:
\column{.65} - Define a block with the title Workflow in the first argument; the second argument contains dummy text and an image with a caption:
  \block{Workflow}{
    \lipsum[1]
    \begin{tikzfigure}[\LaTeX\ workflow]
      \includegraphics[width=\linewidth]{flowchart}
     \end{tikzfigure}
  }
The tikzposter package provides the tikzfigure environment as a replacement for the figure environment. The optional argument will be the caption of the figure.
- We are still in the first column and start a set of subcolumns:
\begin{subcolumns} - The first subcolumn will take half of the available width – in this case, the width of the left column:
\subcolumn{.5} - Create a block with a bulleted list and a mathematical equation to see how it looks on a poster. We will also use a colored box and an inner block with a title for the equation:
\block{Mathematics}{ Take a coffee, then: \bigskip \coloredbox{\begin{itemize} \item State \item Proof \item Write in \LaTeX \end{itemize}} \bigskip \innerblock{Integral approximation}{ \[ \int_a^b f(x) dx \approx (b-a) \sum_{i=0}^n w_i f(x_i) \] } } - Add a note that will have a callout shape, pointing into the formula:
\note[targetoffsetx = 4.5cm, targetoffsety = -5cm, angle = -30, connection]{Weight function} - Make another subcolumn, talking the other half of the available width. Insert a block filled with text, and then end the subcolumns environment:
\subcolumn{.5} \block{Text}{\lipsum[1]} \end{subcolumns} - Now that we are back in our primary column environment, make another column, print a block with an image and some text, and then end the columns environment:
\column{.35} \block{Plotting functions}{ \includegraphics[width=\linewidth]{plot} \lipsum[4] } \end{columns} - As we ended the columns, a block would use the whole available width. To keep text readable, we will now use the multicol package. We divide the text itself into columns using a multicolumn environment with four columns:
\block{Conclusion and outlook}{ \begin{multicols}{4} \lipsum[10-11] \end{multicols} } - End the document:
\end{document} - Compile, and take a look:
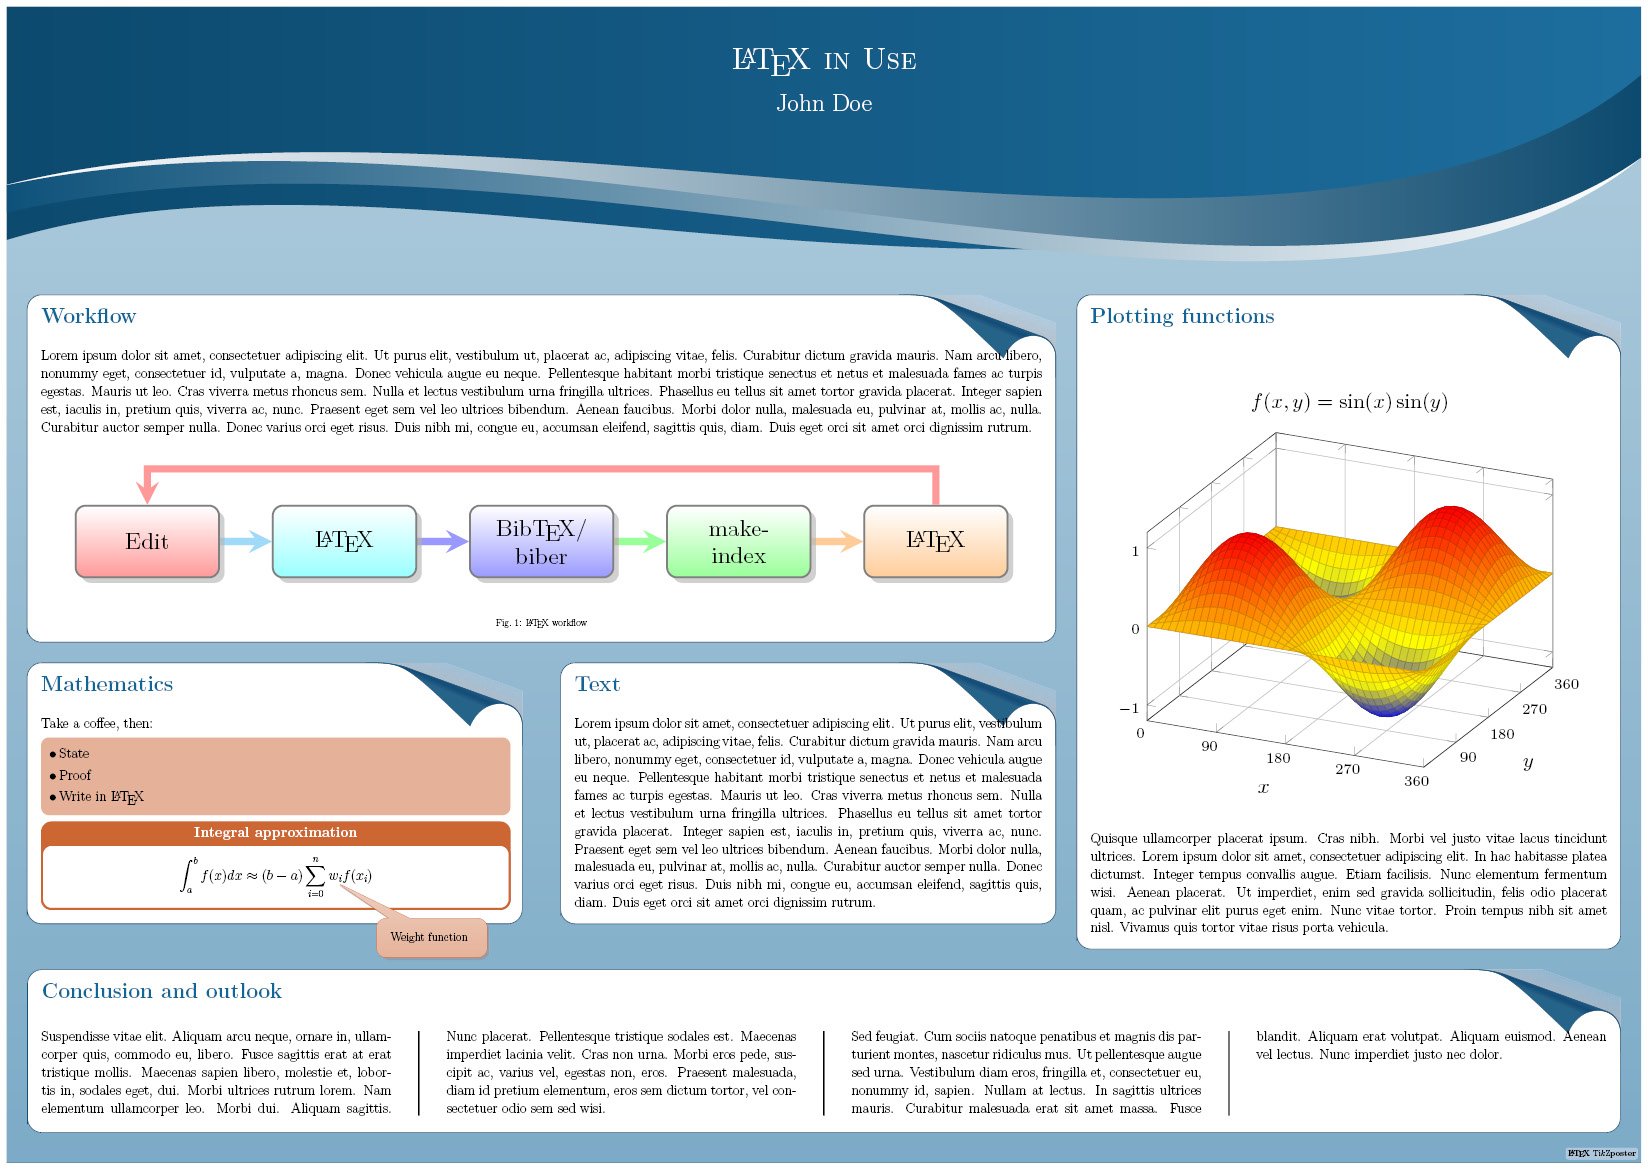
Figure 1.8 – A colorful poster with a block layout
How it works...
The tikzposter class supports huge paper sizes and large fonts and handles block heights and spacing between columns. We, as the users, just decided about the relative column width.
Several class options are provided. You can add them to the \documentclass command as we did with the preceding landscape option:
- The paper size can be chosen by a0paper, a1paper, or a2paper. a0paper is the default.
- Available font sizes are 12pt, 14pt, 17pt, 20pt, and 25pt. The last one is the default.
- With either landscape or portrait, you can select the orientation. portrait is the default.
- The standard fleqn option for flush-left equations is supported.
- The standard leqno option for equation numbering at the left side is also supported.
You can adjust several lengths. Give them as class options in the key=value form with a measurement unit such as mm or cm:
- margin: The distance between the edge of the poster area and the edge of the paper
- innermargin: The distance from the outermost edge of the blocks to the edge of the poster
- colspace: The horizontal distance between consecutive columns
- subcolspace: The horizontal distance between consecutive columns in a subcolumn environment
- blockverticalspace: The distance between the bottom of a block and the top of the next block below
A sample call using the exact defaults would be:
\documentclass[a0paper, portrait, 25pt, margin=0mm, innermargin=15mm, colspace=15mm, subcolspace=8mm, blockverticalspace=15mm]{tikzposter}
The package makes use of the very capable graphics language, TikZ. We will see more of TikZ in Chapter 6, Creating Graphics. For now, the main benefit is that tikzposter provides a lot of predefined styles and color schemes.
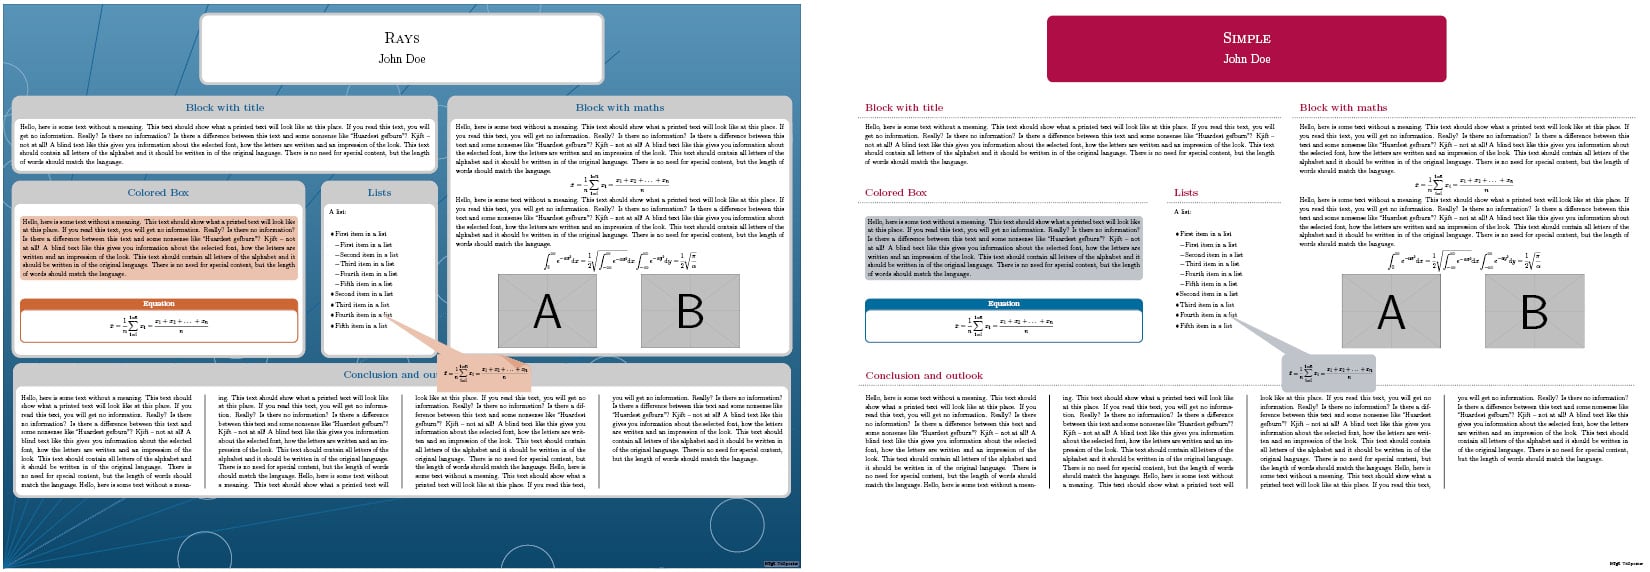
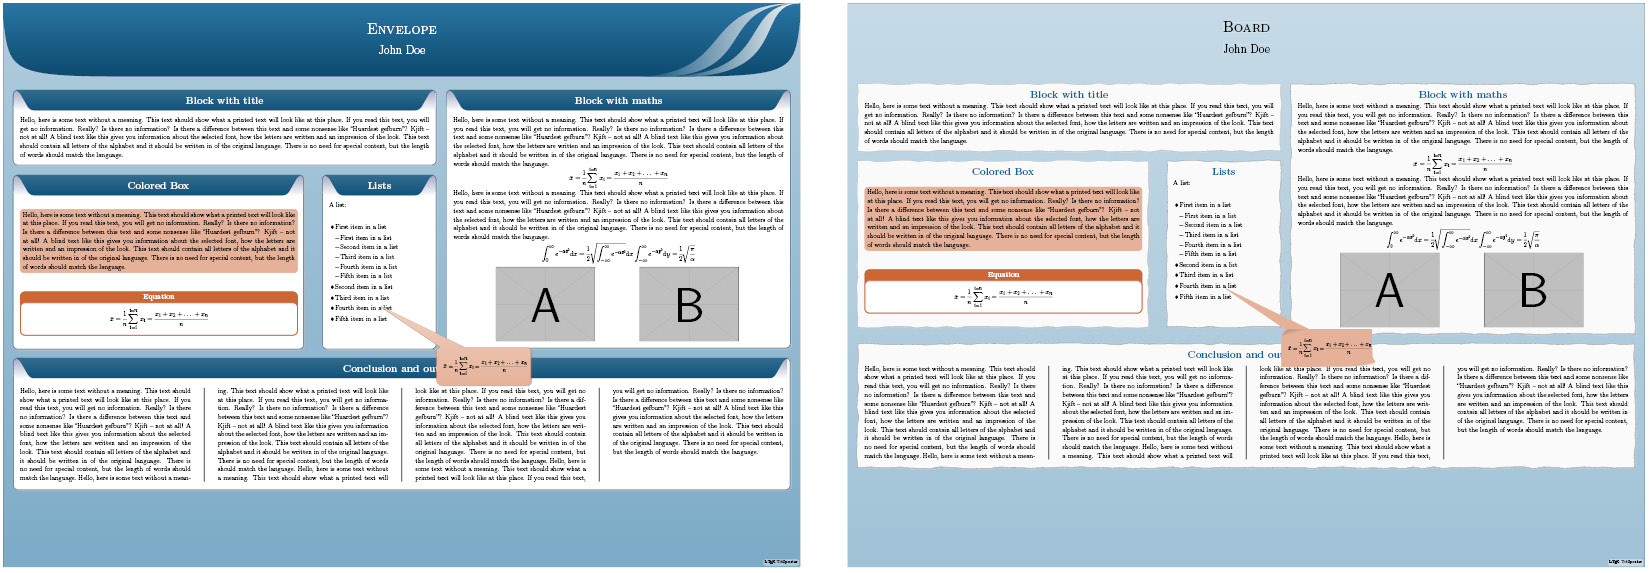
You can use a main layout style with \usetheme{name}. At the time of writing, there were nine themes available:
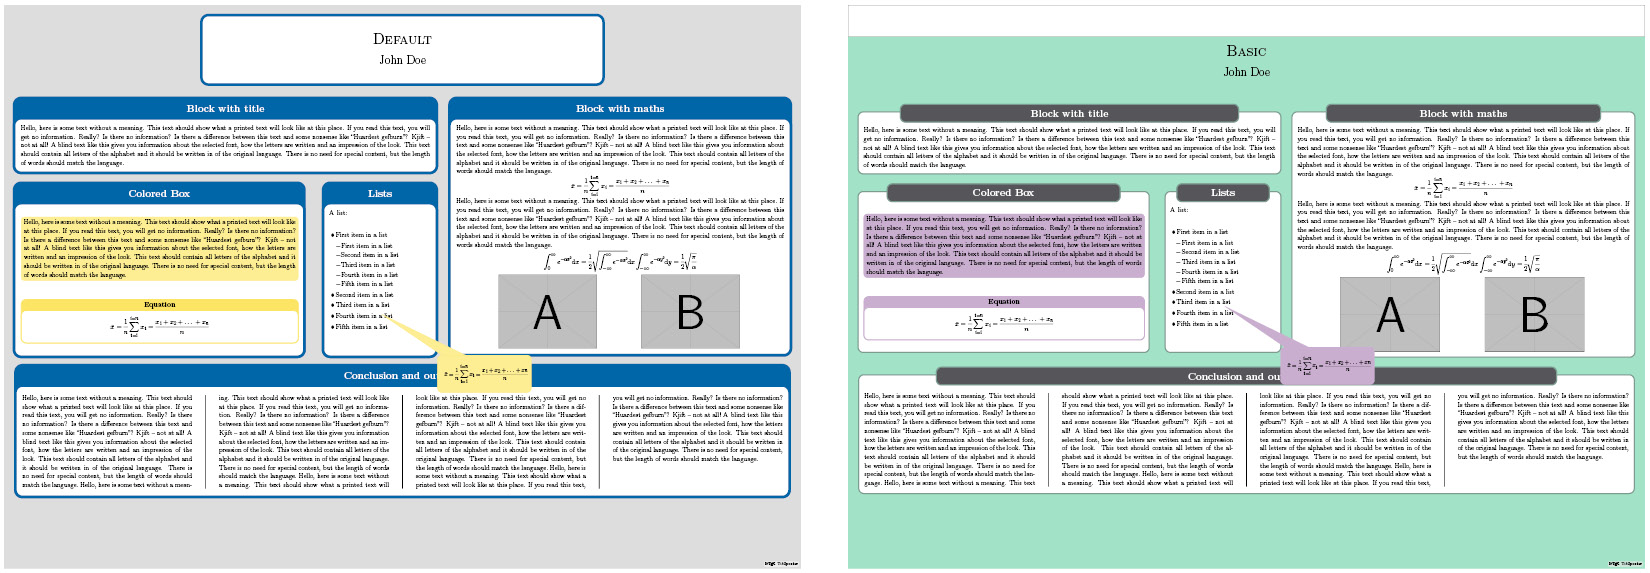
- Rays (left) and Simple (right):
- Envelope (left) and Board (right):
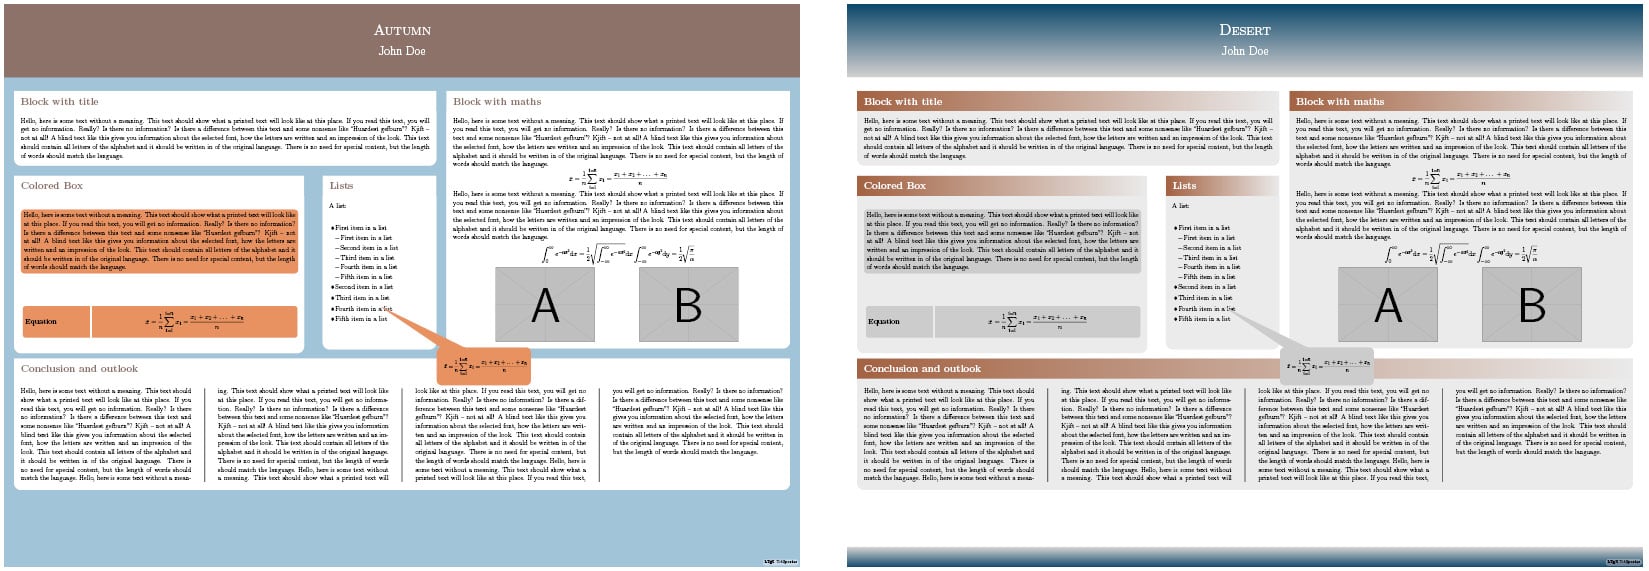
- Autumn (left) and Desert (right):
Furthermore, predefined styles for color, title, background, notes, blocks, and inner blocks can be chosen and composed. There’s support for creating further styles.
The commands you have seen previously can be used immediately without further options. However, they can be customized via several options.
A complete reference is available by executing texdoc tikzposter at Command Prompt and online at https://texdoc.org/pkg/tikzposter. You can find a style guide, a feature guide, and more at https://bitbucket.org/surmann/tikzposter/downloads.
There’s more...
One of the first poster classes is the a0poster class. It supports A0, A1, A2, and A3 paper sizes. It provides font sizes from 12 pt up to 107 pt. Math formulas are printed in a suitable size. There’s no specific support for graphics, color, or text placement. For this, you would need additional packages such as TikZ.
In a previous recipe, you already saw beamer as a presentation class. The beamerposter package can be used together with it for producing presentations in poster size. It combines the beamer class with a0poster code. So, you can produce large posters with a wide range of font sizes together with beamer’s color and graphics capabilities, such as beamer boxes with titles.
As noted before, you can use the texdoc command or the https://texdoc.org website to access the documentation of the mentioned classes and packages.