

After ensuring that we have the desired template for the container, it is now time to create one. We can click on the Create CT button in the top-right corner of the Proxmox GUI to open the container creation dialog box, as shown in the following screenshot:
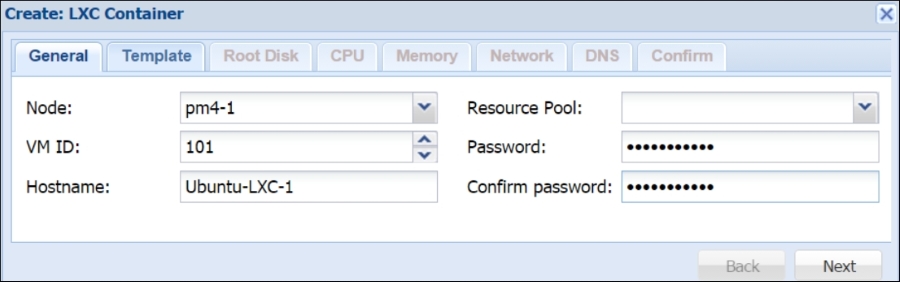
The general tab of the dialog box is used to assign identification information, as outlined below.
This is a drop-down list used to select in which Proxmox node the container is going to be created. In our example, we will create the container in node pm4-1.
This is a textbox used to enter the numeric ID of the container. We can also use the up and down arrows in the box to assign the IDs. If we assign an ID, which already exists in the cluster, the box will show a red border around the textbox. For our example container, we are using ID #101.