Book Image

Implementing Azure Solutions - Second Edition

By : Florian Klaffenbach, Markus Klein, Sebastian Hoppe, Oliver Michalski, Jan-Henrik Damaschke
Book Image

Implementing Azure Solutions - Second Edition

By: Florian Klaffenbach, Markus Klein, Sebastian Hoppe, Oliver Michalski, Jan-Henrik Damaschke

Overview of this book

<p>Microsoft Azure offers numerous solutions that can shape the future of any business. However, the major challenge that architects and administrators face lies in implementing these solutions. </p><p>Implementing Azure Solutions helps you overcome this challenge by enabling you to implement Azure Solutions effectively. The book begins by guiding you in choosing the backend structure for your solutions. You will then work with the Azure toolkit and learn how to use Azure Managed Apps to share your solutions with the Azure service catalog. The book then focuses on various implementation techniques and best practices such as implementing Azure Cloud Services by configuring, deploying, and managing cloud services. As you progress through the chapters, you’ll learn how to work with Azure-managed Kubernetes and Azure Container Services. </p><p>By the end of the book, you will be able to build robust cloud solutions on Azure.</p>
Table of Contents (14 chapters)

First approach – adding a storage account to your resource group

To add a storage account to your resource group, perform the following steps:

  1. Open your Azure portal at https://portal.azure.com.
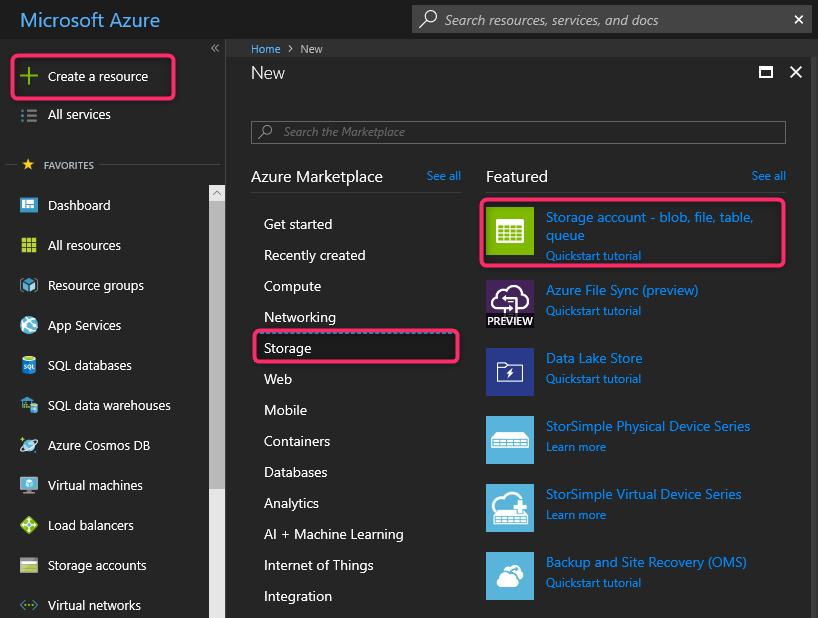
  2. In the portal, click on Create a resource | Storage | Storage account - blob, file, table, queue, as shown in the following screenshot:
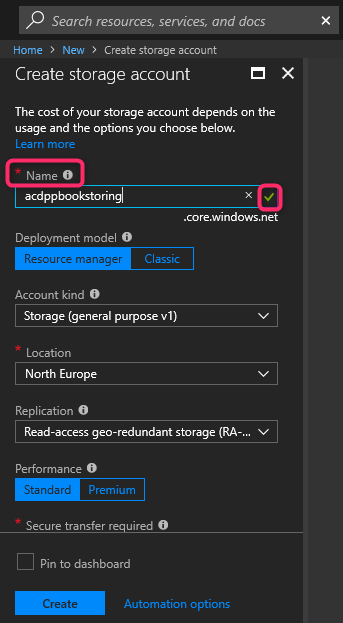
  1. On the Create storage account blade, type a unique name for the storage account you are creating in the Name textbox. If the name is unique, you will see a green tick:
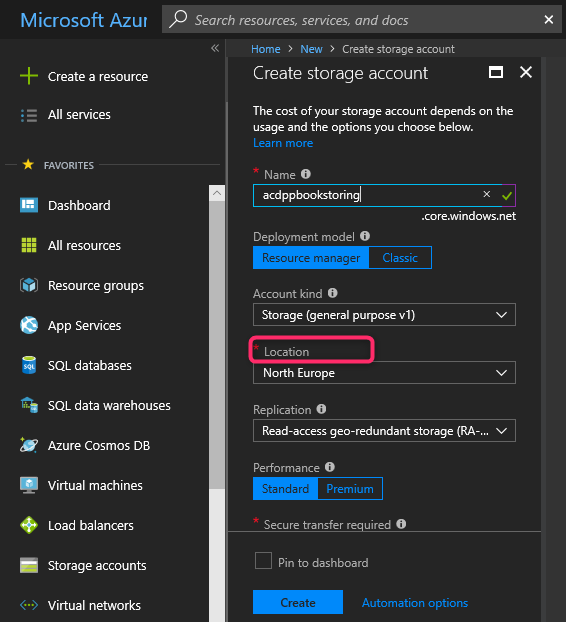
  1. In the Location list, select the same location you have been using for the resource group:
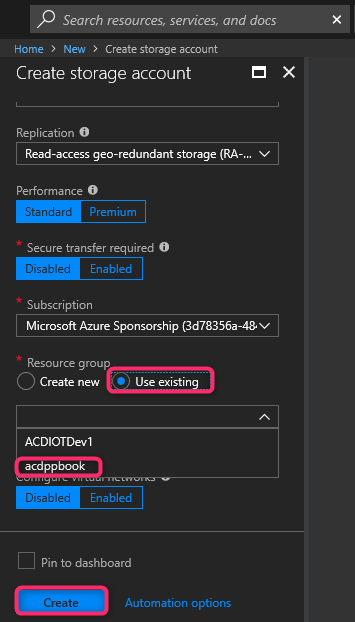
  1. In the Resource group  blade, click the Use existing checkbox, then search for and select acdppbook in the drop-down list, and then click on the Create button, as shown in the following screenshot: