With its progress, Microsoft is changing and evolving the Azure environment, and recently added a new option for VMs in Azure. The option is called managed disks. These disks are abstracted from the storage account and storage account limitations.
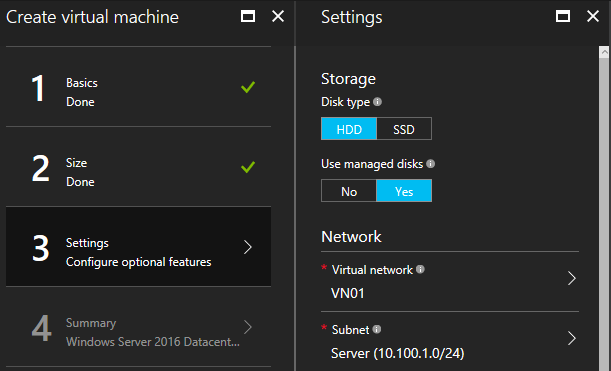
You only have to specify the type, which can be standard or premium storage, and the size of the disk you need, and Azure creates and manages the disk. To get more info about managed disks, like pricing or currently available disk type, visit following part of the documentation. https://docs.microsoft.com/en-us/azure/virtual-machines/windows/managed-disks-overview. To create a VM with managed disks, you can do so during the deployment process, which we will go through later in this chapter:
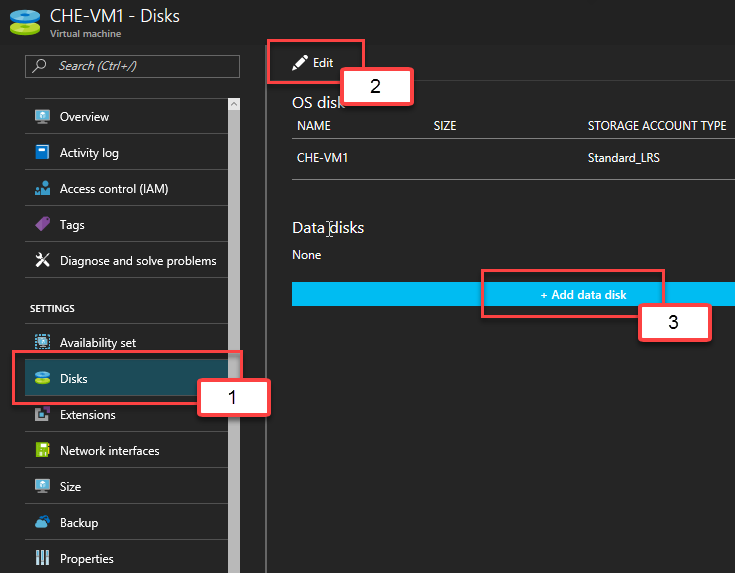
If you want to manage the disks of a VM, you now can find a configuration blade in the VM settings, where you can edit the managed disks of the VM or click on +Add data disk, as shown in the following screenshot: