

Adding keys, scaling, and exporting your model
In this section, you will add keys that let you combine individual pieces to assemble the full character. Then, you will learn how to scale and export your model so that it can be properly interpreted and processed by the printing software. Let’s get started.
Creating a key model
There are many options for the shape of the key, but a simple tapered cube is a popular choice that gets the job done well:
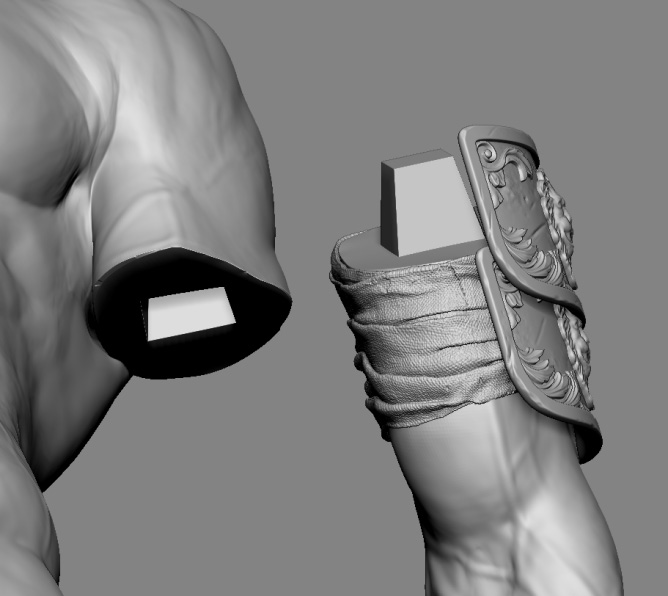
Figure 10.24 – Male key as a tapered cube (on arm) and matching female key (on torso)
To create this shape, follow these steps:
- Go to Tool | Subtool | Append and pick any shape (for example, Sphere3D).
- Navigate to Tool | Initialize. Set X Res, Y Res, and Z Res to 6, and select QCube:
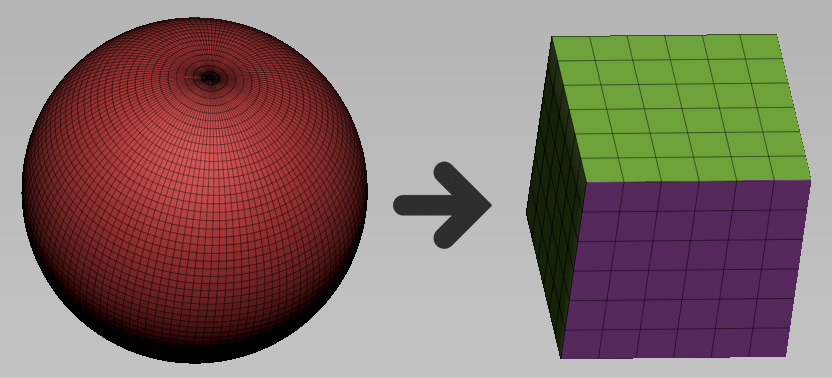
Figure 10.25 – Turning a mesh into a primitive shape with the Initialize function
- Now, open the Gizmo menu, click on the gear icon, and select Taper. Taper...