

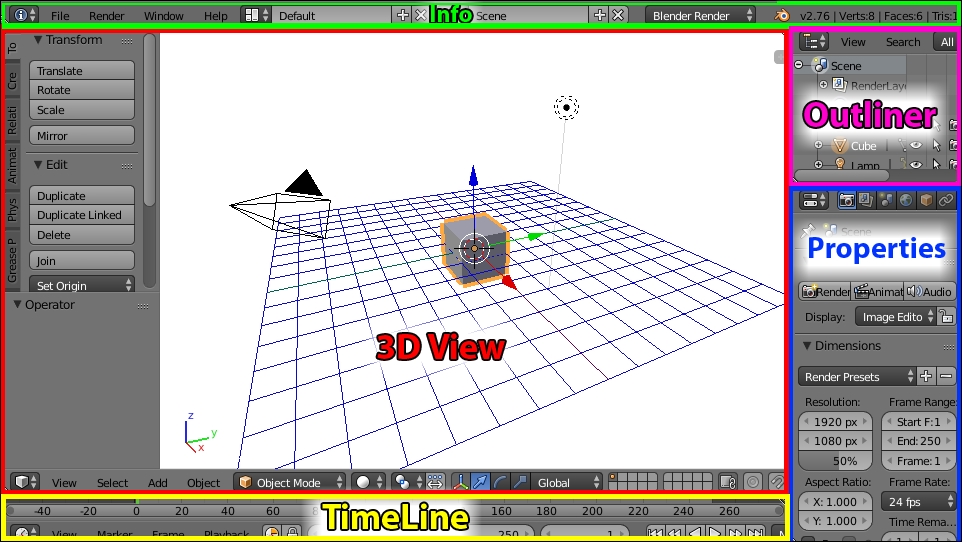
Blender's interface is made up of many smaller windows called panels. There are many different panels available in Blender. Like most things in Blender, the panels are completely configurable. Panels can be added or removed as needed, and panel layouts can be saved and switched among easily. For simplicity, the default view—the way Blender is presented the first time it loads up—will be used throughout this series. It provides most of the necessary functionality:
Note
For the most part, the screens shown in this book series will look similar to the default Blender screen. The major change will be to the background color of the 3D View, a choice made to make the illustrations more compatible with printing.
Here's an explanations of the different panels in the default view:
The Info panel: Located across the top of the window, the Info panel has many of the menu options in most programs, such as File, Window, and Help. It also has Layout settings, Scene settings, and Renderer...