

It is always a good idea to save your work frequently. To save your work in Blender, choose File | Save from the info panel or press Ctrl + S. Then, navigate to a chosen folder or directory, give the file a name, and click on the Save As Blender File button or press the Enter key.
It is recommended that each Blender project gets its own folder and that all projects be saved in a location that will be easy to find later.
It is also a good idea, while learning especially, to give each version of the file you save a slightly different name. This way, there is a history of the work done and it's easy to go back in the case of a mistake that isn't discovered immediately. This is called incremental saving and is simple to do in Blender. Simply choose File | Save As or press Ctrl + Shift + S to get to the save menu. If the project has been saved previously, it should already have a name. Next to the filename, there are plus and minus buttons:
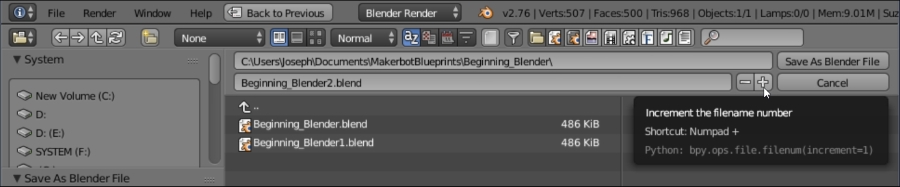
By clicking on those buttons, the filename...