Book Image

Shopify Theme Customization with Liquid

By : Ivan Djordjevic
Book Image

Shopify Theme Customization with Liquid

By: Ivan Djordjevic

Overview of this book

Shopify is one of the fastest-growing eCommerce platforms, which means developers familiar with the Liquid concept are needed now more than ever. This book will help you to build a solid foundation by enabling you to develop your skills from the ground up by gaining essential theoretical knowledge of Liquid and putting that knowledge to use through hands-on projects. 
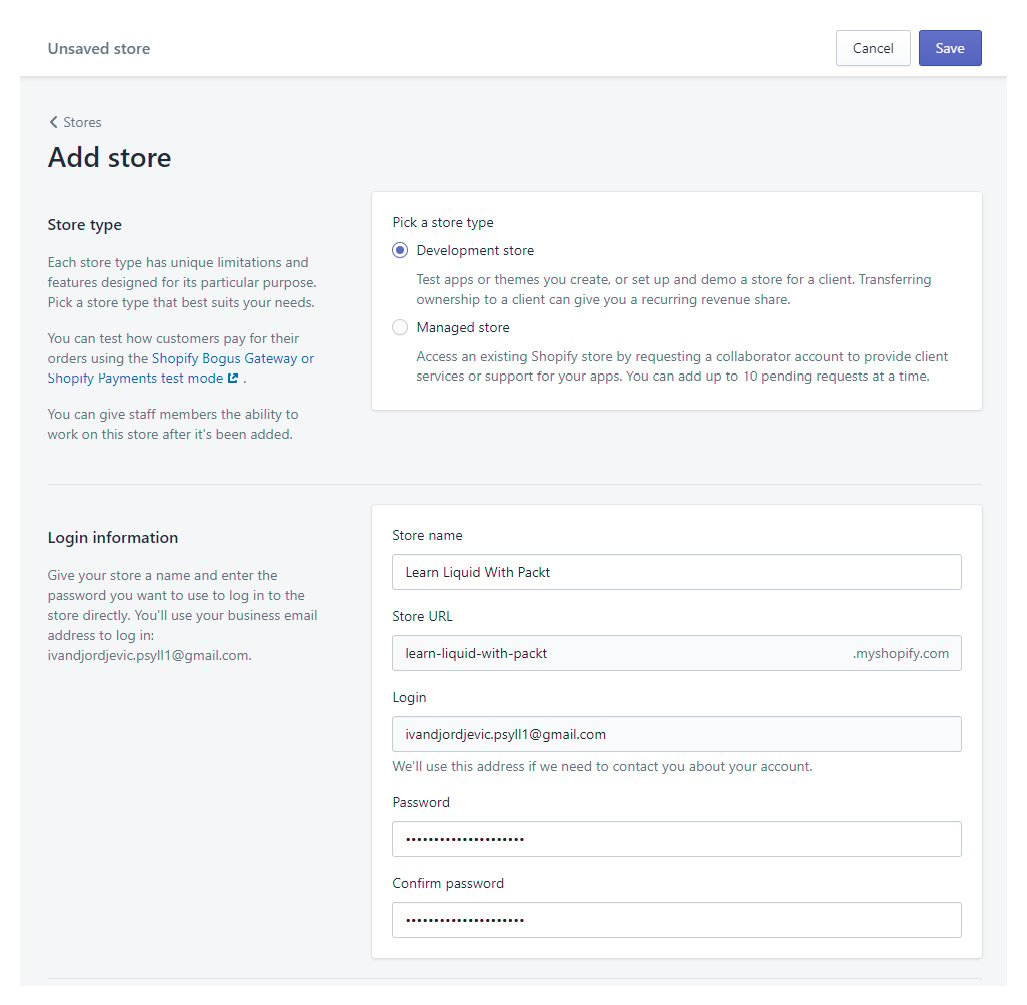
Shopify Theme Customization with Liquid begins by helping you get to grips with basic Shopify information, its interface and theme structure, setting up your Partner account, and creating a child theme, which is essential when preparing for any future work on Shopify. You'll then explore Liquid core features that will provide you with a basic understanding of the Liquid programming logic needed to develop any feature. As you advance to the latest and advanced features, you'll learn about JSON settings, allowing you to create any type of static or dynamic section - a must-have for becoming a competent Shopify developer. Finally, the book takes you through the Shopify Ajax API to gain the necessary skills needed to create a variety of dynamic features and content. By the end of this Shopify book, you'll be able to take on challenging projects to showcase your theme customization expertise to your future employer.
Table of Contents (15 chapters)
1
Section 1: Shopify Explained
4
Section 2: Exploring Liquid Core
8
Section 3: Behind the Scenes
Appendix: Frequently Asked Questions

How to start?

The first step toward learning and working on Shopify requires us to learn about the Shopify Partners Program. The Partners Program is a platform created by Shopify that assembles people from all over the world and offers them the ability to build new e-commerce stores for store owners, design themes, develop apps, and refer new clients to Shopify. One of the most enticing extensions of the platform is that it will allow us to create a development store to practice our Liquid knowledge.

Before creating our Development store and familiarizing ourselves with Shopify, we will first need to create an account within the Shopify Partners Program. Creating the account is a relatively straightforward process, which we can start on the following page: https://www.shopify.com/partners:

  1. We can begin the process by clicking on the Join now button in the top-right corner of the header or by clicking on the Log in button to access an existing account. After filling in the basic information on the create account page and the subsequent Account Information page, we will get our first view of the Partners dashboard:
    Figure 1.1 – Example of a Shopify partner dashboard

    Figure 1.1 – Example of a Shopify partner dashboard

  2. After creating an account, the next step will be to create our Development store. We can do this by visiting the Store link in the upper-left sidebar and pressing the Add store button, which will prompt a store registration form that we will need to fill in:
Figure 1.2 – Example of creating the Development store

Figure 1.2 – Example of creating the Development store

Most of the options require no simplification as they are self-explanatory, but we will need to analyze the most important one, Store type, which consists of two options:

  • Development store
  • Managed store

For our learning purposes, we will be using Development store. However, we will also provide a short explanation of what the Managed store option means and when we can use it.

The Managed store option will enable us to request collaborator access to an existing store. Selecting this option will prompt another section named Permission, where we will need to choose the type of access that we are requesting. Generally, we can choose to request access to all areas of the client store. However, to perform theme customization on a client store, we will need access to the Themes option under Online store.

Once we have selected the permission level that we require to perform the work and have entered the URL of the store that we are requesting access for, all that is left is to send the request by pressing the Save button. The store owner will receive a notification of the store access request and then choose to grant or deny access.

The Development store options will allow us to create an entirely new store where we can practice our Liquid skills, test out new features before they are rolled out to the Shopify live storefront, or create a new store that we can later transfer to our client.

Important note:

While creating the Development store is completely free of charge, in transferring the store to the client, the theme will automatically lose development status. The person to whom we have transferred the ownership will need to select a recurring plan for which the developer who initially created the theme will receive a recurring commission for as long as they are paying for their subscription plan.

Let's create our development store by selecting Development store as the store type and filling in the store information.

Tip:

The developer preview is a new feature that Shopify has rolled out recently and will allow us to preview the innovations they are rolling out before they hit the live storefront. However, we will abstain from using this option.

Once you have filled in the login information, store address, and have selected the purpose of the store, press the Save button to create your store.

Success! Our store is ready to go, and with it, we are ready to proceed to familiarizing ourselves with the Shopify admin panel.