If you installed WebdriverIO from an existing project, this is where we continue. We need to build the project before we can run our first test. From the Terminal, type the following:
> yarn install
This will bring in all the associated packages to run the project. Sometime in the future, vulnerabilities may occur and we will have to update our packages. We can use Yarn to check which packages are current and which are outdated:
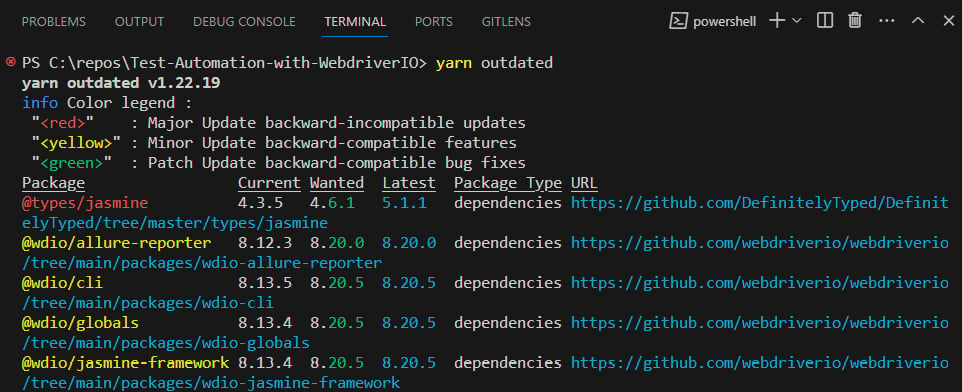
> yarn outdated
The output can be seen in the following screenshot:
Figure 2.10 – Displaying the outdated package
Incompatibility could occur if we upgrade all packages blindly. Fortunately, there is the yarn upgrade command, which allows the packages to be upgraded individually:
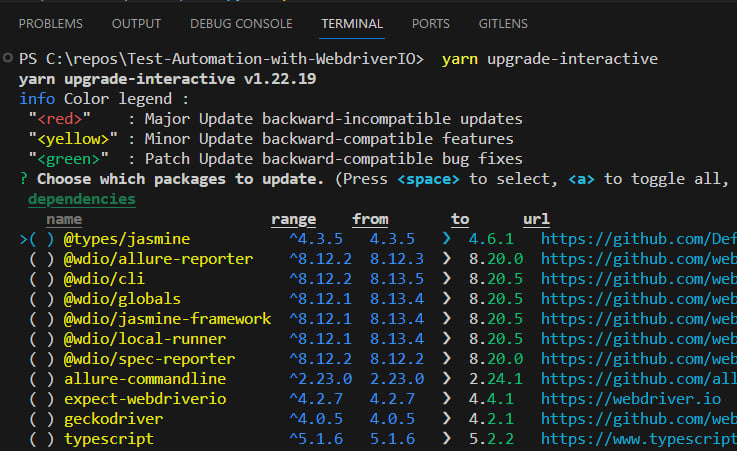
> yarn upgrade-interactive
We will see the following output:
Figure 2.11 – Interactive package list for upgrading
This gives us the most flexibility when we’re keeping our project packages up to date.
Quick tip
If you want to clear the Terminal, use cls in Windows or Ctrl + K or clear on Mac.
After the installation, the yarn.lock file will be updated and the node_modules folder will have all the supporting dependencies downloaded. This contains the expanded list of packages, which has been included to support the packages in package.json. The yarn.lock file will never need to be edited.
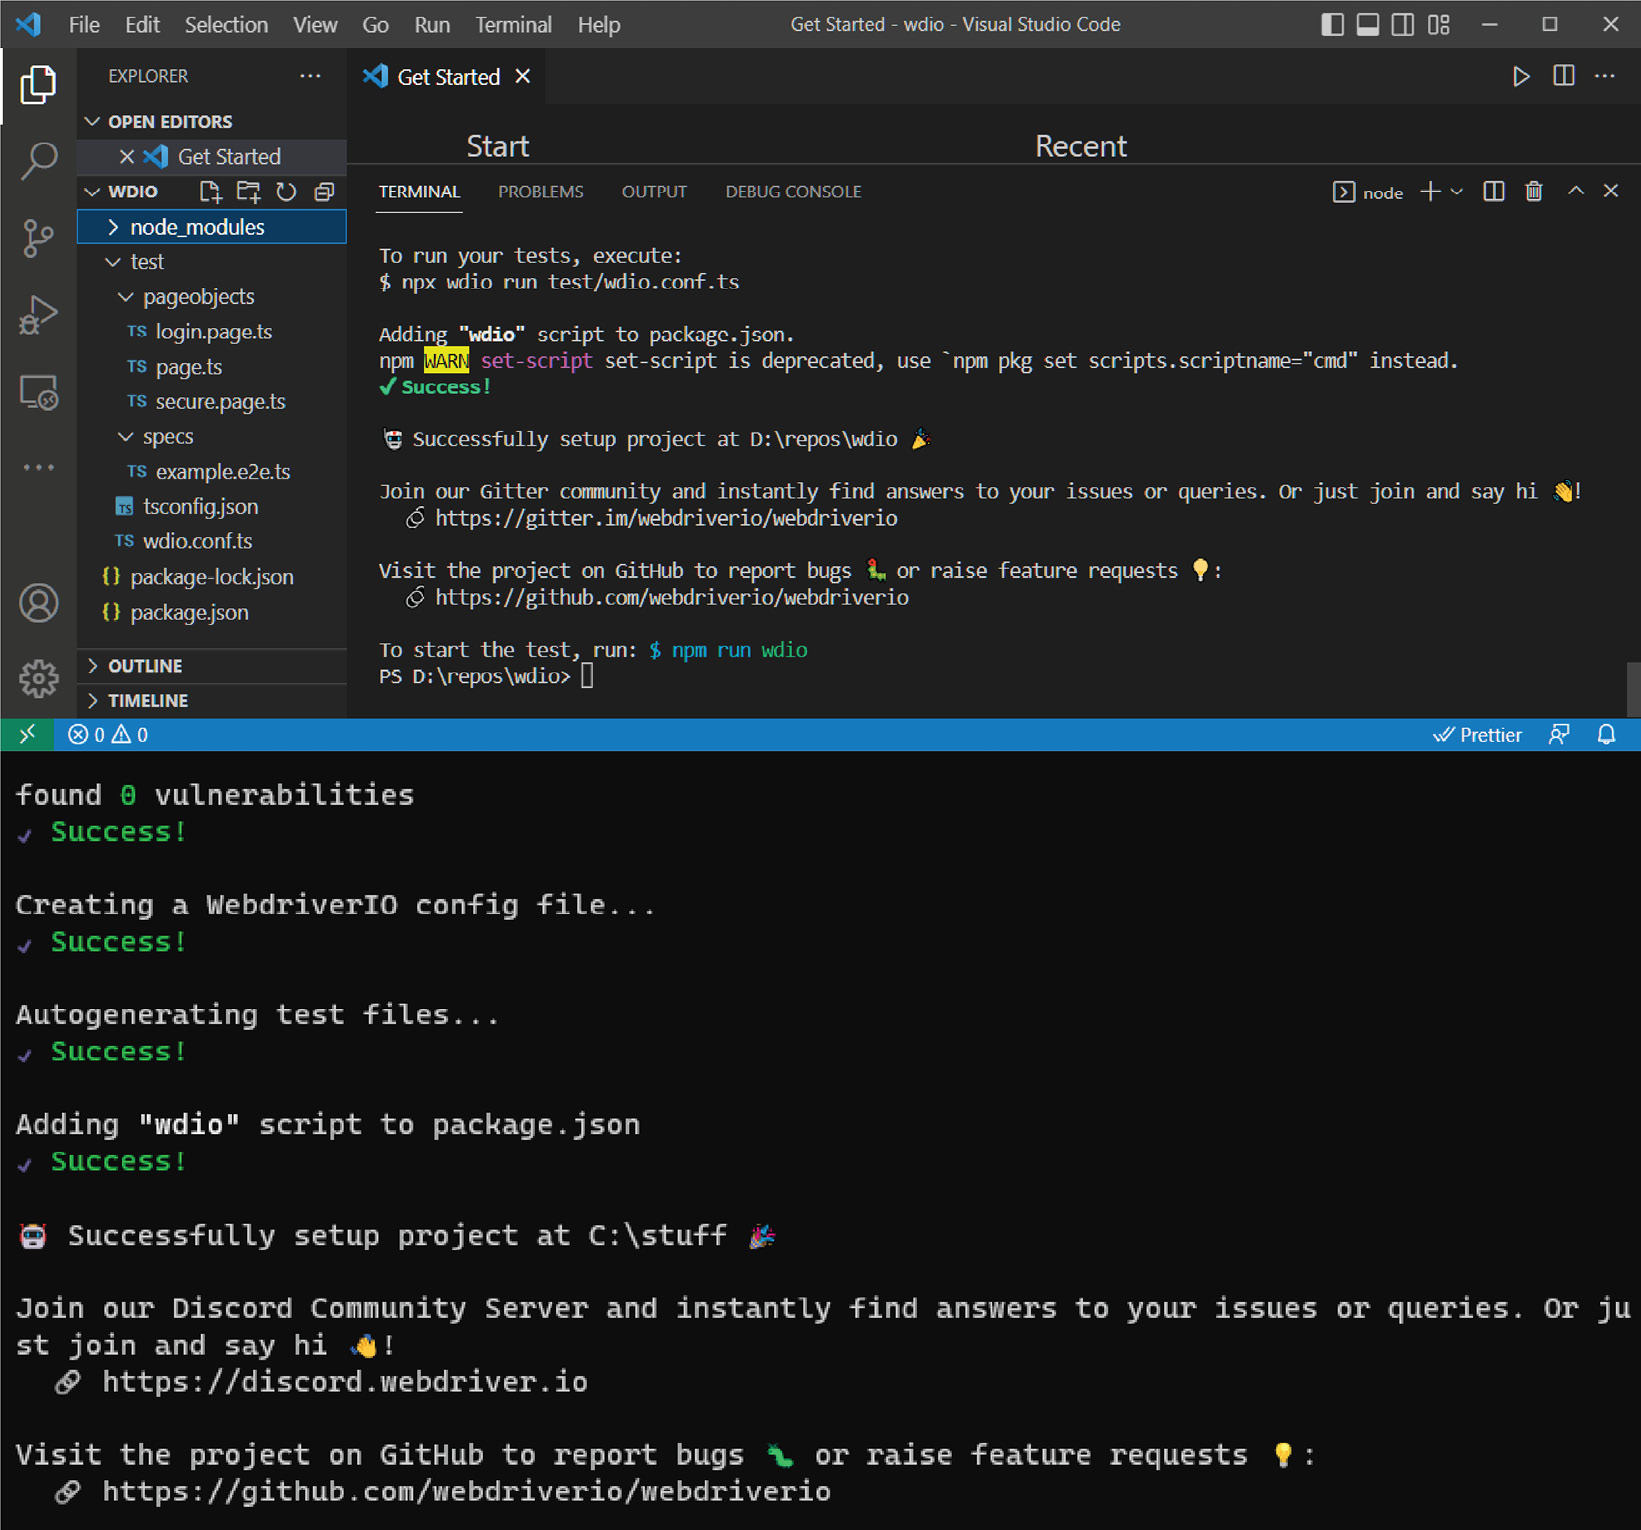
At this point, we should point out that the WebdriverIO setup assumes that a novice user may not know what to do to bring in all the supporting packages:
Figure 2.12 – WebdriverIO with TypeScript successfully installed
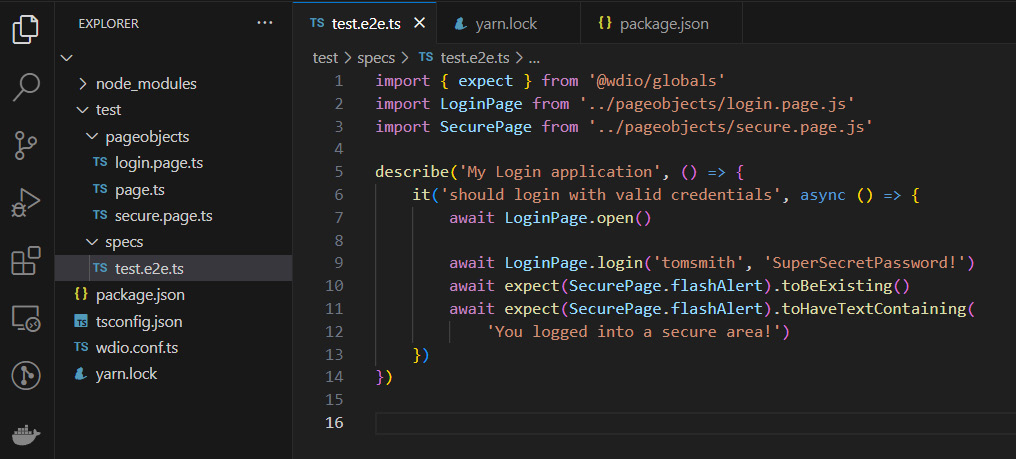
Lastly, we can confirm the version of WebdriverIO that is installed with the version flag.
For Windows users:
> npx wdio --version
For Mac users:
> wdio --version
We made it! All the supported features have been added to the package.json file. WDIO even gives us a hint to try out our first test – npm run wdio:
Figure 2.13 – WebdriverIO gives us a hint on how to run the first test
This has set up WebdriverIO and created a sample test that can be executed with the following yarn command:
> yarn wdio
This results in the following output:
Figure 2.14 – Output of yard command
Tests can also be executed by running a command. Let’s take a look at the options for both Windows and Mac:
For Windows users:
> npx wdio run test/wdio.conf.ts
For Mac users:
> wdio run test/wdio.conf.ts
All the test examples can be found in this book’s GitHub repository: https://github.com/PacktPublishing/Enhanced-Test-Automation-with-WebdriverIO.
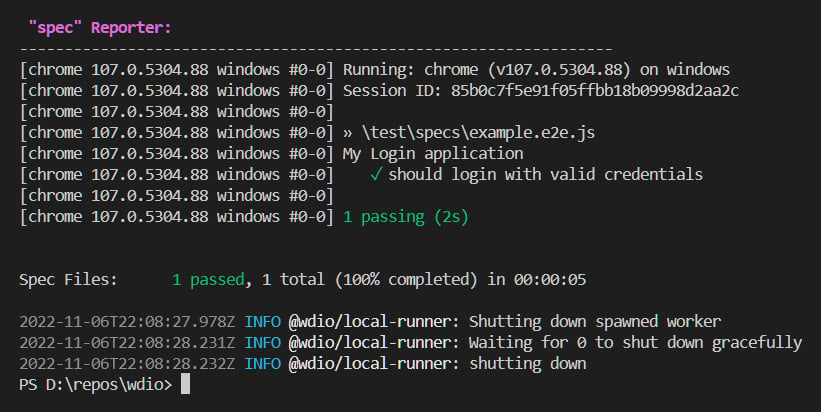
This runs the sample tests with basic output detail to the Terminal window from the spec Reporter window:
Figure 2.15 – Pass results shown in the spec report from the sample WDIO test
Now that we have set up our project, either by answering the initial configuration questions or cloning an existing project, we are ready to look at the configurations and file settings of our new WDIO automation project:
Figure 2.16 – All project files
This will display all the files and folders in the project. There are quite a lot of them, so we will cover the important ones here. Open the README.md file first.
For any project, the README file is the best place to start. It gives us critical information about how the project is configured, its features, and, most importantly, how to quick-start a sample test.
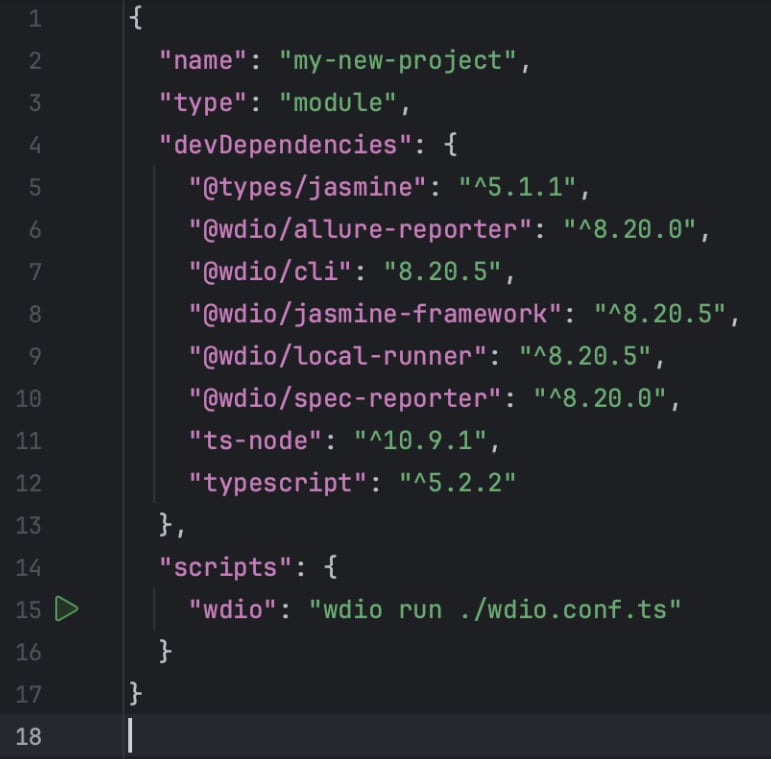
Next, open the package.json file.
This is where much of the Node.js configuration occurs:
Figure 2.17 – All devDependancies in the wdio project
What is the yarn.lock file?
The yarn.lock file contains the full list of required project packages, including ones that support other packages in package.json. It is massive, but don’t worry – you will never have to change it. Yarn Package Manager handles all of this. Whew!
Let’s run Yarn Package Manager with the install command to get everything loaded and up to date:
> yarn install
This can be seen in the following screenshot:
Figure 2.18 – Building the project using Yarn Package Manager
Making our first commit
Now that we have our first test running, it is time to bring it all to our fortress of solitude – by committing it to our local repo and then to the GitHub repository.
Ignoring files in the Git repository
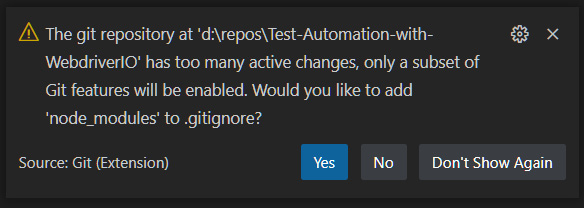
Before we make our first commit to the Git repo, we need to ignore some files. Once we have set up our WDIO project, VS Code might suggest that the node_modules folder should be included in the gitignore file:
Figure 2.19 – VS Code detects that the node_modules folder can be ignored
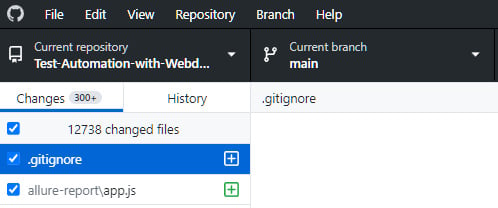
We never want to commit this folder to our Git repo as it gets updated constantly by npm. Having npm create the folder contents on the fly with the most up-to-date versions is better:
Figure 2.20 – GitHub Desktop indicates over 12,000 files to be committed to the new repo
This is far more files than we need.
To tell Git to ignore this project folder, simply create a .gitignore file in the root of the project and enter the node_modules folder name:
Figure 2.21 – A .gitignore file contains files and folders that should not be committed
The same goes for our Allure report and results folders. These files will be rebuilt repeatedly after each test and will not need to be under version control. Once these tests are run from Jenkins, prior runs can be preserved there temporarily or permanently.
By simply adding and saving the .gitignore file, the list of files changes dramatically:
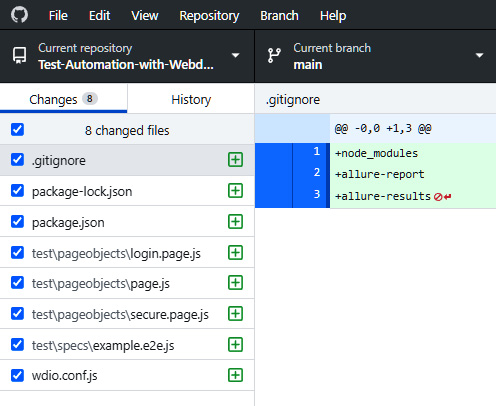
Figure 2.22 – The repo now only stores the files
Once this .gitignore file is saved, we will see the changes reflected in GitHub Desktop with a manageable size of just eight files.
Tip
Never store passwords in the repo. A password should be provided by a secure data provider service such as Vault or AWS Secrets. If no such option exists, then a password file could be referenced in the folder above the project. Otherwise, storing such a credential file in the project requires adding it to the .gitignore file for security.
One of the first bugs I found in my career was related to passwords. Here, the user had the option to reset their password with a random string of characters. This page would occasionally crash. The reason was that the requirement had the password generated from all 128 ASCII characters. This included BELL, unprintable characters, as well as ones that were difficult to type on the keyboard. The real problem was that this set included angle brackets (< and >). The page would only crash when a new password was generated with one of those two characters, as they were interpreted as opening or closing HTML tags on the page.
There are tools that IT security uses to detect passwords in repos, but they often only check the main or master repos and ignore the later feature branches. This, too, is a security risk. Always clean up old branches, as this can be considered a security operations center (SOC) II compliance violation, even if the passwords have long since expired.
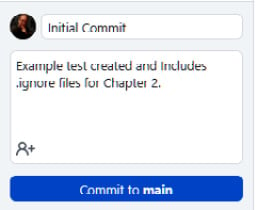
We can now add a summary description and optional details. Simply click Commit to main – all our new files will be committed to our local main branch:
Figure 2.23 – Adding a comment and details to a local commit
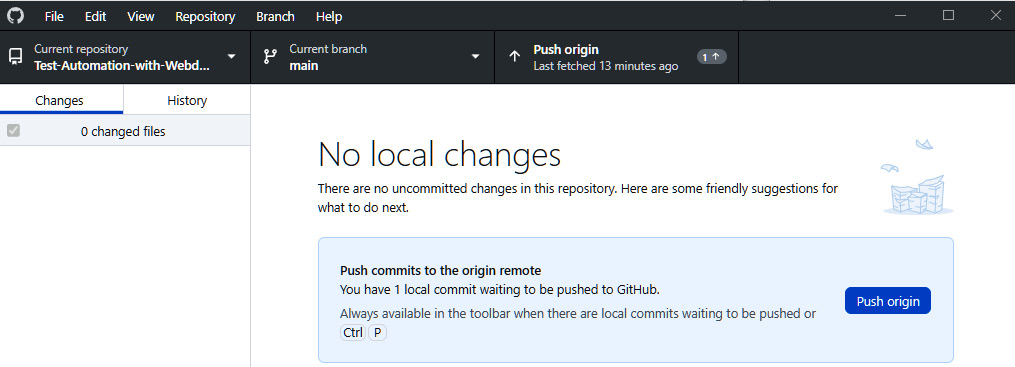
However, this is just staged on our local Git repo. The final step is to click Push origin, which will push it up to GitHub for our team to pull down:
Figure 2.24 – GitHub Desktop shows that all changes have been committed and suggests pushing any new changes
Congratulations! You have made your first commit to your Git repo. Your team members can now pull your changes to be sure all their tests are running smoothly.
But what if you need to add new functionality that will take a few days to complete?
Branching out
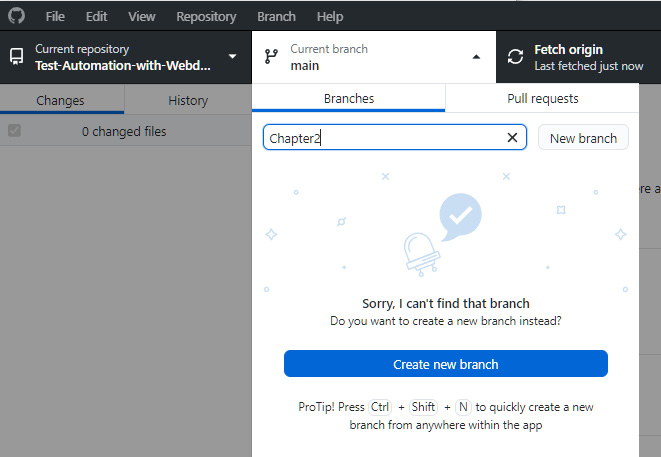
To be a part of an automation team, you may be asked to add new and complex functionality. If this takes a few days, we might consider feature branching. A new branch is created from main. Your changes will be committed to your branch, and changes from main will be brought in periodically:
Figure 2.25 – Adding a new branch in GitHub Desktop from main
When your changes are complete, a pull request will be made to pull your changes into the main branch, and the feature branch may be deleted.
For this book, the final state of the framework will be in a branch named after this chapter. The main branch will contain the final project.


 Free Chapter

