
Now that you understand how WordPress works, you're probably itching to get started! So, let's start by installing WordPress. There are two ways to do this:
Using an installer such as Softaculous or Fantastico, which may be provided by your hosting company
Directly installing WordPress using the Famous 5 Minute Install
Let's start with the easier way, which is to use an installer.
If your hosting provider gives you access to an installer, it will probably be accessible via your hosting dashboard or cPanel, which is a dashboard many hosting providers give you to manage your site.
Note
The exact way this looks and where you find it will vary from host to host, so your screen will probably look slightly different from what you see here, but the process is much the same.
My hosting provider includes a link in its control panel called Web Apps. Yours might be called Fantastico, Softaculous, or something else. If you're unsure, check with your hosting company and ask them if they provide a WordPress installer.
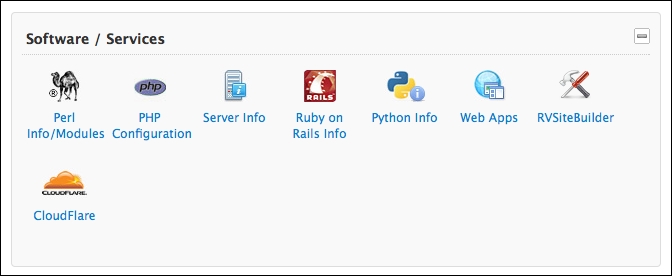
Fig 1.2: Accessing an installer
When I open this, I see a list of the web apps available to me, including WordPress:
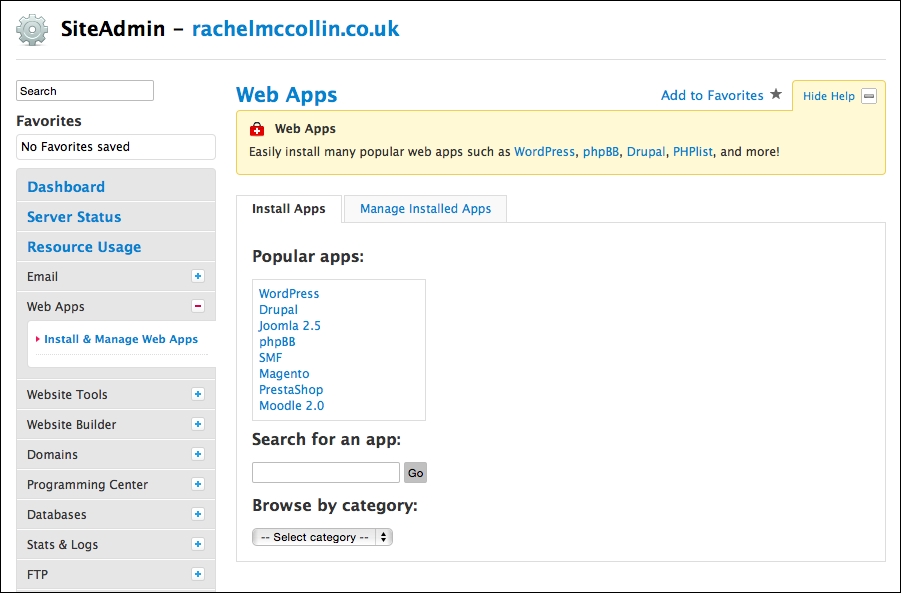
Fig 1.3: Choosing WordPress in the installer
These are the steps you need to follow now:
Click on WordPress and then on Install Now.
You will be presented with a list of fields to complete. Fill them out as follows:
Prefix: I prefer to use just
http://as thewwwreally isn't necessary these days.Domain: This will already be filled out with your domain name; leave it as it is.
Directory: If you add something here, WordPress will be installed in a subdirectory of your site and not in your root directory. If you already have a static site running on this domain, using a subdirectory will mean that your static site will still work while you install and set up WordPress. If not, it's easier to leave this empty. You'll learn later in this chapter how to manage your old site while you're setting up WordPress.
Database Name: You can leave this as it is or change it to something that's more memorable to you. If you're not going to be working on your database, just leave it alone.
Table Prefix: Leave this as
wp_.Site Description: This is where you enter your description or strapline. Most themes will display this below the title at the top of your pages. If you don't have a description, leave this blank.
Enable Multisite: If this is offered by your installer, leave it unchecked.
Admin Username: The default is admin, but for security reasons, you should change this to something unique and memorable for you.
Admin Password: Enter your password twice for logging in to your site. Be sure to make it secure, including uppercase letters, numbers, and other characters.
Admin Email: Enter your e-mail address.
Select Language: If this is an option, select your language if it isn't English.
Select Plugins: This isn't offered by all installers, so you may not see it. I leave this blank, preferring to install plugins later on.
Email recipient: If you add your e-mail address here, you will receive an e-mail with details of your new WordPress installation, including a link to the admin screens.
Tip
Some installers offer a backup option, which is a good idea to select if available. It's also a good idea to use a backup plugin in your site too. For a review of some of the best backup plugins, visit http://premium.wpmudev.org/blog/premium-freemium-wordpress-backup-plugins/.
Here, you can see an example for the installation I'm setting up:
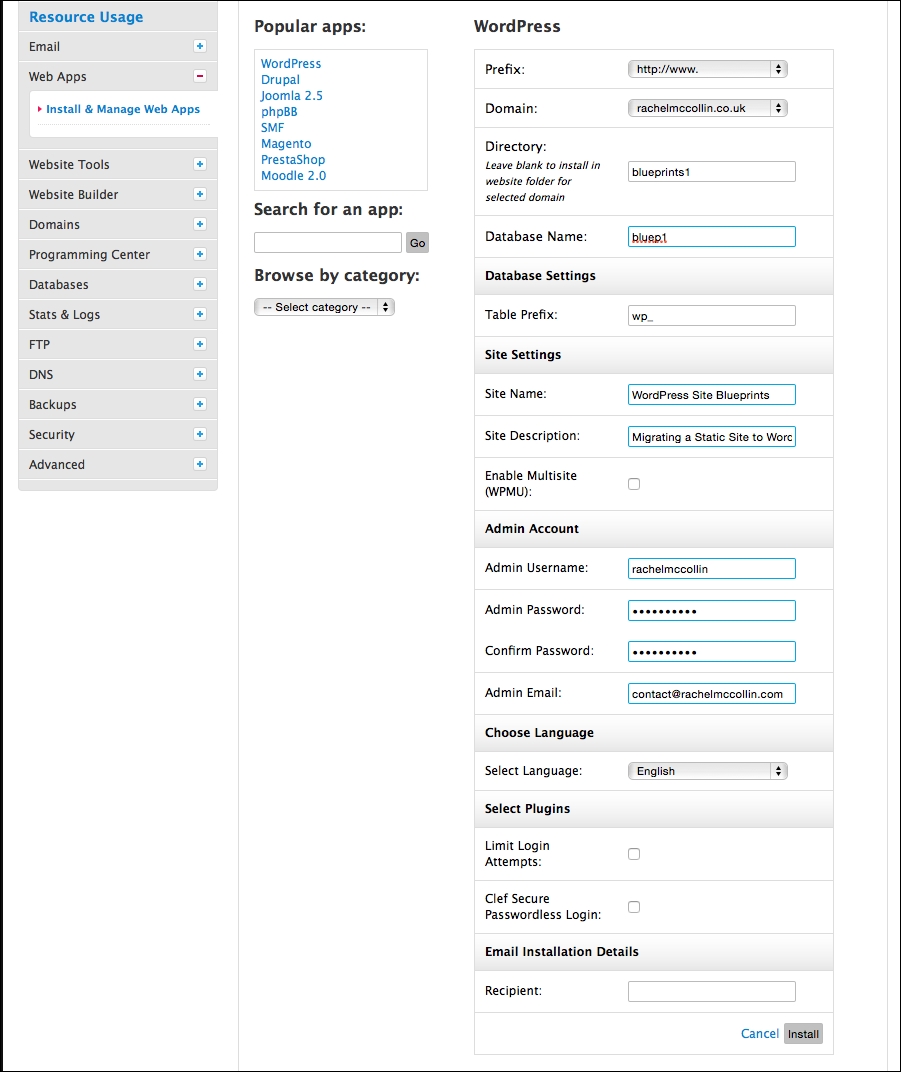
Fig 1.4: Enter your site details
Once you've entered your details, click on Install and the installer will do its work. You will see a screen with a link to your new site and to the admin screens. Well done!
But what do you do if your hosting provider doesn't give you access to an installer? That's where manual installation comes in.
Installing WordPress manually takes a little longer, but isn't difficult as long as you know the steps to take. You'll need to learn how to do this if your hosting company doesn't provide an installer or if you want to install WordPress locally on your PC or Mac. This can be useful for working on a development site, where you're creating a dummy version of the site before you launch it to the world.
Note
If you want to install WordPress on your local machine, the process is very similar to the one here, but you'll also need to install an app such as MAMP (for Mac and Windows) or XAMPP (for Mac, Windows, or Linux). You can find instructions at http://codex.wordpress.org/Installing_WordPress_Locally_on_Your_Mac_With_MAMP and http://premium.wpmudev.org/blog/how-to-install-wordpress-locally-for-pcwindows-with-xampp/. For a guide to migrating your site to the live site once you're happy with it, refer to http://code.tutsplus.com/tutorials/migrating-a-wordpress-site-from-a-local-server-to-production--wp-26.
Installing WordPress manually consists of four steps:
Downloading the WordPress files
Creating a database on your web server
Uploading the WordPress files to your server
Running the WordPress installation script by accessing the URL for your site in your browser
Let's work through each of those steps in turn.
To download the WordPress files, follow these steps:
Go to https://wordpress.org/download/ and click on the Download button to download the files.
This will download a
.zipfile to your computer. Unzip this.
Your site will need a database to hold all of your content. WordPress doesn't create this for you; you'll have to do it yourself.
In your hosting provider's dashboard or in cPanel, go to phpMyAdmin. If you can't find this, ask your hosting provider; they might have a different way to create a database, such as using a wizard.

Fig 1.5: The phpMyAdmin home screen
Click on the Databases tab.
You will see a field labeled Create a new database. Type the name of your database in this field. Make a note of this as you'll need it again later.
Click on OK.
You now have an empty database set up. The next step is to upload WordPress.
To upload WordPress, you'll need an FTP client or a code editing program with FTP built in. I tend to use Coda (http://panic.com/coda/), which is a code editor for the Mac, or FileZilla (https://filezilla-project.org), which is a free FTP client.
In your FTP client or code editor, display your
Downloadsfolder locally and the files on your remote server.If you already have a static site on your server and want to keep it running while you create your new site, create a folder inside your
public_htmlfolder. I'm creating a folder calledblueprints1, as you can see in the following screenshot. If you don't have an existing site, you can skip this step.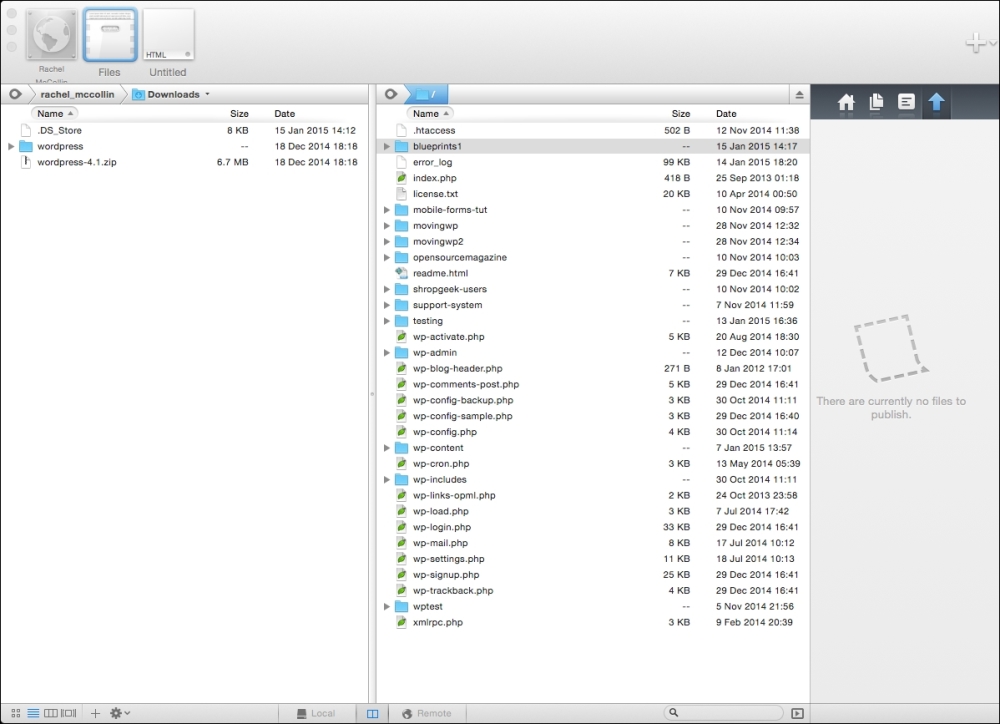
Fig 1.6: The blueprints1 folder
Now copy the contents of the
wordpressfolder from yourDownloadsfolder to the folder you've created. If you haven't created a folder, copy it to thepublic_htmlfolder. Don't copy thewordpressfolder, copy its contents.Make yourself a coffee while you wait for the files to upload!
Now that you have a database and the WordPress files uploaded, you just need to activate the WordPress installation script by visiting your new site's URL in your browser.
To activate the installation script, you'll need to perform the following steps in your browser:
In your browser of choice, type in the URL for your new site. Remember that if you've created a folder for your site, it will be
http://yourdomain.com/folder, wherefolderis the name of your new folder andyourdomain.comis your domain name.You will be presented with the first of the installation screens, where you choose your language. Select your language and click on Continue.
The next screen tells you what's coming up. Give it a quick read (and don't worry!) and click on Let's go!.
The following screen is where you need to give WordPress some information about your database so that it can access it. Input the following:
Database Name: Enter the name you gave your database earlier
User Name: Enter the username you created for your database earlier
Password: Enter the password you assigned to your new username
Database Host: Leave this as localhost (unless your hosting provider uses a different hostname)
Table Prefix: Leave this as wp_
You can see what I've entered in the following screenshot:

Fig 1.7: Entering your database details to install WordPress
You'll now see a screen congratulating you on getting this far. Click on the Run the install button to continue.
You're nearly there! All that's left is to enter your site details on the next screen:
Site Title: Enter the name of your site.
Username: Enter your username for logging in to your site (which is different form your database username—don't use the same username as this will make your site less secure).
Password twice: Enter the password you want to use to log in.
Your Email: Enter your e-mail address for notifications.
Privacy: Uncheck this for now as this is a development site and you don't want search engines finding it just yet. Don't forget to go back and check the box when you launch the site, otherwise you won't get picked up by Google.
Here's what I've added:

Fig 1.8: Entering information about your site
Next, you'll see the success screen. Click on the Log in button to access your new site.
Now simply log in with your username and password and you'll be able to start administering your site.
Now that you've installed WordPress (whichever method you used) and logged in, you'll see the Dashboard screen. If you can see this screen, you've done everything correctly. Well done!
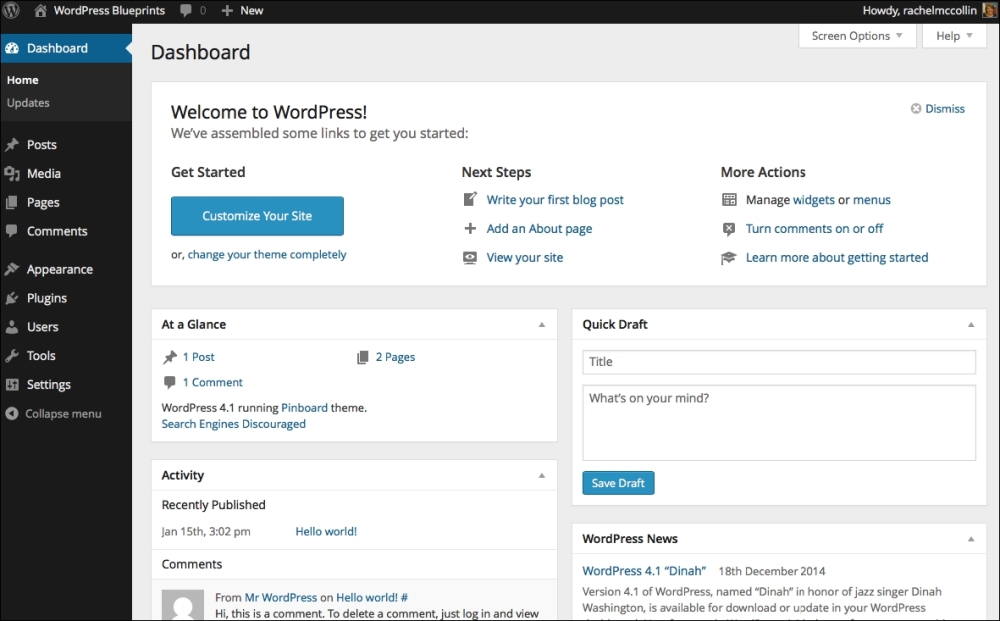
Fig 1.9: The main Dashboard screen in WordPress
But before you start configuring your site and adding content to it, let's take a moment to look at how this affects your old site.
In the previous section, I mentioned installing WordPress in a subdirectory if you have an existing static site that you want to keep live while you create your new one.
Let's look at how this works:
You install WordPress in a subdirectory, which has a different name from any of the pages in your site (if you have an HTML file with the same name as your subdirectory, the browser might go to the WordPress installation instead of that HTML page when a link to it is clicked).
You uncheck the box, allowing search engines to index your site so that people won't stumble upon it when it's not ready. If you missed this step, you can make the change in the WordPress admin. Simply go to Settings | Reading and click on the Search Engine Visibility checkbox. Then, click on Save Changes. While WordPress does give you a warning that this is up to the search engines, in my experience, they do honor this and your site won't get found.

Fig 1.10: The Reading Settings screen
Once your new site is ready, you don't need to move it to the root directory; you just make a couple of small edits to the files and settings, and this tells WordPress that the site is in a subdirectory. We'll look at this later on in the chapter once your site is set up.