
Two flavors of Eclipse Juno have been included in this release: 4.2 and 3.8. The basic difference between these two flavors is that 4.2 is built on top of the e4 (Eclipse 4) platform and has undergone a lot of GUI changes, but 3.8 is based on Version 3 of the platform. It is also fair to say that the 3.8 release focuses on stability and bug fixes, whereas Eclipse Juno 4.2 emphasizes the introduction of new features.
The default appearance of the platform's user interface has been revamped. The main goal of this visual update was to adopt a more modern visual style. Eclipse Juno features a workbench with a whole new look, as shown in the following screenshot. To better understand this screenshot and how things are visually organized in Eclipse, we need to go through some concepts. The term workbench refers to the desktop development environment. So, as shown in the screenshot, the workbench encompasses pretty much everything else. The elements inside the workbench are grouped into perspectives, in Eclipse's parlance (the surrounded area indicated by 2 in the screenshot). Perspectives, in turn, contain views and editors (in the following screenshot, the letter a represents views, whereas the letter b represents editors). They control what appears in the workbench. Each perspective provides all you need to perform a certain task. For instance, the Debug perspective contains the set of functionalities you would use while debugging Java programs. This functionality is split into views.
An example of a view that belongs to the Debug perspective is the Breakpoint view. (If you had never heard about breakpoints before this, do not worry. We will cover everything about them in a later chapter.) As for editors, most perspectives contain several views and a single editor. In Eclipse, as many editors as you want can be open at a given time. However, only one can be active at a time. As you progress through the book, you will switch perspectives very often. Also, you will learn how to use the most important views and editors.
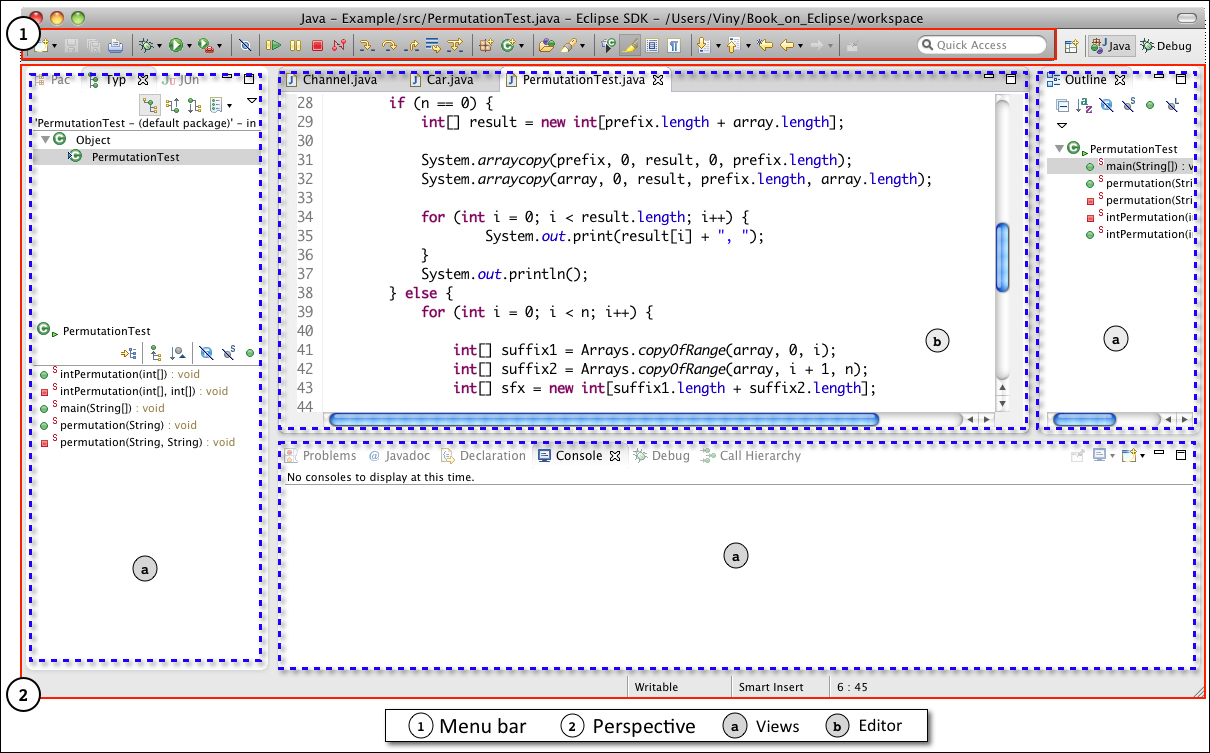
At a glance, the two changes that will certainly draw the attention of the reader familiar with Eclipse are the debug control commands (Resume, Stop, Step Into, and so on). Since these have been moved out of the Debug view into the global toolbar (we will cover debugging in Chapter 3, Unit Testing with JUnit and Debugging), we now have a global search bar in the top-right corner. These elements can be seen in the previous screenshot in the area indicated by the number 1 (that is, on the menu bar or the global toolbar).
Have you ever wanted to use a view side by side with an editor? Now, in Eclipse Juno, it is also possible to stack views and editors. For instance, if you have a view whose information when displayed takes up too much space, you can stack it in the editor area to provide more space. To do so, just drag the view by its title bar while keeping the left button of the mouse pressed. As you move the view around the workbench, the mouse pointer will indicate where and what shape the view will take if you release the left mouse button. When the view is in the location that you want (in this case, between two editor tabs), release the left mouse button. The following screenshot shows a view (the Data Source Explorer view) that was docked in the editor area. You can do the same with any view. It is also worth mentioning that you can place views pretty much wherever you want.

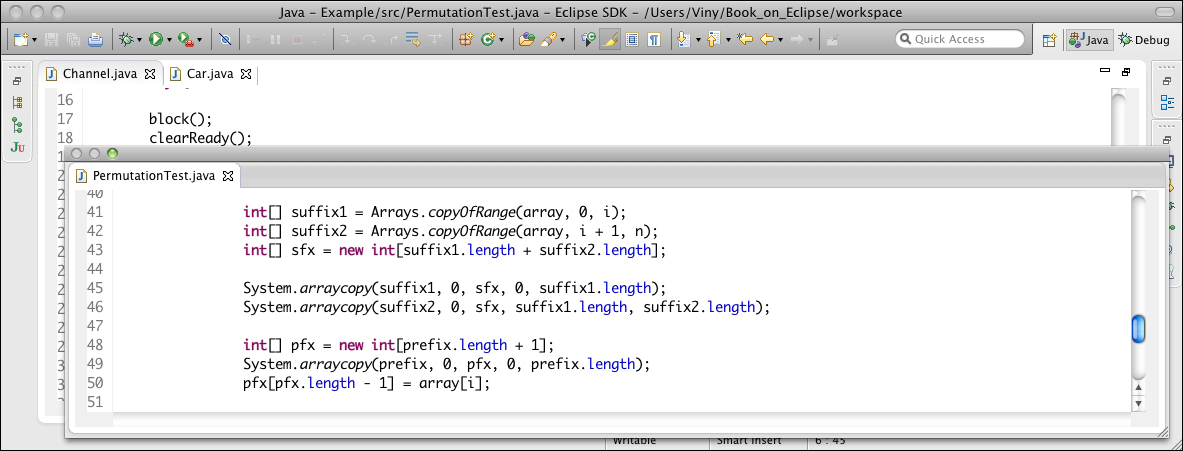
Another useful improvement is that editors can now be detached into their own windows. And what is better, the detached editor will retain its properties; this means that it will behave in exactly the same way as an editor still attached to the workbench window. This improvement is shown in the following screenshot. To detach an editor from Eclipse, simply drag it out of Eclipse's workbench window (main window).
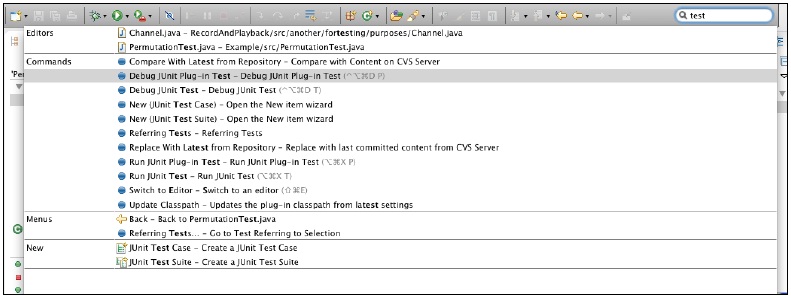
If you are one of those developers who try to get as much done as possible without lifting your fingers from the keyboard, you will find the new global search bar interesting and useful (the global search bar is in the top-right corner of the workbench). It allows you to access classes, views, perspectives, commands, menus, and so on quickly just by typing their names. The following screenshot shows the global search bar in action. To access the search bar without using the mouse, press Ctrl + 3.
In the previous versions of Eclipse, a lightweight refresh mechanism was introduced. This mechanism keeps the contents of the workspace synchronized with the filesystem; the out-of-sync files are automatically, asynchronously refreshed. However, in previous versions of the IDE, you had to enable this feature.
Now, however, it is enabled by default. If you want to disable it, navigate to Preferences | General | Workspace, and deselect Refresh on access. Unless you have a very strong reason to do so, you should keep it enabled.
Part of the Debug perspective has been moved to the main menu bar. To be more specific, the common debug control commands (that is, Resume, Stop, and so on) have been moved to the main menu bar (as shown in the following screenshot). If you do not like it this way, you can customize it. Navigate to Window | Customize Perspective…. Here, you can either add more debugging commands or remove them from the main menu bar altogether.
Tip
If you are feeling a little bit nostalgic and want everything as it used to be, that is, without the debugging command all over the place, that old look can be restored. To do so, first toggle the Show Debug Toolbar option in the Debug view's menu, and then disable the Debug toolbar from the Customize Perspective dialog. Also, if you want to return to the classic look (preserving the new features), you can navigate to Preferences | General | Appearance and select Classic from Theme.
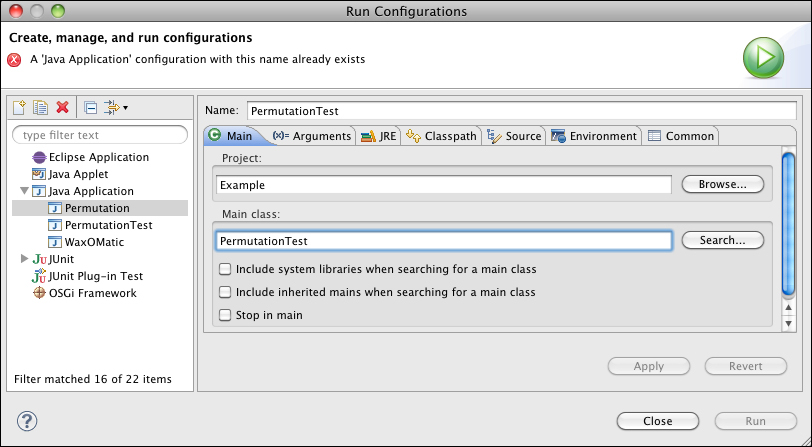
Eclipse Juno ships with improved launch configuration support. From now on, if you'll create a launch configuration with the same name as that of an existing launch configuration, the type of conflicting launch configuration will be shown in the error message. The following screenshot shows the error message that you will get when trying to create a launch configuration with the same name as a previous one. (You will learn how to create launch configurations for your Java projects in the next chapter.)
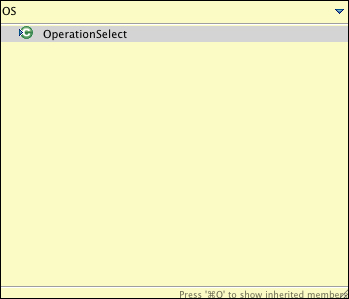
If you are already familiar with Eclipse, you have probably used the Quick Outline (Ctrl + O) and the Quick Hierarchy (Ctrl + T) views. These useful time-saving views are even better in Eclipse Juno: they now support CamelCase matching on the element name. For example, to search for ByteArrayOutputStream, simply type BAOS. The following screenshot shows a usage example:
Note
If you are a Mac OS X user, use the command button (?) to access the Quick Outline and Quick Hierarchy views instead of Ctrl.
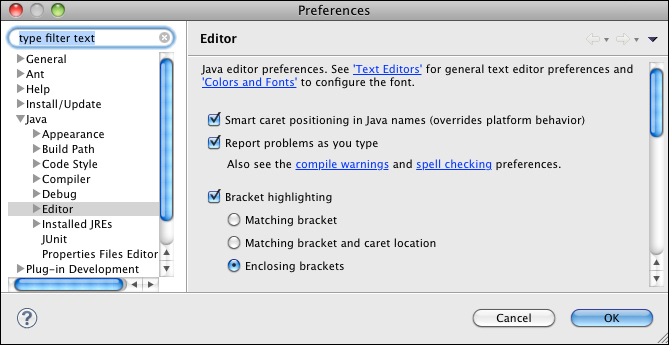
Another useful thing is the improved bracket-matching support in the Java editor. Now this editor supports the highlighting of enclosed brackets. This can be configured by going to the preference page at Java | Editor and then selecting the option Enclosing brackets, as shown in the following screenshot:
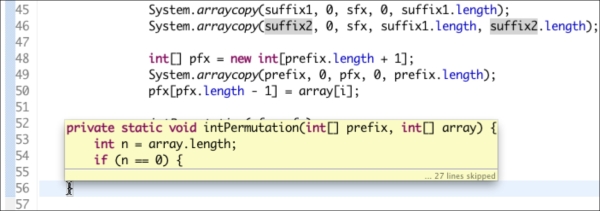
After enabling this option, go to the Navigate menu end select Go To | Matching Bracket (Ctrl + Shift + P), now this option works everywhere in the Java files. When inside a pair of brackets, pressing Ctrl + Shift + P navigates the caret to the nearest enclosing end bracket. On pressing the same buttons a second time, the caret navigates to the corresponding start bracket. Further, when you hover over a closing curly brace, Eclipse shows you the source code near the matching opening brace (as highlighted in the following screenshot).
There is way more than we described here. However, giving an in-depth overview of every improvement will not buy you anything. You'd better start on your journey towards Eclipse mastery. All the skin-deep improvements Eclipse has undergone are documented at http://archive.eclipse.org/eclipse/downloads/drops4/R-4.2-201206081400/news/eclipse-news-part1.html.
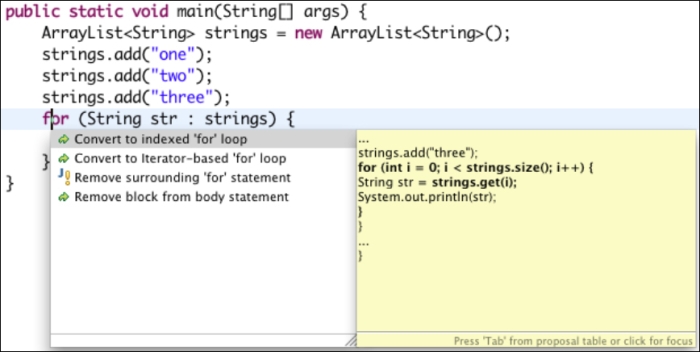
A lot of non-GUI-related improvements have also been made. For instance, now you can use the quick assist (Ctrl + 1) to turn an enhanced for loop into either an indexed for loop or an iterator-based loop. The option to transform a for loop into an indexed for loop is available for expressions that iterate over arrays or list-based types. The option to turn a for loop into an iterator-based for loop is only available for expressions of the type iterable. The following screenshot shows the new quick assist in action:
As we will see in Chapter 3, Unit Testing with JUnit and Debugging, Eclipse now ships with JUnit 4.10. Also, Eclipse supports the latest servlet application programming interface (3.0) that we will briefly discuss in Chapter 7, Web Development Using Eclipse WTP. The complete list of improvements is available at http://help.eclipse.org/juno/index.jsp?topic=%2Forg.eclipse.platform.doc.user%2FwhatsNew%2Fplatform_whatsnew.html.