

In order to install ADT into Eclipse it's enough to perform the following steps:
Start Eclipse then navigate to Help | Install New Software.
Click on Add in the top-right corner.
In the Add Repository dialog that appears, enter
ADT Pluginin theNamefield and the following URL for theLocationfield: https://dl-ssl.google.com/android/eclipse/.When the installation completes, restart Eclipse.
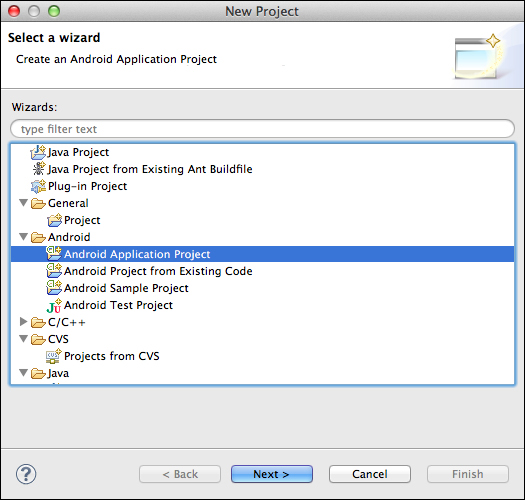
Once the Eclipse installation is properly configured it's possible to create a new project using the appropriate wizard.
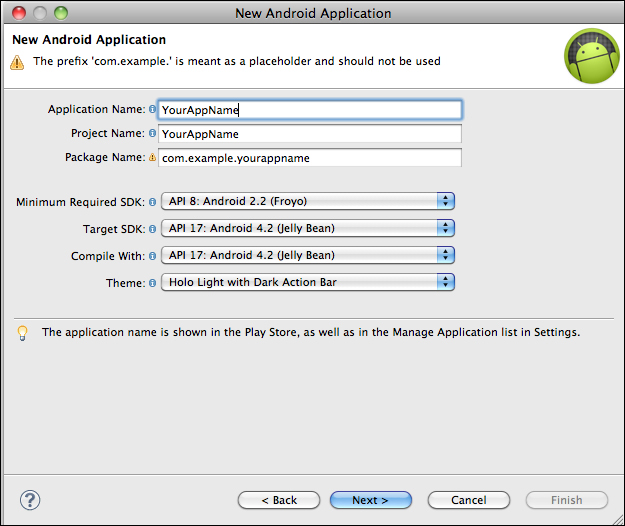
Next, define the application name, the packaging, the Android SDK to use in order to build the app and the minimum SDK.
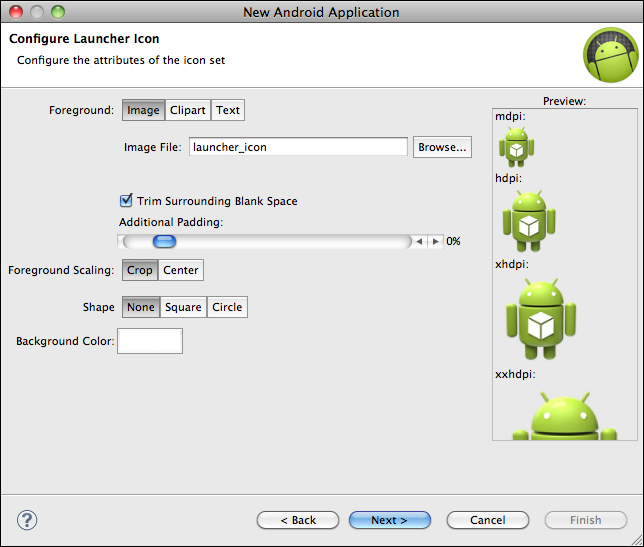
The wizard lets you define the application icons, i.e., the icons end users will see in the mobile device when using the app.
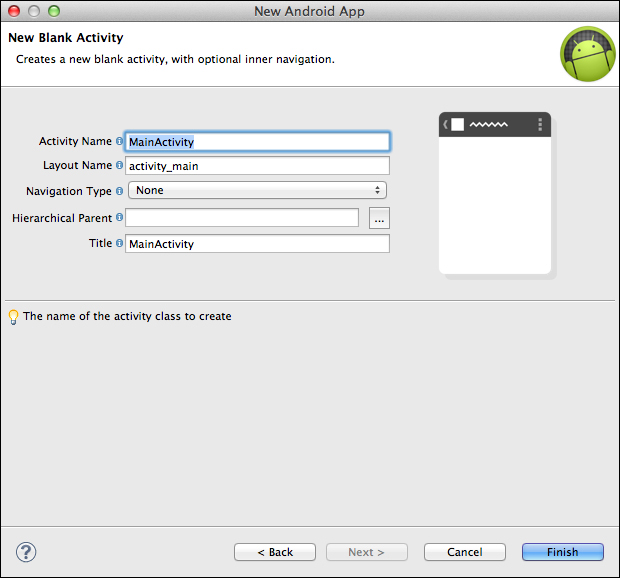
An important step when creating an Android project based upon PhoneGap is to select the option to start with a blank activity and configure it properly. An activity is a single, focused thing that the user can do. Almost all activities interact with the user, so the Activity class takes care of creating a window in which it's possible to place the UI of the application. Make sure the activity doesn't inherit from anything—i.e., leave the Hierarchical Parent field blank.
Tip
Always edit the Title field in order to show the appropriate name of your app when installing, running, and uninstalling it.
It's very important to have PhoneGap in the Eclipse workspace or be aware of the path to reach the PHONEGAP_ROOT folder in order to use the files required to run the app.
In the root directory of the project create two new directories: /libs and assets/www.
Place a copy of the cordova-2.x.y.jar and cordova-2.x.y.js into these directories, the files are located in the PHONEGAP_ROOT/lib/android folder. Copy the xml folder inside the project res folder.
Verify that cordova-2.x.y.jar is listed in the Build Path of the project. Right-click on the /libs folder and go to Build Paths | Configure Build Path. Then, in the Libraries tab, add cordova-2.x.y.jar to the project.
In order to run and debug the application, the Main file of the project should look like the following code snippet:
package com.gnstudio.samples.cordova.hello;
import android.os.Bundle;
import org.apache.cordova.*;
public class MainActivity extends DroidGap{
    @Override
    public void onCreate(Bundle savedInstanceState){
        super.onCreate(savedInstanceState);
        super.loadUrl(Config.getStartUrl());
    }
}
The Main file by default contains the override of the default Android menu function. It can be safely removed because it's not needed at all.