

Let's take a look at the steps involved in the installation of JIRA:
Whether you install JIRA using the custom installer or an archive file, JIRA will first launch itself in the browser with the setup wizard:
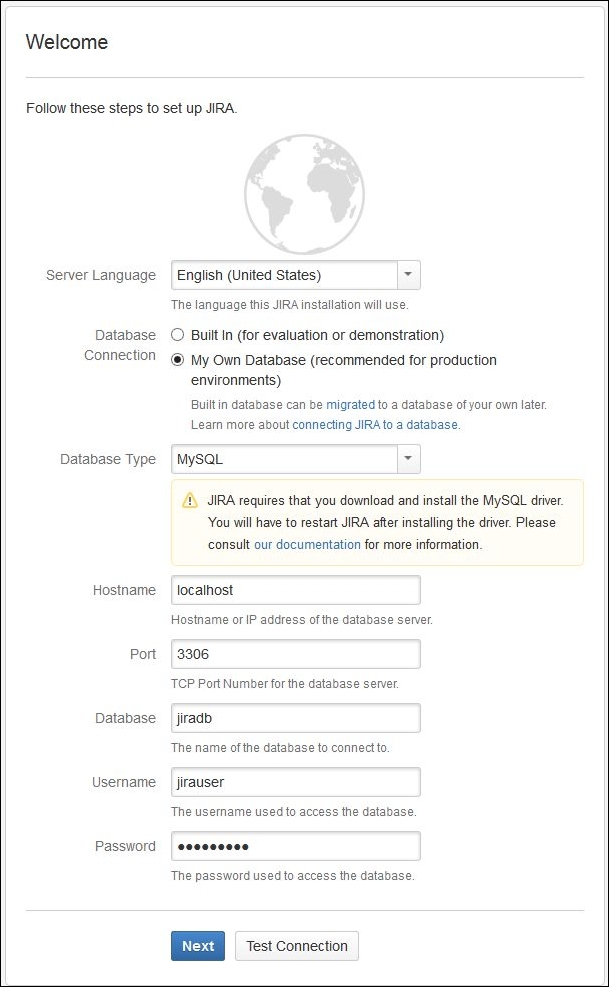
Select the language that JIRA will use. As we want to use the MySQL database, select My Own Database as Connection and MySQL as Database Type. If you want to evaluate JIRA, then you can also use Built In (for evaluation or demonstration) as Database; JIRA uses HSQLDB (HyperSQL Database), which is only used for testing purposes.
Enter your MySQL server Hostname, Port, Database name, database Username, and Password. You may click on the Test Connection button to check whether the credentials are correct or not.

Now, enter the Application Title for this instance. Select Public if you want the user to sign up. Select Private as Mode, where only administrators can create accounts. With the Base URL option, users can access this instance. You can also change it later on and use the domain name or subdomain, such as
jira.company.comas Base URL.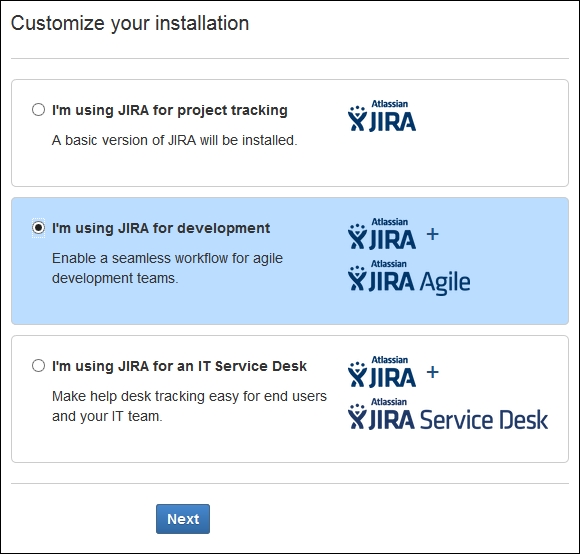
In the next screen, JIRA will ask you to select whether you want to combine JIRA with JIRA Agile or JIRA Service Desk. We want to use JIRA Agile too, so we will select this option. When we click on the Next button, the JIRA Agile add-on will also be downloaded and installed.

You will now get three options to configure the license:
I don't have an account: If you don't have an account on my.atlassian.com, select this option. It will create an account and generate an evaluation license for you.
I have an account but no key: If you already have an account on my.atlassian.com, select this option, enter your credentials, and your evaluation license will be generated.
I have a JIRA key: If you have purchased the license key, then select this option and enter your license key.
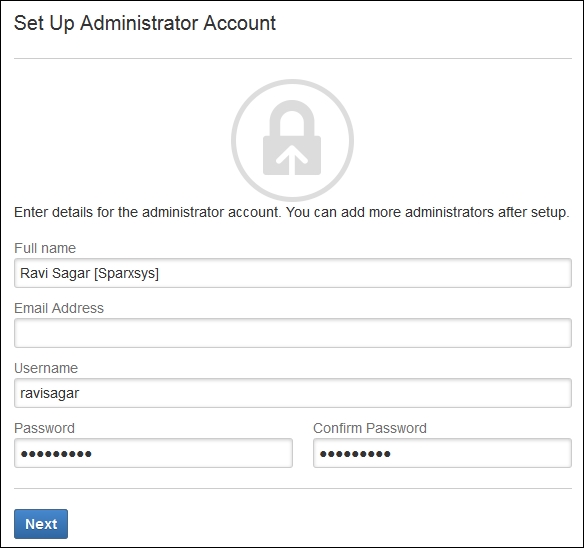
Now, we need to set up the Administrator Account. Enter your Full name, Email Address, Username, and Password. Don't forget this credential because this account has full admin access of the JIRA instance.

Finally, we have the option to configure Email Notifications. If you have the SMTP server in your company, then you can use it. For this example, we have used Google Apps Mail / Gmail. It's quite simple to configure. Just enter your Google Apps username and password. There is no need to change any other setting. You can click on the Test Connection button to verify your credentials and communicate with the e-mail server.
Click on the Finish button to complete the setup wizard and JIRA installation. Now, you will be logged in automatically and presented with the System Dashboard panel.