
This recipe uses the NDK and JNI knowledge from the previous recipe to develop our first Android OpenGL ES 3.0 application. We will use our source code for NativeTemplate.h/NativeTemplate.cpp that we programmed in the Programming OpenGL ES 3.0 Hello World Triangle recipe. This recipe uses the Android framework to provide the necessary services to host the OpenGL ES program in it.
For our first Android OpenGL ES 3.0 recipe, we advise you to locate the sample AndroidHelloWorldTriangle recipe with this chapter. It will be helpful to import the contents to quickly build the application. To import recipes, refer to the Opening a sample project in Android ADT and iOS recipe in Appendix, Supplementary Information on OpenGL ES 3.0.
Here is the step-by-step procedure to program our first OpenGL ES 3.0 application in Android:
Create a blank activity project by going to New | Android Project. Provide a proper name for the application and project. For example, specify Application Name as
AndroidBlueTriangle, Project Name asAndroidBlueTriangle, and specify Package Name ascookbookgles. The package name in Java is equivalent to the namespace concept in C/C++.On the last page, specify Activity Name as
GLESActivity, Layout Name asactivity_gles, and Navigation Type asNone.In Package Explorer, browse to
AndroidBlueTriangle|src|cookbook.gles. Here, you will find ourGLESActivityclass. Under the same package calledcookbook.gles, add two new classes calledGLESViewandGLESNativeLib. In order to add a new class, right-click on thecookbookglespackage in the package explorer and go to New | Class.Use the sample recipe
AndroidBlueTriangleand copy/paste the contents ofGLESActivity.java,GLESView.java, andGLESNativeLib.javato the respective files of your project. In the next section, you will better understand these files and the classes contained in them.Add a new folder called JNI under this project. Inside this folder, create
Android.mk,Application.mk,NativeTemplate.h, andNativeTemplate.cpp. Theandroid.mknative code makefile is used by the JNI, as discussed in the previous recipe. UseHelloWorldAndroidto copy the contents of these two files from source to their respective files.For OpenGL ES 3.0,
Android.mkmust contain the-lEGLand-lGLESv3flags in order to link with the EGL and OpenGL ES 3.0 libraries. Also, as we target Android devices running Android version 18 (Jelly Bean), theApplicaton.mkmust contain theAPP_PLATFORM:=android-18platform.
Open the command-line terminal and run
ndk-buildinside thejnifolder. Under Eclipse, refresh Package Explorer so that the library created byndk-buildis updated in the project. Here is the rendering output upon execution: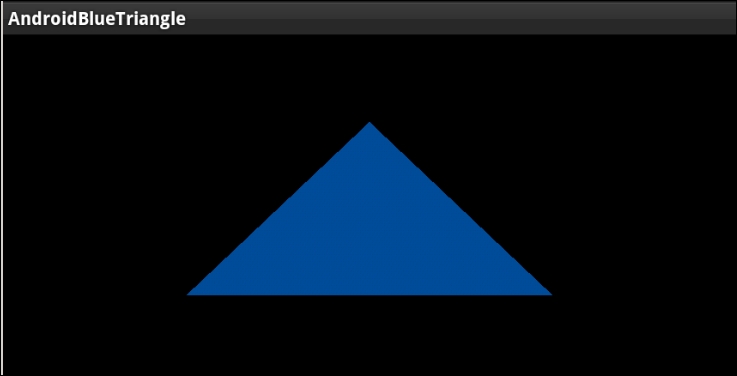
The first Android recipe for OpenGL ES 3.0 contains two OpenGL ES classes:
GLESActivityis an extended version of Activity. Activity is an application component that allows various types of views on the screen. Each activity has a window region, within which various type of views are rendered. For our requirements, we need a surface where we can render OpenGL ES. Therefore, theGLESActivityclass is usingGLESViewfor viewing purpose.GLESViewis our custom class that is extended fromGLSurfaceView. It provides a surface for OpenGL ES rendering. It helps OpenGL ES know about various events, such as the status of activity, whether it is in active or sleep mode, whether it has changed its dimensions, and so on.GLSurfaceViewprovides some important class interfaces. Among them, the three most important ones are as follows:GLSurfaceView.EGLConfigChooser: This class is responsible for choosing the correct EGL configuration, as per our requirements. Basically, an EGL is an interface between the OpenGL ES APIs and the rendering context. In order to use the correct rendering context, we should know the EGL configuration that suits our requirements. In this recipe, we have extendedConfigChooserfromGLSurfaceView.EGLconfigChooser.GLSurfaceView.EGLContextFactory: The rendering context is very much dependent on the device hardware configuration. OpenGL ES APIs do not know or care about creating the rendering context. Your local SDK provider is responsible for providing an interface to create it and attach it to your local application system. In Android, it is accomplished with theEGLContextFactoryclass. This requires EGL configuration. We have already seen how theEGLConfigChooserclass gave us the correct EGL configuration, as per our requirement. You need to use this configuration to create your customContextFactory, which is the extended version ofGLSurfaceView.EGLContextFactoryin our recipe.To create OpenGL ES 3.0 context, use the
eglCreateContextfunction. This function accepts an attribute list where the second item belongs to the OpenGL ES version, which must be 3.0. See the sample code give here for OpenGL ES 3.0 support:private static double glVersion = 3.0; int[] attrib_list = {EGL_CONTEXT_CLIENT_VERSION, (int) glVersion, EGL10.EGL_NONE }; EGLContext context = egl.eglCreateContext(display, eglConfig, EGL10.EGL_NO_CONTEXT, attrib_list);GLSurfaceView.Renderer: This provides the interface to manage OpenGL ES calls to render a frame. It calls the render function in loop.
NativeTemplate.cpp: This is the native code file that contains OpenGL ES commands responsible for rendering the blue triangle on screen.
When the Android OpenGL ES framework launches an activity, it first checks the available EGL configurations on device and chooses the one best suited to our requirements. This configuration is used to create OpenGL ES rendering context. Finally, rendering is performed by GLSurfaceRenderer, where it calls the native OpenGL ES code with the help of the GLESNativeLib class.
The OpenGL ES rendering source is coded in NativeTemplate.cpp, which is exposed to the Android framework via the libglNative.so static library. This library is compiled from the NDK using the ndk-build command and is automatically stored under the folder AndroidBlueTriangle | libs | armeabi | libglNative.so.
You can explore more about the official Android OpenGL ES and its framework classes at http://developer.android.com/reference/android/opengl/package-summary.html.
Refer to the Software requirements for OpenGL ES 3.0 – Android ADT recipe in Appendix, Supplementary Information on OpenGL ES 3.0
Using JNI on Android to communicate with C/C++