
Using SketchUp as a repair tool
At times, you may come across a 3D model that your slicing software will not accept. While it would be great to think that a 3D model would be ready to print any time anyone created and shared it, this is just not always the case. It is not too hard to find examples of a .stl file that is missing faces from the mesh, or a 3D model that is completely the wrong size.
While it is easy to have a “plenty of fish in the sea” mentality and throw out these models and go look for alternatives, there are situations where you may have found the perfect file for your needs, but you just cannot get it to print. In that case, you may want to try importing the model into SketchUp and see if you can take care of the problems, manually.
Fixing it in the slicing program
It should be noted that many slicing programs out there have some repair options built into them. In some cases (such as a single missing face in the mesh), a fix might be as simple as clicking a button and letting the slicer fill in the gap. In many cases that I have seen, however, these repair tools are very basic and cannot fix anything but the most basic of issues.
I have this .stl file of a dog model that I want to print for a friend:

Figure 1.14 – A .stl file that looks good from a distance
The model looks good, but when I take it into my slicer it ends up looking weird. The problem is that there are holes in the mesh, and my slicer can’t seem to be able to figure out how to fix the problem.
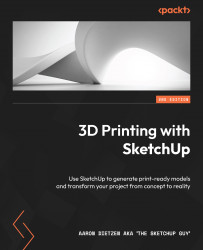
Using SketchUp, I can spin the model around quickly in 3D and zoom in on the mesh to see if I can identify any holes (I can even use a few different tools or extensions to help speed up the process, but we will get into them in Chapter 7, Importing and Modifying Existing 3D Models). In this specific example, if I orbit around the dog and take a look at the bottom of his front foot, I will see an issue.
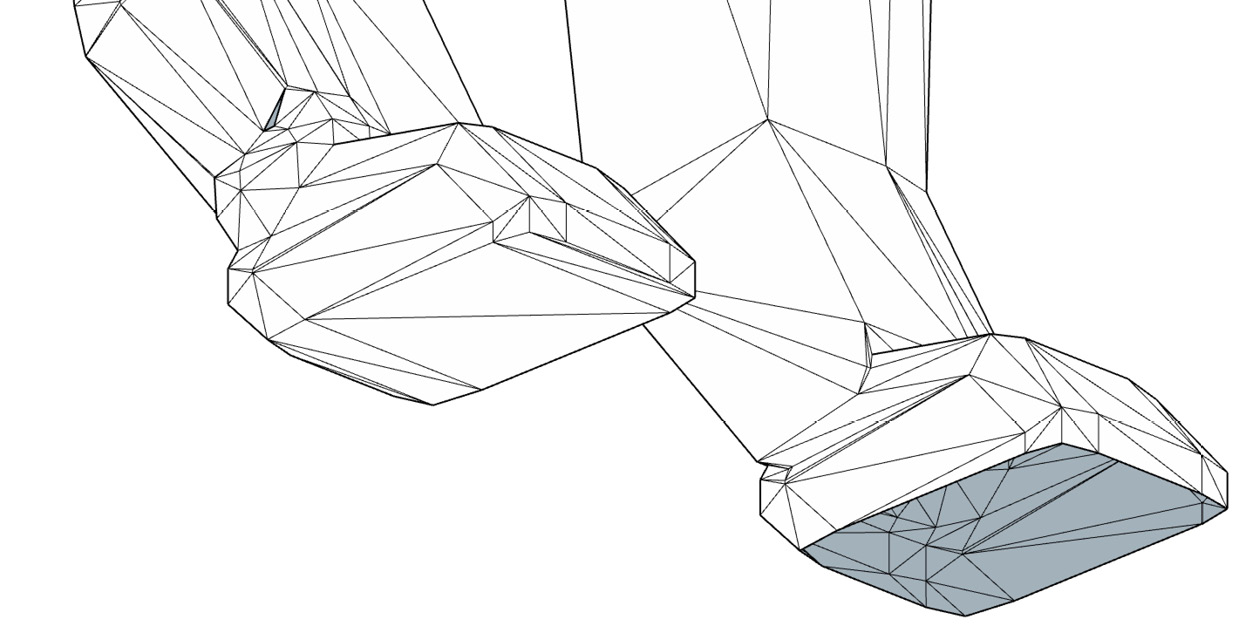
Figure 1.15 – Faces missing from the bottom of the dog’s foot
This is very easy to fix but, once it’s repaired, there is still an issue with this mesh. If I continue to explore the file, I find that the dog’s other front foot is missing a tiny little triangle.
Figure 1.16 – One more missing face in the mesh
Once I use SketchUp to create some very basic geometry to fill the holes, I can export a new .stl file and send it off to my slicer to get it ready for printing.