


To be able to forward the packets from one network to the other, Windows Server 2016 can act as a router for both IPv4 and IPv6 traffic, thanks to the built-in server role. In this way, the Windows Server 2016 computer can act on the network in a similar way to a hardware router device, with additional, Windows operating system-specific functionality. To be able to route traffic to and from different networks or subnets, you will need two or more physical network adapters.
Before you can configure a Windows Server 2016 as a router, you need to install a supporting role. To install a server role that supports routing, perform the following steps:
- Open Server Manager.
- Click on the Manage menu and choose Add Roles and Features.
- On the Before You Begin screen, click on Next. To skip this page next time, select Skip this page by default.
- On the Installation Type page, select Role-based or feature-based installation, and then click on Next.
- On the Server Selection page, under Server Pool, make sure that the current server is selected. Alternatively, select the server on which you want to install the routing support role. Then, click on Next.
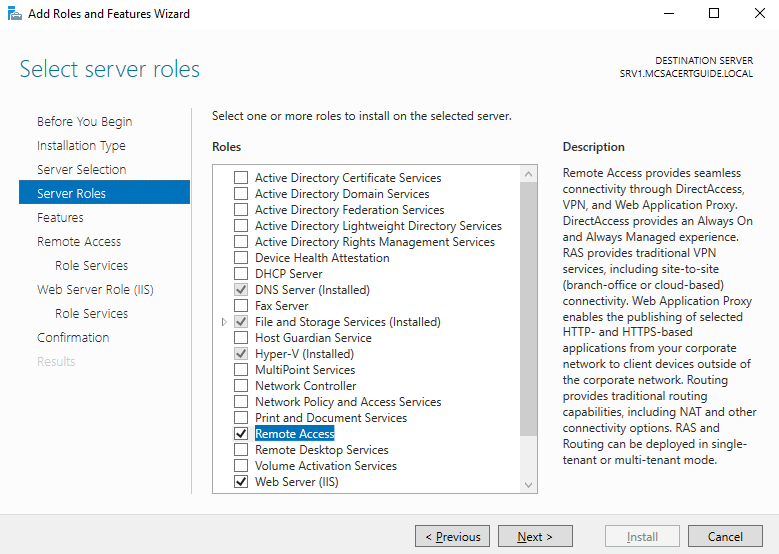
- On the Server Role page, select the Remote Access role; then, click on Next:
- On the Features page, click on Next.
- On the Remote Access page, read the information and then click on Next.
- On the Role Services page, select Routing, and then click on Add Features if Add Roles and Features Wizard prompts you to install features required for the routing role:
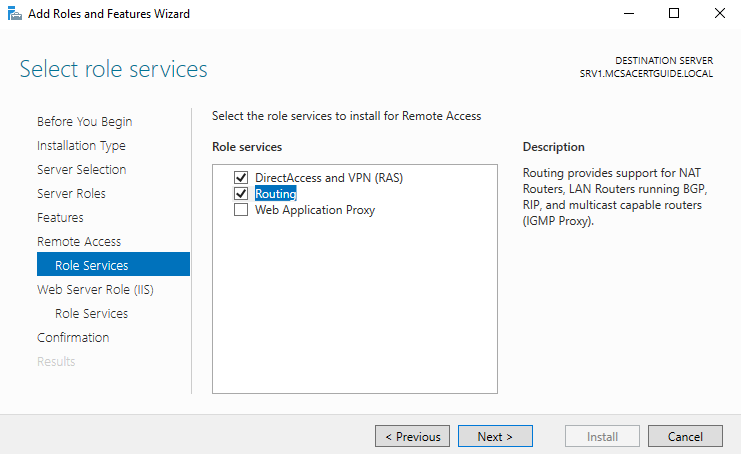
- The wizard automatically selects the DirectAccess and VPN (RAS) role and Web Server Role (IIS); then, click on Next.
- On the Role services page for Web Server Role (IIS), click on Next.
- On the Confirmation page, click on Install.
- When the installation finishes, observe the installation progress page and click on Close.
- After the installation finishes, observe the Server Manager window and the yellow triangle containing an exclamation mark near the flag.
- Click on the flag and yellow triangle:
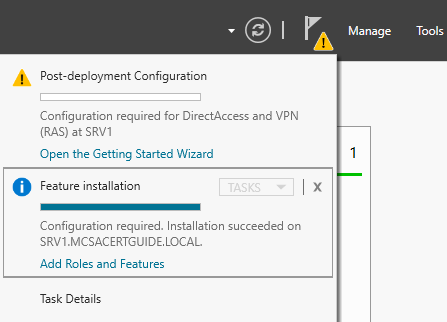
- The menu shows that the installed DirectAccess and VPN role needs post-deployment configuration in order to be functional.
To configure Windows Server 2016 functionality as a router, perform the following steps:
- Open Server Manager.
- Click on the Tools menu and choose Routing and Remote Access.
- The Routing and Remote Access window opens. Right-click on a server that you want to configure and choose Configure and Enable Routing and Remote Access.
- The Routing and Remote Access Server Setup Wizard starts. Then, click on Next.
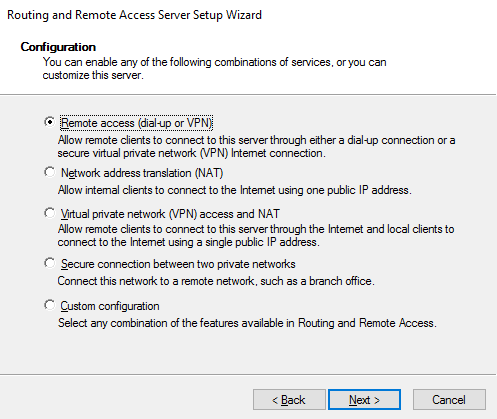
- On the Configuration page, select Custom configuration, and then click on Next:
- On the Custom Configuration page, select LAN routing, and then click on Next:
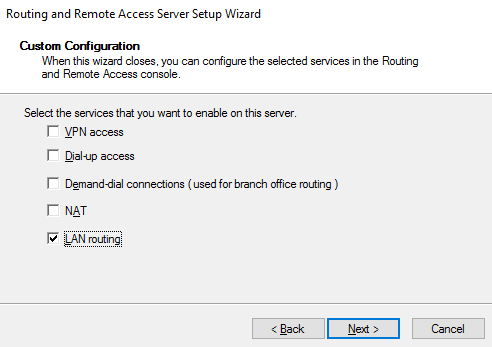
- Click on Finish.
- Now, wait a few seconds; when the Routing and Remote Access dialog box appears, click on Start Service.
To enable a routing protocol on a Windows Server 2016 operating system, complete the following steps:
- Open Server Manager.
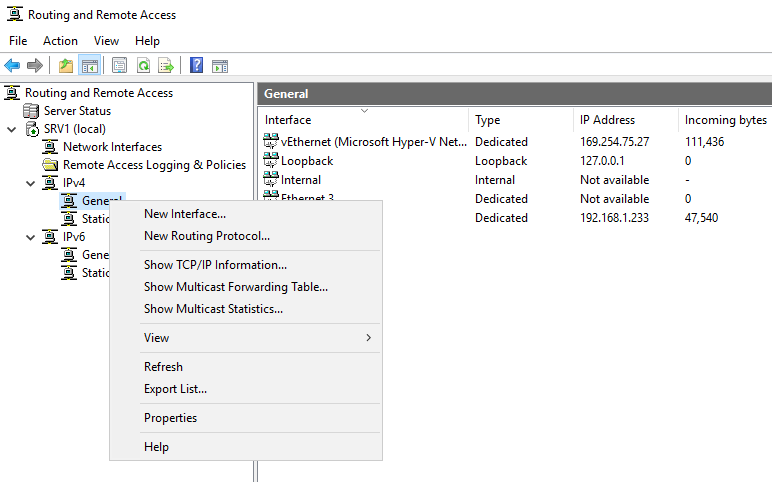
- Click on the Tools menu and choose Routing and Remote Access.
- Under the IPv4 node, right-click on General and choose New Routing Protocol…:
- Select RIP Version 2 for Internet Protocol and click on OK:
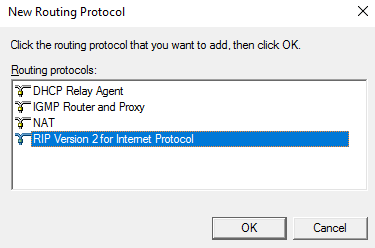
- Note that you will not be able to add the RIP protocol if there are no usable network interfaces installed on a computer. Right-click on RIP and select New Interface….
- Choose a network interface to enable RIP on and click on OK; a RIP Properties page opens.
- You can accept the defaults, or make the desired changes, and then click on OK to enable the RIP routing protocol on an applicable network interface.
Windows Server 2016 supports Border Gateway Protocol (BGP). BGP is a dynamic routing protocol, which means that it "learns" the routes between connected sites. To install BGP support in the Windows Server 2016 operating system, you must enable the support for each tenant using the PowerShell Enable-RemoteAccessRoutingDomain command.
The following example demonstrates how to install RAS in multitenancy mode with VPN, RAS, and BGP support:
$Sample_RoutingDomain = "SampleTenant"
Install-RemoteAccess -MultiTenancy
Enable-RemoteAccessRoutingDomain -Name $Sample_RoutingDomain -Type All -PassThru
To enable BGP only, without multitenancy capabilities, use the following PowerShell command:
Install-RemoteAccess –VpnType RoutingOnly


