

In this step, you'll create your first scene and add a couple of objects and a camera. Our first example will contain the following objects:
|
Object |
Description |
|
Plane |
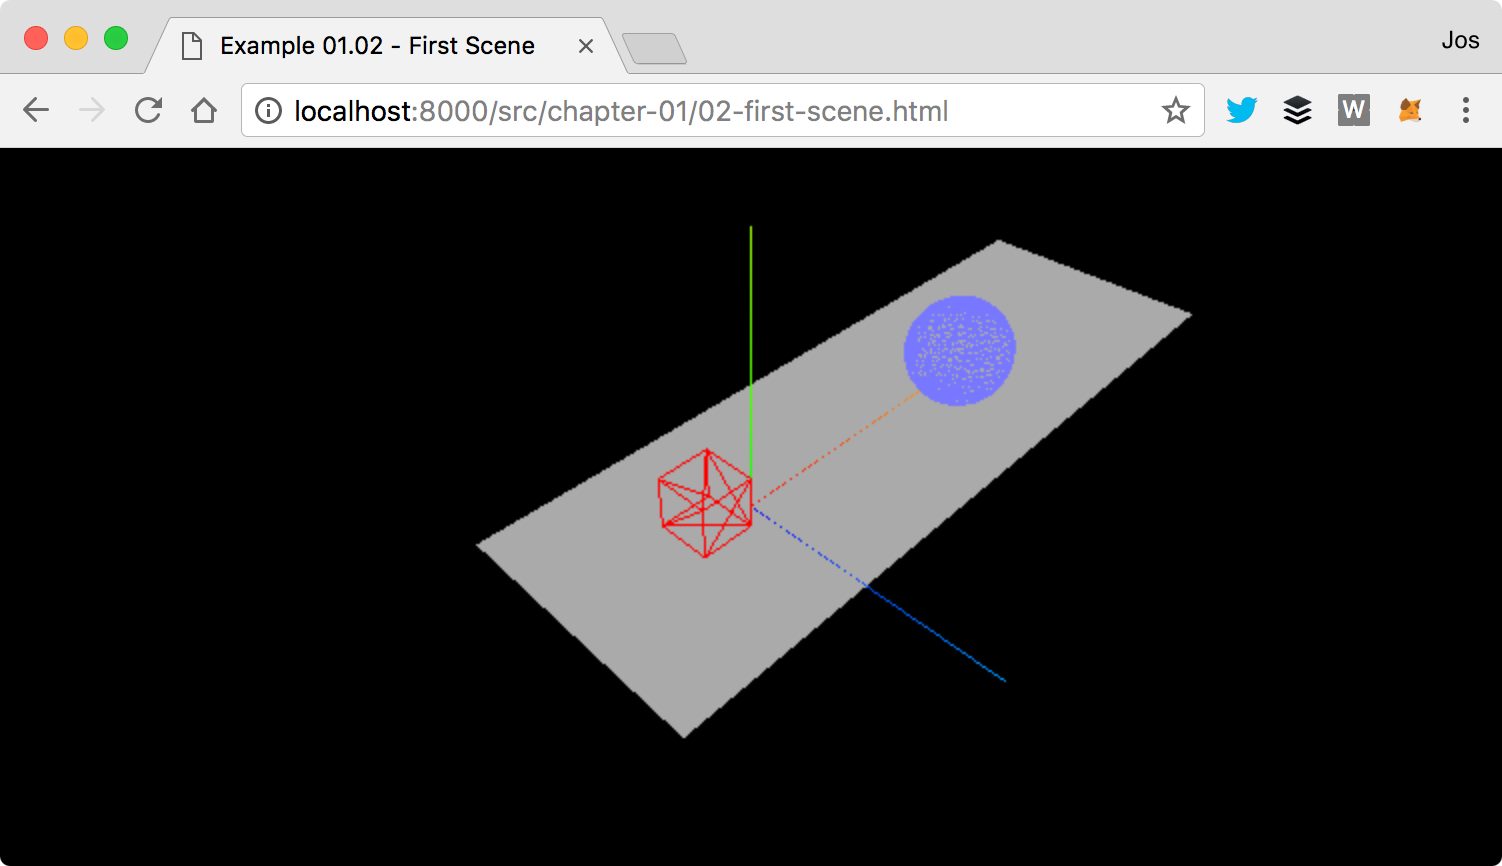
This is a two-dimensional rectangle that serves as our ground area. In the second screenshot of this chapter, this is rendered as the gray rectangle in the middle of the scene. |
|
Cube |
This is a three-dimensional cube, which we'll render in red. |
|
Sphere |
This is a three-dimensional sphere, which we'll render in blue. |
|
Camera |
The camera determines what you'll see in the output. |
|
Axes |
These are the x, y, and z axes. This is a helpful debugging tool to see where the objects are rendered in 3D space. The x axis is colored red, the y axis is colored green, and the z axis is colored blue. |
I'll first show you how this looks in code (the source with comments can be found in chapter-01/js/01-02.js), and then I'll explain what's happening:
function init() {
    var scene = new THREE.Scene();
    var camera = new THREE.PerspectiveCamera(45, window.innerWidth / window.innerHeight, 0.1, 1000);
    var renderer = new THREE.WebGLRenderer();
    renderer.setClearColor(new THREE.Color(0x000000));
    renderer.setSize(window.innerWidth, window.innerHeight);

    var axes = new THREE.AxesHelper(20);
    scene.add(axes);

    var planeGeometry = new THREE.PlaneGeometry(60, 20);
    var planeMaterial = new THREE.MeshBasicMaterial({
        color: 0xAAAAAA
    });

    var plane = new THREE.Mesh(planeGeometry, planeMaterial);
    plane.rotation.x = -0.5 * Math.PI;
    plane.position.set(15, 0, 0);
    scene.add(plane);

    // create a cube
    var cubeGeometry = new THREE.BoxGeometry(4, 4, 4);
    var cubeMaterial = new THREE.MeshBasicMaterial({
        color: 0xFF0000,
        wireframe: true
    });
    var cube = new THREE.Mesh(cubeGeometry, cubeMaterial);
    cube.position.set(-4, 3, 0);
    scene.add(cube);

    // create a sphere
    var sphereGeometry = new THREE.SphereGeometry(4, 20, 20);
    var sphereMaterial = new THREE.MeshBasicMaterial({
        color: 0x7777FF,
        wireframe: true
    });
    var sphere = new THREE.Mesh(sphereGeometry, sphereMaterial);
    sphere.position.set(20, 4, 2);
    scene.add(sphere);

    // position and point the camera to the center of the scene
    camera.position.set(-30, 40, 30);
    camera.lookAt(scene.position);

    // add the output of the renderer to the html element
    document.getElementById("webgl-output").appendChild(renderer.domElement);

    // render the scene
    renderer.render(scene, camera);
}
If we open this example in the browser, we see something that resembles what we're aiming at (see the screenshot at the beginning of this chapter), but it is still a long way off, as follows:
Before we start making this more beautiful, I'll first walk you through the code one step at a time so that you understand what the code does:
var scene = new THREE.Scene();
var camera = new THREE.PerspectiveCamera(45, window.innerWidth / window.innerHeight, 0.1, 1000);
var renderer = new THREE.WebGLRenderer();
renderer.setClearColor(new THREE.Color(0x000000));
renderer.setSize(window.innerWidth, window.innerHeight);
At the top of the example, we create a scene, a camera, and a renderer. The scene object is a container that is used to store and keep track of all the objects we want to render and all the lights we want to use. Without a THREE.Scene object, Three.js isn't able to render anything. More information on the THREE.Scene object can be found in Chapter 2, The Basic Components that Make Up a Three.js Application. The sphere and the cube we want to render will be added to the scene later on in the example.
In this first fragment, we also create a camera object. The camera object defines what we'll see when we render a scene. In Chapter 2, The Basic Components That Make Up a Three.js Application, you learn more about the arguments you can pass into the camera object. Next, we define renderer. The renderer object is responsible for calculating what the scene object will look like in the browser based on what the camera is looking at. We create a WebGLRenderer that uses your graphics card to render the scene in this example.
We set the background color of renderer to black (new THREE.Color(0X000000)) with the setClearColor function and tell renderer how large the scene needs to be rendered using the setSize function. By passing in the window.innerWidth and window.innerHeight, we use all the screen space available.
So far, we've got a basic empty scene, a renderer, and a camera. There is, however, nothing yet to render. The following code adds the lines showing the axis and the plane:
var axes = new THREE.AxesHelper(20);
scene.add(axes);

var planeGeometry = new THREE.PlaneGeometry(60, 20);
var planeMaterial = new THREE.MeshBasicMaterial({
    color: 0xAAAAAA
});
var plane = new THREE.Mesh(planeGeometry, planeMaterial);
plane.rotation.x = -0.5 * Math.PI;
plane.position.set(15, 0, 0);
scene.add(plane);
As you can see, we create an axes object (the passed-in value determines the size of the lines representing the x, y, and z axes) and use the scene.add function to add these axes to our scene. Next, we create the plane. This is done in two steps. First, we define what the plane looks like using the new THREE.PlaneGeometry(60,20) code. In this case, it has a width of 60 and a height of 20. We also need to tell Three.js what this plane looks like (for example, its color and its transparency). In Three.js, we do this by creating a material object. For this first example, we'll create a basic material (THREE.MeshBasicMaterial) with the color 0xAAAAAA. Next, we combine these two into a Mesh object and assign that to the plane variable. Before we add plane to the scene, we need to put it in the correct position; we do this by first rotating it 90 degrees around the x axis, and next, set its position in the scene using the position property. If you're already interested in the details of this, look at the 06-mesh-properties.html example from the code folder of Chapter 2, The Basic Components That Make Up a Three.js Application, which shows and explains rotation and positioning. All we then need to do is add plane to scene, just like we did with axes.
The cube and sphere objects are added in the same manner, but with the wireframe property set to true, which tells Three.js to show us a wireframe and not a solid object. Now, let's move on to the final part of this example:
camera.position.set(-30, 40, 30);
camera.lookAt(scene.position);

document.getElementById("webgl-output").appendChild(renderer.domElement);
renderer.render(scene, camera);
At this point, all the elements we want to render are added to the scene at the correct positions. We've already mentioned that the camera defines what will be rendered. In this piece of code, we position the camera using the set function to hover above our scene (we can also use position.x, position.y, and position.z to set the individual parts of the camera's position). To make sure the camera is looking at our objects, we use the lookAt function to point it at the center of our scene, which is located at position (0, 0, 0) by default. All that is left to do is append the output from the renderer to the <div> element of our HTML skeleton. We use standard JavaScript to select the correct output element and append it to our div element with the appendChild function. Finally, we tell renderer to render scene using the camera object provided.
In the next couple of sections, we'll make this scene more interesting by adding lights, shadows, more materials, and even animations.