
Playing with Google Colab – CPUs, GPUs, and TPUs
Google offers a truly intuitive tool for training neural networks and for playing with TensorFlow (including 2.x) at no cost. You can find an actual Colab, which can be freely accessed, at https://colab.research.google.com/ and if you are familiar with Jupyter notebooks, you will find a very familiar web-based environment here. Colab stands for Colaboratory and it is a Google research project created to help disseminate machine learning education and research.
Let's see how it works, starting with the screenshot shown in Figure 32:
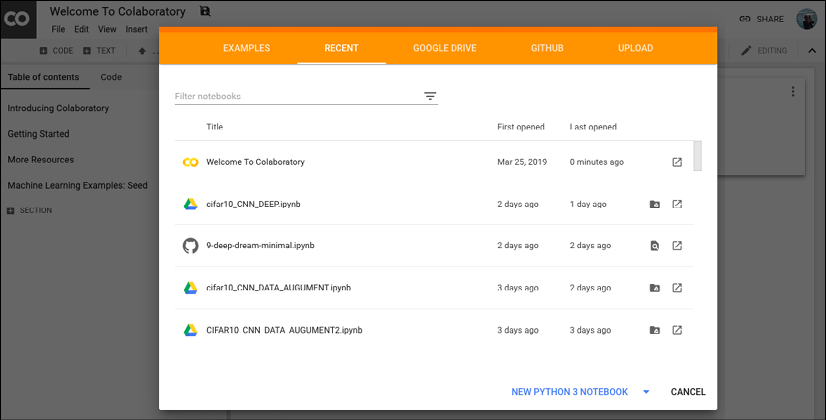
Figure 32: An example of notebooks in Colab
By accessing Colab, you can either check a listing of notebooks generated in the past or you can create a new notebook. Different versions of Python are supported.
When we create a new notebook, we can also select whether we want to run it on CPUs, GPUs, or in Google's TPUs as shown in Figure 25 (see Chapter 16, Tensor Processing Unit for more details on these):
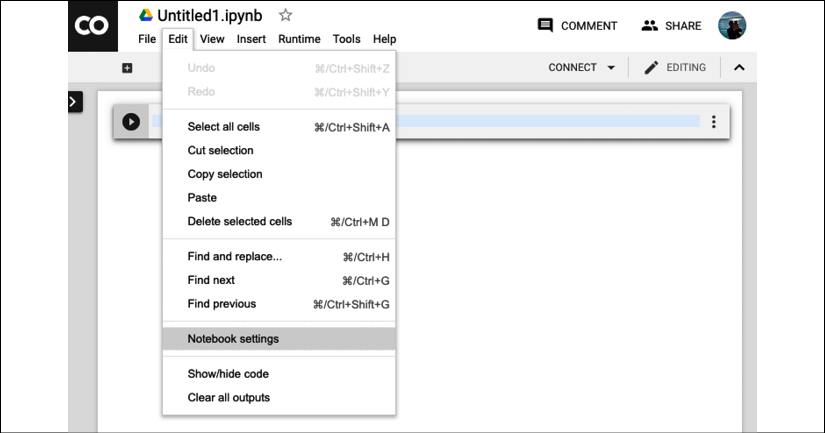
Figure 33: Selecting the desired hardware accelerator (None, GPUs, TPUs) - first step
By accessing the Notebook settings option contained in the Edit menu (see Figure 33 and Figure 34), we can select the desired hardware accelerator (None, GPUs, TPUs). Google will allocate the resources at no cost, although they can be withdrawn at any time, for example during periods of particularly heavy load. In my experience, this is a very rare event and you can access colab pretty much any time. However, be polite and do not do something like start mining bitcoins at no cost – you will almost certainly get evicted!

Figure 34: Selecting the desired hardware accelerator (None, GPUs, TPUs) - second step
The next step is to insert your code (see Figure 35) in the appropriate colab notebook cells and voila! You are good to go. Execute the code and happy deep learning without the hassle of buying very expensive hardware to start your experiments! Figure 35 contains an example of code in a Google notebook:
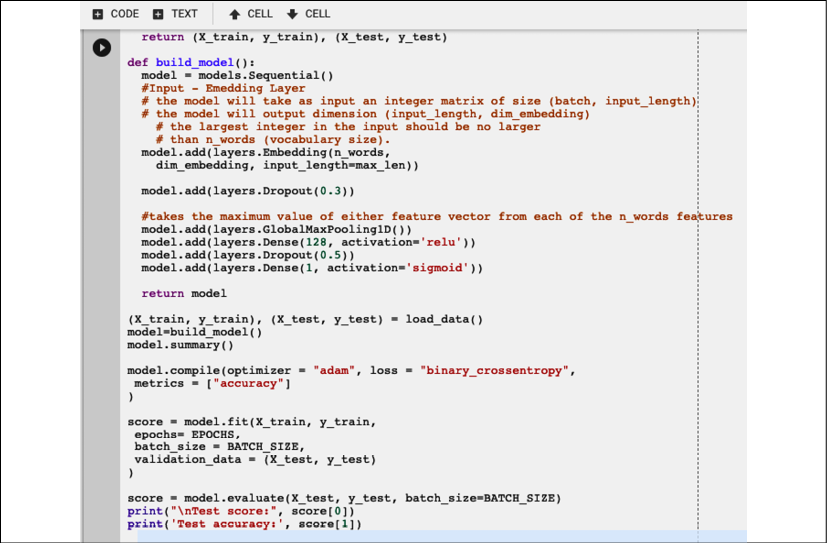
Figure 35: An example of code in a notebook