
To log into an existent repository, follow these instructions:
Launch Spoon.
If the repository dialog window doesn't show up, select Repository | Connect to repository from the main menu. The repository dialog window appears.
In the drop-down list, select the repository you want to log into.
Type your username and password. If you have never created any users, use the default username and password—
adminandadmin. Click on OK.You will now be logged into the repository. You will see the name of the repository in the upper-left corner of Spoon:
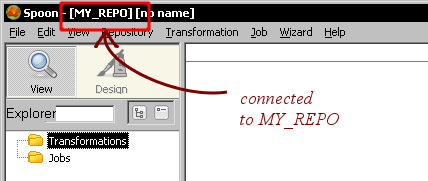
You opened Spoon and logged into a repository. In order to do that, you provided the name of the repository and proper credentials. Once you did it, you were ready to start working with the repository.
If you want to work with the repository storage system, you have to log into the repository before you begin your work. In order to do that, you have to choose the repository and provide a repository username and password.
The repository dialog that allows you to log into the repository can be opened from the main Spoon menu. If you intend to log into the repository often, you'd better select Edit | Options... and check the general option Show repository dialog at startup?. This will cause the repository dialog to always show up when you launch Spoon.
It is possible to log into the repository automatically. Let's assume you have a repository named MY_REPO and you use the default user. Add the following lines to the kettle.properties file:
KETTLE_REPOSITORY=MY_REPO
KETTLE_USER=admin
KETTLE_PASSWORD=admin
The next time you launch Spoon, you will be logged into the repository automatically.
Tip
For details about the kettle.properties file, refer to the section on Kettle variables in Chapter 2.
To log into a repository, you need a user account. Every repository user has a profile that dictates the permissions that the user has on the repository. There are three predefined profiles:
There are also two predefined users:
If you have Administrator profile, you can create, modify, rename, or delete users and profiles from the Repository explorer. For details, please refer to the section Examining and modifying the contents of a repository with the Repository explorer, later in this chapter. Any user may change his/her own user information both from the Repository explorer and from the Repository | Edit current user menu optio.
In a repository, the jobs and transformations are organized in folders. A folder in a repository fulfills the same purpose as a folder in your drive—it allows you to keep your work organized. Once you create a folder, you can save both transformations and jobs in it.
While connected to a repository you design, preview, and run jobs and transformations just as you do with files. However, there are some differences when it comes to opening, creating, or saving your work. So, let's summarize how you do those tasks when logged into a repository:
|
Task |
Procedure |
|---|---|
|
Open a transformation / job |
Select File | Open. The Repository explorer shows up. Navigate the repository until you find the transformation or job you want to open. Double-click it. |
|
Create a folder |
Select Repository | Explore repository, expand the transformation or job tree, locate the parent folder, right-click and create the folder. Alternatively, double-click the parent folder. |
|
Create a transformation |
Select File | New | Transformation or press Ctrl+N. |
|
Create a Job |
Select File | New | Job or press Ctrl+Alt+N. |
|
Save a transformation |
Press Ctrl+T. Give a name to the transformation. In the Directory textbox, select the folder where the transformation is going to be saved. Press Ctrl+S. The transformation will now be saved in the selected directory under the given name. |
|
Save a job |
Press Ctrl+J. Give a name to the job. In the Directory textbox, select the folder where the job is going to be saved. Press Ctrl+S. The job will be saved in the selected directory under the given name. |
Besides users, profiles, jobs, and transformations, there are some additional PDI elements that you can define:
|
Element |
Description |
|---|---|
|
Connection definitions to relational databases. These are covered in Chapter 8. | |
|
Partitioning is a mechanism by which you send individual rows to different copies of the same step—for example, based on a field value. This is an advanced topic not covered in this book. | |
|
Slave servers are installed in remote machines to execute jobs and transformations remotely. They are introduced in Chapter 13. | |
|
Clusters |
Clusters are groups of slave servers that collectively execute a job or a transformation. They are also introduced in Chapter 13. |
All these elements can also be created, modified, and deleted from the Repository explorer.
Once you create any of these elements, it is automatically shared by all repository users.
A PDI repository is a database. As such, you may regularly backup it with the utilities provided by the RDBMS. However, PDI offers you a method for creating a backup in an XML file.
You create a backup from the Repository explorer. Right-click the name of the repository and select Export all objects to an XML file. You will be asked for the name and location of the XML file that will contain the backup data. In order to back up a single folder, instead of right-clicking the repository name, right-click the name of the folder.
You can restore a backup made in an XML file also from the Repository explorer. Right-click the name of the repository and select Import all objects from an XML file. You will be asked for the name and location of the XML file that contains the backup.