

The Repository explorer shows you a tree view of the repository to which you are connected. From the main Spoon menu, select Repository | Explore Repository and you get to the explorer window. The following screenshot shows you a sample Repository explorer screen:
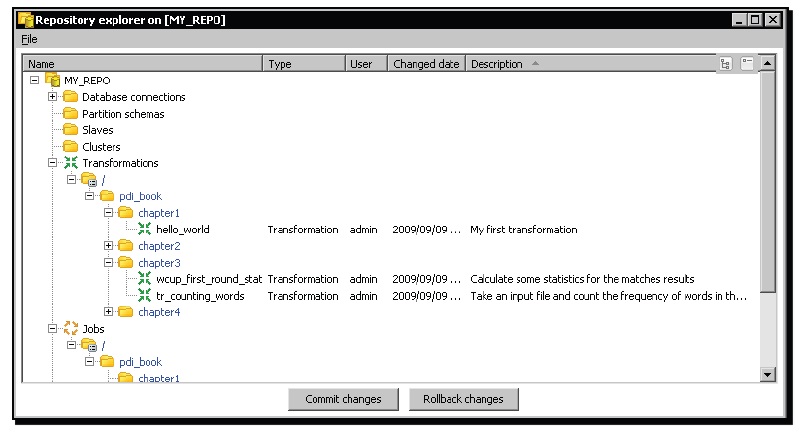
In the tree you can see: Database connections, Partition schemas, Slave servers (slaves in the tree), Clusters, Transformations, Jobs, Users, and Profiles.
You can sort the different elements by name, user, change data, or description by just clicking on the appropriate column header: Name, User, Changed date, or Description. The sort is made within each flder.
The Repository explorer not only shows you these elements, but also allows you to create, modify, rename, and delete them. The following table summarizes the available actions:
|
Action |
Procedure |
Example |
|---|---|---|
|
Create a new element |
Double-click the name of the element at the top of the list. Alternatively, right-click any element in its category and select the New option. |
In order to create a new user, double-click the word Users at the top of the users list, or right-click any user and select New User. |
|
Right-click it and select the Open option. Alternatively, double-click it. |
In order to edit a job, double-click it, or right-click and select Open job. | |
|
Right-click it and select the Delete option. |
In order to delete a user, right-click it and select Delete user. |
Note
When you explore the repository, you don't see jobs and transformations mixed. Consequently, the whole folder tree appears twice—once under Transformations and then under Jobs.
In order to confirm your work, click on Commit changes. If you make a mistake, click on Rollback changes.