

Before we add audio to our scene, we need to cover a few more basic concepts within Unity.
Of course, the best way to do that is to get hands on and explore more of the scene objects with the following exercise:
- If you have taken a break, open back up Unity and reload the
GameAudioBasicsproject, which we saved at the end of the last section. Of course, if you haven't taken a break, good for you, and just continue as you were. - Now, divert your attention to the
Hierarchywindow and specifically the search field at the top of the window. Click on the down arrow at the left of the search field, to select the form of the search as shown in the following screenshot:
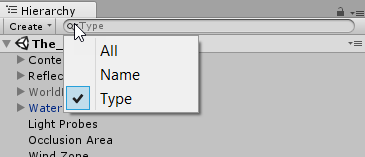
Setting the search type
- Now, enter
AudioListener; make sure to use the same case in the search field. This will filter the GameObject in theHierarchywindow with an AudioListener component attached, as shown in the following screenshot:
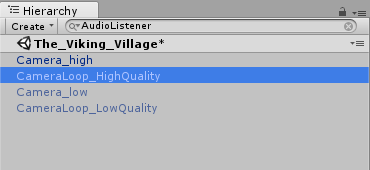
Hierarchy window showing filtered list of game objects with AudioListener
- As you can see, this filtered list of objects is showing us the various scene cameras. A camera in Unity is what captures the rendered view of the scene. As such, you can think of a camera as the player's eyes to the game world. Therefore, it only makes sense that we also make the camera be able to listen to the world using the AudioListener component. That way, as the camera moves around the scene, the ears or Audio Listener, will also be tightly coupled.
Note
A GameObject in Unity is the base scene object. What differentiates one object from another is the components attached to the GameObject. A component is a script that applies specialized functionality to a GameObject. A component could include everything from a camera, audio listener, audio source, mesh renderer, and so much more. The Inspector window allows you to view, modify, add, and remove components on a GameObject.
- Select
Camera_highat the top of the list in theHierarchywindow and take a look at theInspectorwindow and bottom-right corner of theSceneview as shown in the following screenshot:
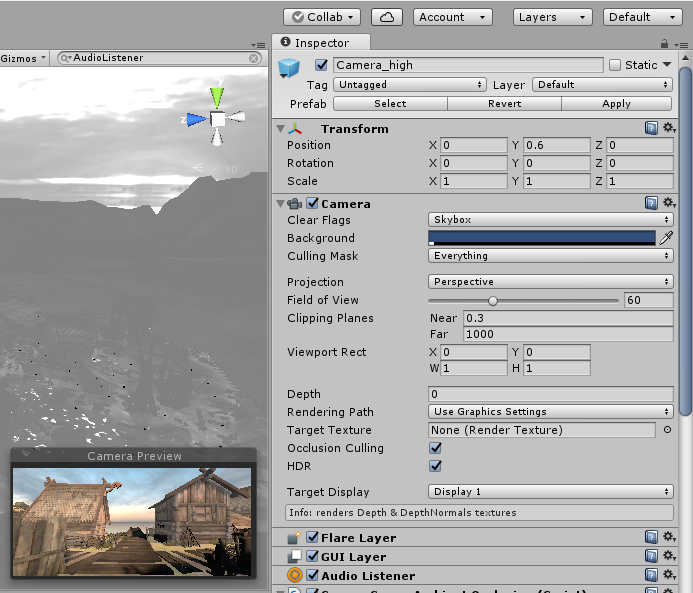
Camera preview and Inspector window
- As you can see, there are a number of components attached to the
Camera_highobject in theInspectorwindow. We won't get into the details of all the components but just take notice of theCameraandAudio Listener. Remember that these two components equate to the scene's eyes and ears. Select theCamera_highobject selected and press thePlaybutton to run the scene. - After the scene starts running and switches to the
Gameview, press the Esc key to unlock the mouse. Then, go to theInspectorwindow and scroll through the components. Feel free to turn off and on components by unchecking the checkbox beside the component name. You can even alter the component settings if you like. Notice how theGameview changes as you make those changes. Don't be afraid to change several things; as long as you are in play mode, nothing will be saved. - When you are done with exploring the
Inspectorwindow, press the Play button again to stop the game running.
Good. As you can see, we already have a number of Audio Listener components set up on the scene. This means that we can certainly hear any audio. However, we are still missing the source of our audio, which hasn't been configured. In the next section, we will add an Audio Source component to our scene.
In order to hear any audio in a scene, we need two components added to game objects. They are the Audio Listener - the ears, and the Audio Source - the noise. As you probably already realized, the dead silence of our scene must mean there are no configured Audio Sources. In the following exercise, we are going to rectify that issue by adding an Audio Source:
- Open the Unity editor and make sure the
Viking Villagescene is loaded. If you are continuing from the last section, be sure to click on theXon the right side of theHierarchywindow search field. This will remove the type filter and show all the scene objects again. - Locate the GameObject called
AccessibleVolumein theHierarchywindow and click on the arrow beside it to expand and show its child objects. Select theCapsule 5object and press F, to frame select the object as shown in the following screenshot:
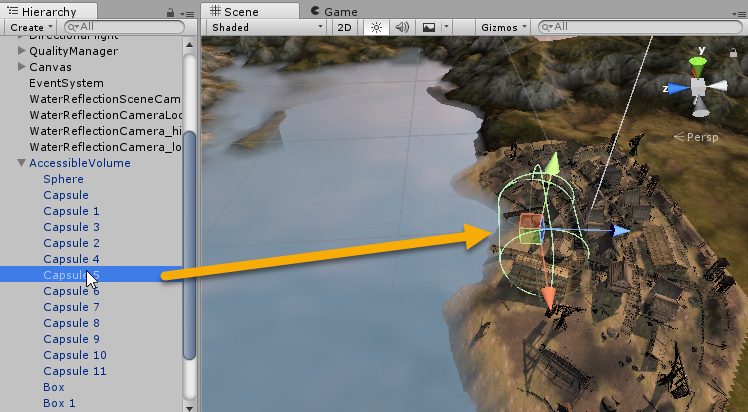
Frame selecting the Capsule 5 GameObject
- What we want to do is use the
Capsule 5object as an Audio Source for ourlake-shore-wavesambient sound we imported earlier. We will use this object as it is conveniently situated close to where we want our Audio Source. Before adding the audio though, let's make a couple changes to the capsule.
Note
We are going to add the audio to the scene following the audio layers and groups we defined earlier. Therefore, the first layer we will be adding the audio to is for the ambient and environmental background noises.
- With the capsule object still selected, rename the object
Ambient_lake-shore-wavesand then set theZposition on theTransformcomponent to60as shown in the following screenshot:
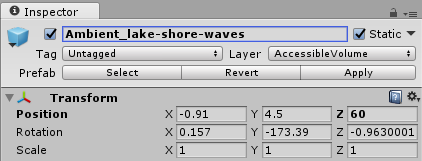
Renaming and altering the position of the Capsule 5 GameObject
Note
Giving your game objects an appropriate name is essential, especially as your scene becomes more complex. Notice how we prefixed the object name with our layer name and then followed that with the audio clip name.
- After you changed the
Zposition of theTransform,you will notice that the object moves to shore of the lake in theSceneview. This is exactly what we want, as this capsule object will be the source for the lake-shore-waves ambient sound. - Next, click on the button
Add Componentbutton at the bottom of theInspectorwindow. Typeaudioin the search text and notice how the list filters to components with audio in the name. Select the Audio Listener component as shown in the following screenshot:
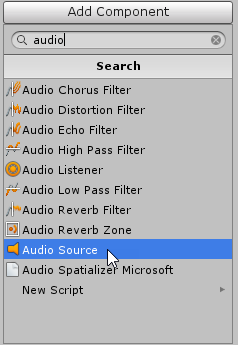
Adding the Audio Source component
- We now have an empty
Audio Sourcecomponent on our object. Click on the target icon located next to theAudioClipproperty. This will open theSelect AudioClipdialog. Select thelake-shore-waves2clip from the list as shown in the following screenshot:
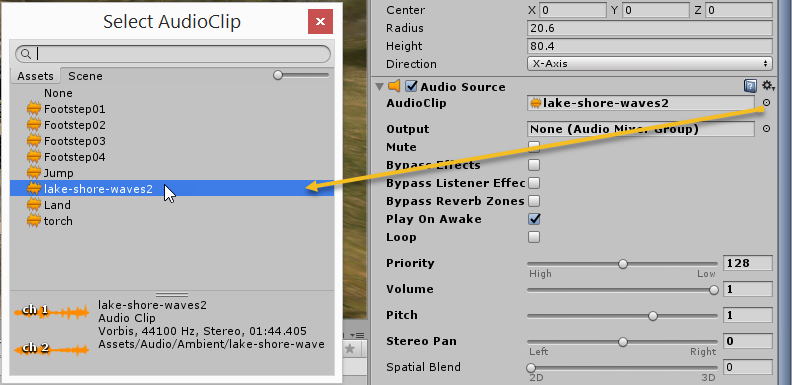
Setting the AudioClip on the component
- Close the dialog after selecting the clip. We won't worry about all the other settings on the component right now. However, we do want to make sure the clip loops, since, after all, it is ambient sound that should keep playing over and over again. Click on the checkbox next to the
Loopsetting to make sure the audio loops.
Note
Audio clips will typically be designed to either play forever, called a loop, or play just once, called a single shot. In most cases, you will want your ambient sounds to loop, but not always. Whereas, audio-like weapons or footsteps will generally be a single shot. A looping audio clip is one that is designed to play over and over again with no noticeable break or change when the clip plays over.
- With the Audio Source is added to the scene, press the Play button. Explore the scene by moving around and listening to the audio as you move. When you are done exploring, press Ctrl+P (command + P on Mac) to stop the scene running.
- Select
File|Save Scenefrom the menu, to save the changes we made to the scene. It is a good habit to save your scene often in Unity and especially when you are working with large scenes.
Good, we now have an ambient Audio Source in our scene. Of course, most likely, the first thing you noticed is that the sound was everywhere and that certainly is not what we want. We obviously only want our waves sound to be more audible when we get closer to the lake and certainly not so pronounced everywhere. What we need is to make our Audio Source use 3D or spatial sound and this is exactly what we will cover in the next section.