

About the Book
Do you want to build your own websites, but have never really been confident enough to turn your ideas into real projects? If your web development skills are a bit rusty, or if you've simply never programmed before, The PHP Workshop will show you how to build dynamic websites using PHP with the help of engaging examples and challenging activities.
This PHP tutorial starts with an introduction to PHP, getting you set up with a productive development environment. You will write, execute, and troubleshoot your first PHP script using a built-in templating engine and server. Next, you'll learn about variables and data types, and see how conditions and loops help control the flow of a PHP program. Progressing through the chapters, you'll use HTTP methods to turn your PHP scripts into web apps, persist data by connecting to an external database, handle application errors, and improve functionality by using third-party packages.
By the end of this Workshop, you'll be well-versed in web application development, and have the knowledge and skills to creatively tackle your own ambitious projects with PHP.
About the Chapters
Chapter 1, Introducing PHP, introduces you to the PHP language, enabling you to set up your first development environment and write your first PHP scripts.
Chapter 2, Types and Operators, introduces the different types used in PHP programming.
Chapter 3, Control Statements, defines different branching and looping techniques and scenarios for the use of different control structures and conditions with operators.
Chapter 4, Functions, looks at functions and the difference between built-in functions and custom functions, as well as exploring the callback function.
Chapter 5, Object-Oriented Programming, explains everything you need to know to have a solid foundational knowledge of object-oriented programming for PHP. You will learn about interfaces, classes, namespaces, class instantiation, class field scopes, methods, magic methods, abstraction, inheritance, object composition, autoloading, and more.
Chapter 6, Using HTTP, explores HTTP requests, which are vital to understand and use in practical web applications. You will become familiar with request types and URL components, find out about common vulnerabilities on the World Wide Web and learn how to protect your application against attacks that exploit those vulnerabilities.
Chapter 7, Data Persistence, describes the utilization of databases, including coverage of their configuration and read and write operations.
Chapter 8, Error Handling, explains error levels and exceptions in PHP, including when they trigger, how they can be triggered, and also—very importantly—how to handle them when they occur.
Chapter 9, Composer, explains how to use the Composer dependency management tool and how to autoload dependencies into PHP scripts.
Chapter 10, Web Services, defines the ways of talking between different platforms by exchanging data.
Note
You can find the bonus chapter, PHPUnit, at: http://packt.live/3tTfEAe.
Conventions
Code words in text, database table names, folder names, filenames, file extensions, pathnames, dummy URLs, user input, and Twitter handles are shown as follows:
"The echo construct is one way to print to the screen."
Words that you see on the screen, for example, in menus or dialog boxes, also appear in the text like this: "Open Insomnia and click on the New Request button."
A block of code is set as follows:
<?php
$language = "PHP";
$version = 7.3;
echo $language;
echo $version;
?>
New terms and important words are shown like this: "Welcome to the world of Hypertext Preprocessor (PHP)."
Long code snippets are truncated and the corresponding names of the code files on GitHub are placed at the top of the truncated code. The permalinks to the entire code are placed below the code snippet. It should look as follows:
Example1.01.php
1 <!DOCTYPE html>
2 <html lang="en">
3 <head>
4     <meta charset="UTF-8">
5     <meta name="viewport" content="width=device-width, initial-scale=1.0">
6     <meta http-equiv="X-UA-Compatible" content="ie=edge">
7    <title>My First PHP Page</title>
8 </head>
Before You Begin
Each great journey begins with a humble step. Our upcoming adventure in the land of PHP is no exception. Before we can do awesome things with data, we need to be prepared with a productive environment. In this section, we shall see how to do that.
Installing PHP 7.3 (Ubuntu)
All the exercises in this book were run with PHP 7.3 on Linux Ubuntu 18.10. Since PHP is cross-platform, you can use it on Windows version 7+ (Visual Studio 2015 required) and macOS as well.
Ubuntu 18.04 LTS ships with PHP 7.2 by default, so in order to install the latest stable PHP version, you should compile from source or install precompiled packages on your machine. Installing precompiled packages from trusted sources is often preferred since the time for installation is much lower than that for compiling from source code. In your Terminal, run the following (one line at a time, with superuser privileges):
apt-get update
apt-get install -y software-properties-common
LC_ALL=C.UTF-8 add-apt-repository -y ppa:ondrej/php
apt-get update
apt-get install -y php7.3-common php7.3-curl php7.3-mbstring php7.3-mysql
Installing PHP 7.3 (Mac OS X)
PHP 7.3 can be installed easily using Liip's php-osx tool:
curl -s https://php-osx.liip.ch/install.sh | bash -s 7.3
Or, if you prefer using Homebrew:
brew install [email protected]
Note
To install Homebrew just run /usr/bin/ruby -e "$(curl -fsSL https://raw.githubusercontent.com/Homebrew/install/master/install)"
Installing PHP 7.3 (Windows)
Here are the steps to install PHP 7.3 on a Windows system:
- Download the latest PHP 7 (non-thread safe version) ZIP file from https://windows.php.net/download/:

Figure 0.1: Downloading PHP 7
- Extract the contents of the ZIP file into
C:\PHP7. - Copy the
C:\PHP7\php.ini-developmentfile toC:\PHP7\php.ini. - Open the newly copied
C:\PHP7\php.inifile in a text editor, such as Notepad++, Atom, or Sublime Text. - Change
memory_limitfrom128Mto1G(to allow for the memory requirements of Composer). - Search for
extension_dirand uncomment the line (remove the leading semicolon, so the line will look likeextension_dir = "ext"). - To add
C:\PHP7to the Windows 10 system path environment variable, open the Control Panel and click onView advanced system settings:
Figure 0.2: Checking for advanced system settings
- Click the
Environment Variables…button:
Figure 0.3: Checking environment variables
- Click on the
Pathrow underSystem variables, and then click onEdit…:
Figure 0.4: Editing the variable
- Click
Newand add theC:\PHP7row:
Figure 0.5: Adding a new row
Click
OKfor all opened windows so far and close the Control Panel. - In a Command Prompt (PowerShell or another Terminal), test that the installation is successful by typing
php -v:
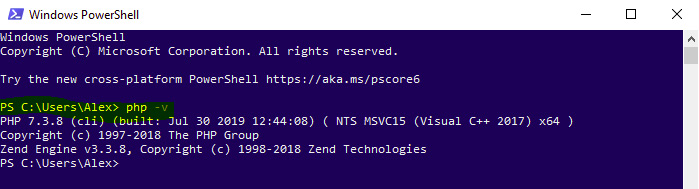
Figure 0.6: Testing the installation
Installing MySQL 5.7 (Ubuntu)
To install MySQL 5.7 on your system, run the following in your Terminal:
apt-get update
apt-get install -y mysql-server
Accessing MySQL as Root (Using sudo)
To access MySQL as a root user, run the following command in your Terminal:
sudo mysql --user=root
Creating a Test User
To create a test user, run the following command in the MySQL Terminal:
create user 'php-user'@'%' identified by 'php-pass';
Granting all Privileges on a Test User
To grant all privileges to a test user, run the following command in your Terminal:
grant all on *.* to 'php-user'@'%';
flush privileges;
In a production environment, you would carefully pick the required-by-the-app privileges only, restricting the range of privileges as much as possible. For more information about privileges on MySQL servers, visit https://dev.mysql.com/doc/refman/5.7/en/privileges-provided.html.
Installing MySQL Workbench on Ubuntu
Open the software manager, search for MySQL Workbench, and click on the Install button.
Installing MySQL 5.7 (Mac OS)
To install MySQL 5.7 using Homebrew, run the following command in your Terminal:
brew install [email protected]
Make MySQL run always as a service:
brew services start [email protected]
Repeat the "Accessing MySQL as Root", "Creating a Test User" and "Granting all Privileges on a Test User" steps from Linux installation above, in order to add the test user.
Installing MySQL Workbench on Mac OS
Here are the steps to install MySQL workbench on the Mac OS:
- Access https://dev.mysql.com/downloads/workbench/.
- Pick your operating system (macOS) and download the DMG file. For older Mac OS versions consider clicking on "
Looking for the latest GA version?" on the right-sided box. - Double-click the downloaded file. You will be presented with the installation window shown in the following figure:

Figure 0.7 MySQL Workbench macOS Installation Window
- Drag the MySQL Workbench icon onto the Applications icon as instructed. MySQL Workbench is now installed, and you can launch it from the Applications folder.
Installing MySQL 5.7 (Windows)
Install MySQL 5.7 on Windows as follows:
- Access https://dev.mysql.com/downloads/installer/.
- Click on the
Looking for previous GA versions?link from the following download box:
Figure 0.8: MySQL installer
- Pick the latest 5.7 version for Windows and click on the
Downloadbutton:
Figure 0.9: Downloading the appropriate version
- Run the downloaded file in order to install the MySQL Workbench.
- Pick
Developer Default(includes the MySQL Workbench as well) and clickNext:
Figure 0.10: Selecting the appropriate Setup Type
- Click
Executeto install the dependencies, and then clickNext. - Click on
Executeto start the download and install the selected components (click onTry againif the download or installation fails):
Figure 0.11: Installing the selected components
- Click
NextandFinishuntil you come to the MySQL Configuration windowAccount and Rolesprompt; enter a root user password. - Click on the
Add Userbutton and enterphp_userfor the username andphp-passfor the password (the same as the details entered when creating the user earlier), and clickOK:
Figure 0.12: Entering the credentials
Note
For Windows OS, the database username
php-userin code snippets for Chapter 7, Data Persistence will need to be replaced withphp_user. This is because the Windows installer for MySQL does not allow hyphens in usernames. - Hit
NextandExecuteuntil the installation process is complete.
Installing Composer
To install Composer on Ubuntu or Mac, you will need to go to https://getcomposer.org/download/ and run the four PHP commands under the Command-line installation section in the given link. There is an encryption code included in the commands to verify the download for security purposes. For example, the commands, at the time of writing, are included as follows (ensure you use the hash value generated for you, not the one shown below):
php -r "copy('https://getcomposer.org/installer', 'composer-setup.php');"
php -r "if (hash_file('sha384', 'composer-setup.php') === '48e3236262b34d30969dca3c37281b3b4bbe3221bda826ac6a9a62d6444cdb0dcd061569
8a5cbe587c3f0fe57a54d8f5') { echo 'Installer verified'; } else { echo 'Installer corrupt'; unlink('composer-setup.php'); } echo PHP_EOL;"
php composer-setup.php
php -r "unlink('composer-setup.php');"
On Windows, you can just download the installer file from https://getcomposer.org/Composer-Setup.exe.
Installing the Insomnia REST Client
Browse to https://insomnia.rest/download/ and download the installer file appropriate for your operating system. Open the installer and complete the installation wizard by selecting the default options.
If you prefer the command line, you can install the Client on Ubuntu using sudo snap install insomnia command, or brew cask install insomnia for macOS.
Installing the Code Bundle
Download the code files from GitHub at https://github.com/PacktWorkshops/The-PHP-Workshop and place them in a new folder called C:\Code. Refer to these code files for the complete code bundle.
If you have any issues or questions about installation, please email us at [email protected].