-
Book Overview & Buying
-
Table Of Contents

Advanced Deep Learning with TensorFlow 2 and Keras - Second Edition
By :
Advanced Deep Learning with TensorFlow 2 and Keras
By:
Overview of this book
Advanced Deep Learning with TensorFlow 2 and Keras, Second Edition is a completely updated edition of the bestselling guide to the advanced deep learning techniques available today. Revised for TensorFlow 2.x, this edition introduces you to the practical side of deep learning with new chapters on unsupervised learning using mutual information, object detection (SSD), and semantic segmentation (FCN and PSPNet), further allowing you to create your own cutting-edge AI projects.
Using Keras as an open-source deep learning library, the book features hands-on projects that show you how to create more effective AI with the most up-to-date techniques.
Starting with an overview of multi-layer perceptrons (MLPs), convolutional neural networks (CNNs), and recurrent neural networks (RNNs), the book then introduces more cutting-edge techniques as you explore deep neural network architectures, including ResNet and DenseNet, and how to create autoencoders. You will then learn about GANs, and how they can unlock new levels of AI performance.
Next, you’ll discover how a variational autoencoder (VAE) is implemented, and how GANs and VAEs have the generative power to synthesize data that can be extremely convincing to humans. You'll also learn to implement DRL such as Deep Q-Learning and Policy Gradient Methods, which are critical to many modern results in AI.
Table of Contents (16 chapters)
Preface

Introducing Advanced Deep Learning with Keras
 Free Chapter
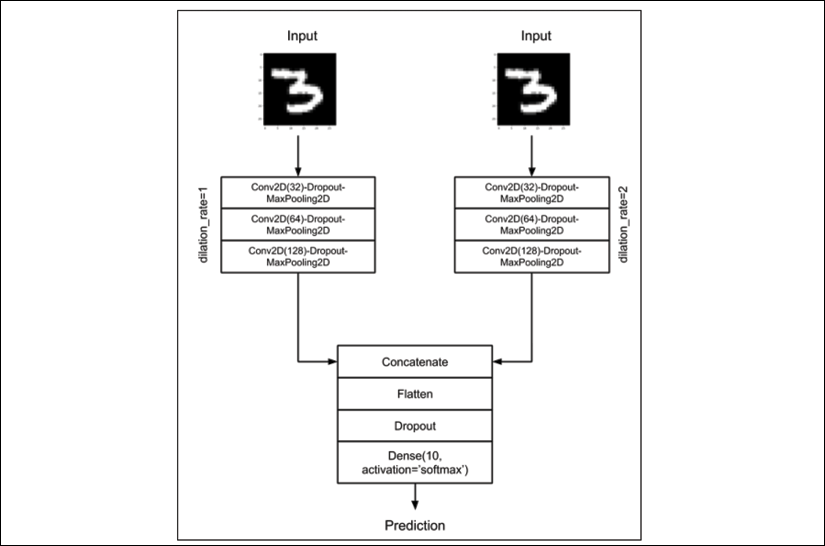
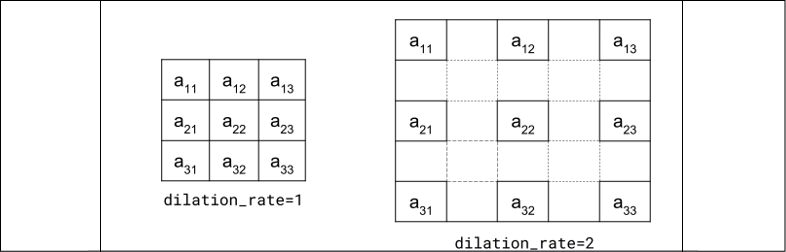
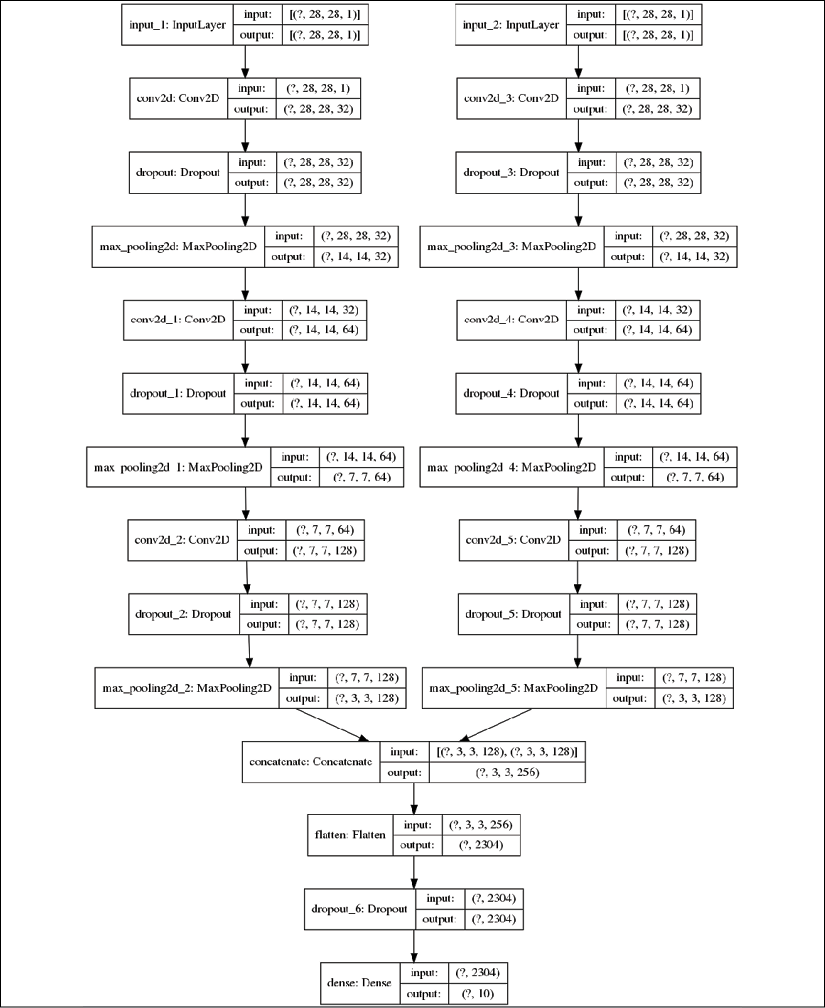
Deep Neural Networks
Autoencoders
Generative Adversarial Networks (GANs)
Improved GANs
Disentangled Representation GANs
Cross-Domain GANs
Variational Autoencoders (VAEs)
Deep Reinforcement Learning
Policy Gradient Methods
Object Detection
Semantic Segmentation
Unsupervised Learning Using Mutual Information
Other Books You May Enjoy
Index