

In this section, we will install the NetBeans IDE step by step, for Windows OS—that is, Windows 7. In order to install the software, you need to run the installer and proceed with the followings steps:
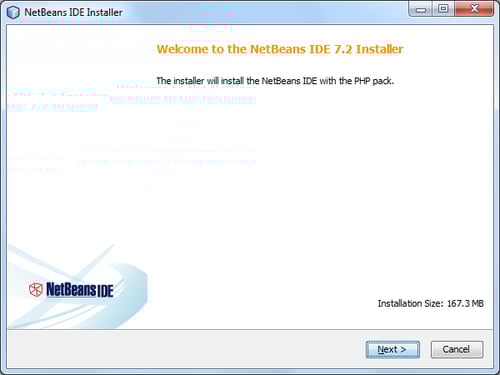
1. Run or execute the installer. The first step will look similar to the following screenshot:
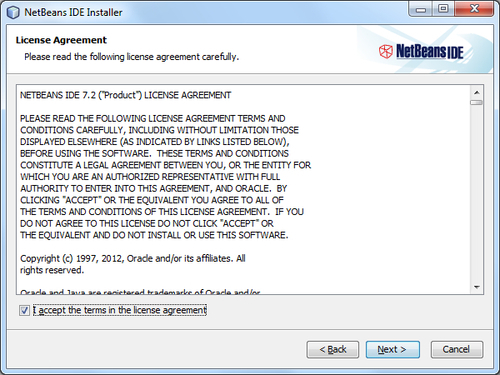
2. By clicking on the Next button, you will be asked to accept the license agreement:
3. The next step will ask you for the installation location for NetBeans and the JRE, with some default program file path:
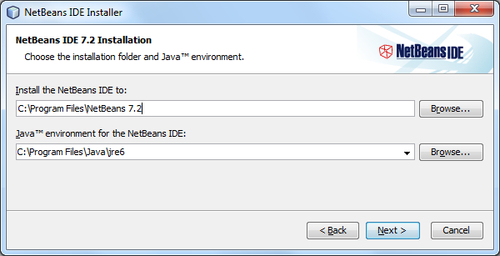
Note that JRE is the Java software for your computer, or the Java Runtime Environment, which is also referred to as the Java Virtual Machine (JVM). JRE will be installed as well.
4. Set the
installationfolder using the file browser, and click on the Next button. The next screenshot shows the total installation size:
5. If everything is set, start the installation by clicking on the Install button, which will start the installation process.

6. After everything is installed correctly, you will see the finish wizard, as shown in the following screenshot:

7. You may check or uncheck the Contribute to the NetBeans project by providing anonymous usage data checkbox, as per your wish to participate or not. Note that it will send project-specific usage data to
netbeans.org, so read the on-screen instructions carefully before checking it. Complete the installation by clicking on the Finish button. Now, go to your OS's Program menu or into the directory where you have installed the IDE to be run. The IDE initializes with a splash screen, as shown below:
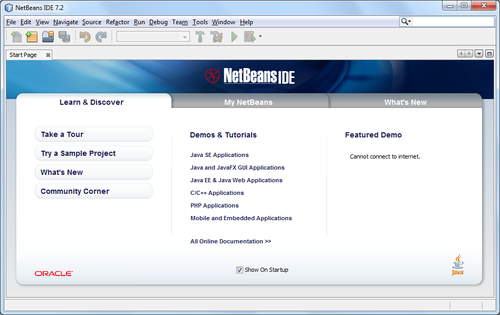
8. Finally, the running IDE looks similar to the following screenshot:
Now that we have the IDE up and running, we can go on to explore setting up the development environment with various operating systems.
In the next section, we will configure our PHP development environment on various operating systems. We will use the latest Apache-MySQL-PHP package installer, that is LAMP, XAMPP, and MAMP, for corresponding operating systems.
If you want to add functionality to your NetBeans IDE configuration, use the NetBeans Plugin Manager. For example, assume that you have already been running the NetBeans IDE for the Java or C/C++ pack. You then decide that you want to try out the PHP functionality. To do this, go to the NetBeans Plugin Manager from the IDE (choose Tools | Plugins), and add the PHP pack to your existing installation.
Multiple installations of NetBeans IDE 5.x, 6.x, and 7.x can coexist with the latest version on the same system. You do not have to uninstall the earlier versions in order to install or run the latest one.
If you have an earlier installation of the NetBeans IDE, you can choose whether or not to import the user settings from the existing user directory when you run the latest IDE for the first time.