Book Image

Azure Machine Learning Engineering

By : Sina Fakhraee, Balamurugan Balakreshnan, Megan Masanz
Book Image

Azure Machine Learning Engineering

By: Sina Fakhraee, Balamurugan Balakreshnan, Megan Masanz

Overview of this book

Data scientists working on productionizing machine learning (ML) workloads face a breadth of challenges at every step owing to the countless factors involved in getting ML models deployed and running. This book offers solutions to common issues, detailed explanations of essential concepts, and step-by-step instructions to productionize ML workloads using the Azure Machine Learning service. You’ll see how data scientists and ML engineers working with Microsoft Azure can train and deploy ML models at scale by putting their knowledge to work with this practical guide. Throughout the book, you’ll learn how to train, register, and productionize ML models by making use of the power of the Azure Machine Learning service. You’ll get to grips with scoring models in real time and batch, explaining models to earn business trust, mitigating model bias, and developing solutions using an MLOps framework. By the end of this Azure Machine Learning book, you’ll be ready to build and deploy end-to-end ML solutions into a production system using the Azure Machine Learning service for real-time scenarios.
Table of Contents (17 chapters)
1
Part 1: Training and Tuning Models with the Azure Machine Learning Service
7
Part 2: Deploying and Explaining Models in AMLS
12
Part 3: Productionizing Your Workload with MLOps

Technical requirements

In this section, we are going to see how to create an automated machine learning model from start to end with step-by-step procedures.

In order to access your workspace, recall the steps from the previous chapter:

  1. Go to https://ml.azure.com.
  2. Select your workspace name.
  3. In the workspace User interface on the left-hand side, click Compute.
  4. On the compute screen, select your compute instance and select Start:
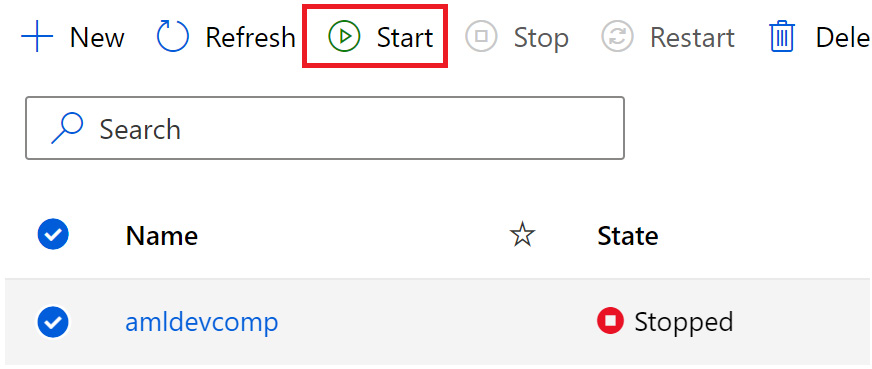
Figure 5.1 – Start compute

Figure 5.1 – Start compute

  1. Your compute instance will change from having a Stopped status to a Starting status.
  2. In Chapter 2, Working with Data in AMLS, we cloned the Git repository – if you have not already done so, continue to follow the steps provided here. If you have already cloned the repository, skip to step 7.
  3. Open the Terminal on your compute instance. Note the path will include your user in the directory. Type the following into the Terminal to clone the sample notebooks...