

Improving edges with texture painting
We will now learn how to use texture painting to improve our material by painting over its edges. We will use a simple cube to demonstrate this technique, but you can apply it to any model or texture. In the following steps, we will shade the edges of our cube:
- First, add some loop cuts near the edges and smooth shading to the cube to make the edges appear smoother, as shown in Figure 9.10.
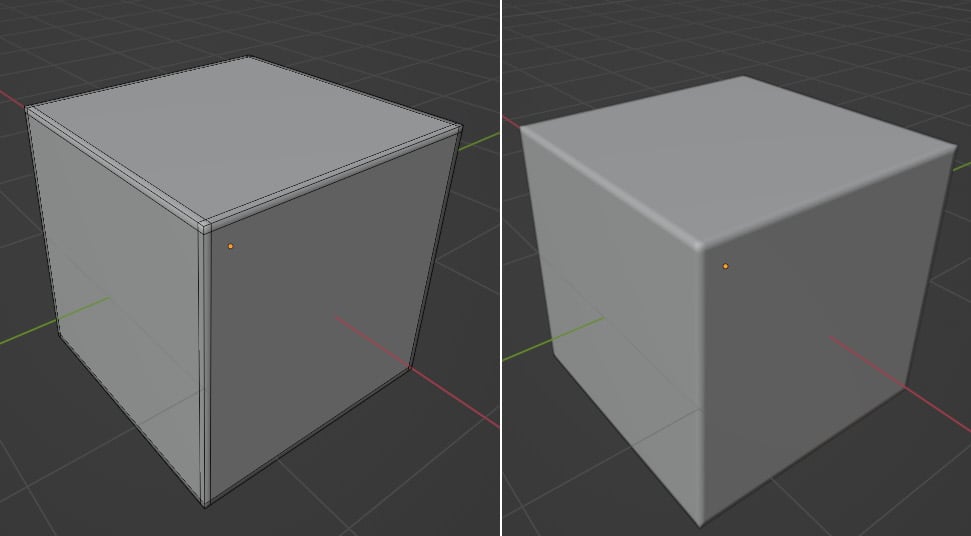
Figure 9.10 – Smoothing the edges
The loop cuts will automatically be added to the UV map.
- Open the Color menu in the Image Editor and select the Eyedropper tool, as shown in Figure 9.11.
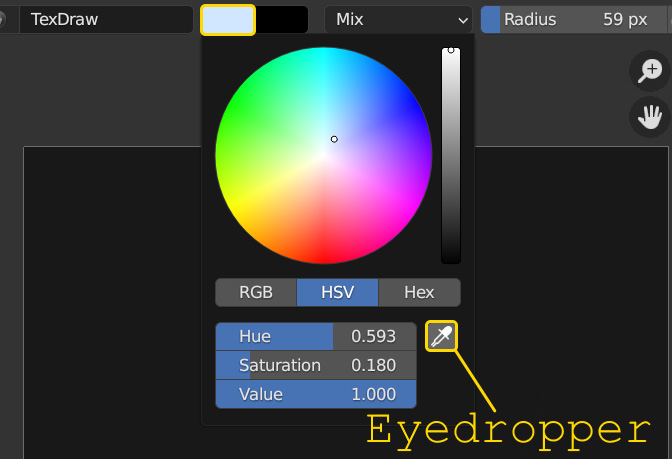
Figure 9.11 – Picking a color with the Eyedropper tool
Then, click on the dark image texture to copy its color.
...