

Using stencils in Blender
We will now learn how to use the stencil texture painting feature in Blender. This allows us to add custom decals to our textures. In the following steps, we will use the bullet hole decal as a stencil in Blender, by importing from the bullet hole decal that we just created in GIMP:
- In Blender, create a new texture slot and load the bullet hole decal, as shown in Figure 9.36.
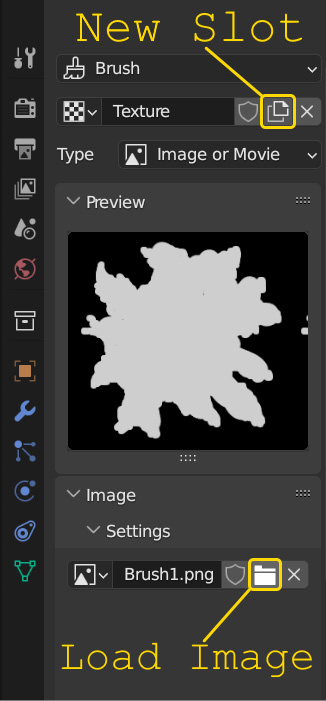
Figure 9.36 – Loading the bullet hole decal in Blender
- Next, select the bullet hole decal in the Texture section of the Image Editor toolbar, and set Mapping to Stencil.
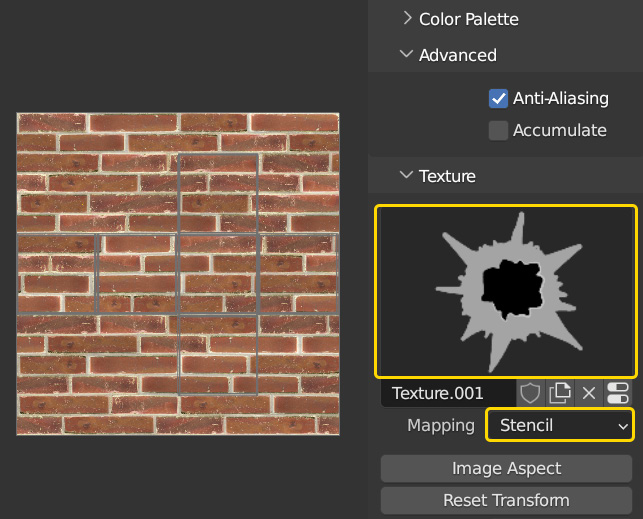
Figure 9.37 – Using the bullet hole as a stencil
This will load the bullet hole decal in the lower-left corner of the 3D View. We can move this image around by right-clicking on it and dragging it.
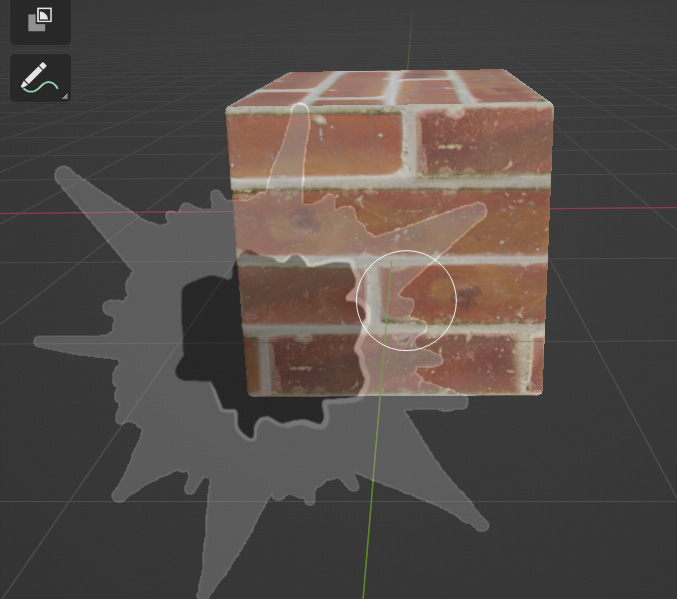
Figure 9.38 – The stencil visible in 3D View