Book Image

KeyShot 3D Rendering

By : Jei Lee Jo
Book Image

KeyShot 3D Rendering

By: Jei Lee Jo

Overview of this book

Creating realistic images has been always a meticulous process where setting up the stage is a long and complicated task. KeyShot has simplified this process by allowing us to have a greater amount of control and flexibility in all aspects of the rendering procedure."KeyShot 3D Rendering" provides a series of exercises with a detailed explanation of each part of the pipeline, from importing our model, to texturing, lighting, and rendering. In addition, the book covers in detail how to use all the necessary parameters inside KeyShot and also explains alternative methods to showcase your work."KeyShot 3D Rendering" starts with covering all the basic principles and fundamentals of how to work and navigate in KeyShot. Throughout the book, there will be exercises that will guide and help you to complete the chapter's assignment. Also there will be an explanation of all the terms and parameters used in the exercises.You will learn how to use HDRIs (High Dynamic Range Images) as the primary source for lighting and also how to incorporate backplate images into a scene. You will learn how to create your own materials, textures, and labels. Lastly this book covers camera functions, real-time settings to improve the workflow of your assignments, and also rendering properties.The exercises in the book will provide you with all the tools necessary to bring your models to life and set up your own environment. You will learn how to adjust overall properties accordingly to maximize rendering output.
Table of Contents (13 chapters)

Insulated cup


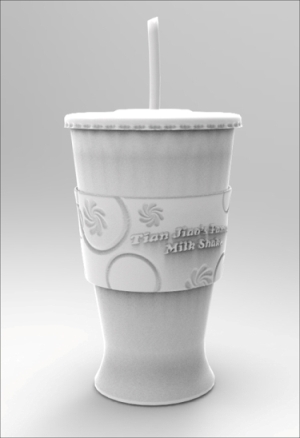
For the next project, we are going to texture and render an insulated cup. Let's start by opening up KeyShot, and perform the following steps:

  1. Select Import from our viewport.

  2. Next find and import the Cup.obj file. It is located at Lessons | Keyshot models | data.

  3. Click on OK.

Let's start applying a material to our cup. Perform the following steps:

  1. Click on the Library icon and open the Library window from the viewport.

  2. Go to the Materials tab.

  3. Let's find the material, Clear shiny plastic – red by navigating to

  4. Plastic | Clear | Shiny | Basic.

  5. Drag-and-drop the material onto our cup.

Since most cups have patterns or indentures, let's add a bump map to make our cup look more interesting. Perform the following steps:

  1. Double-click anywhere on our cup to open the Project Editor window.

  2. Go to the Material tab.

  3. Inside the Material tab, go to the Texture tab and activate the bump channel.

  4. Once a new window opens, scroll down to find tile_bump.jpg.

  5. Click on OK.

  6. Once the map is loaded, change...