

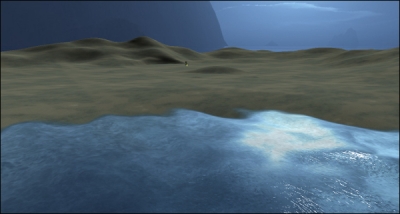
When it comes to bang-for-the-buck visuals in jMonkeyEngine, there is little that trumps using a water filter. It is very impressive and yet easy to do. Having water in the scene will greatly enhance the mood of our test scene. You can view the great looking water with little efforts in the following screenshot:
The scene used should have some height differences (or we will end up with all water or all ground). If no terrain is available or if it needs adjustments, check out the Modifying heightmaps with Terrain Editor recipe in this chapter.
If there isn't already an Effects folder in your Projects Assets folder, add it.
We can add water using a filter by performing the following steps:
Right-click on the Effects folder under Project Assets, select New, and then select Empty FilterPostProcessor file. You might have to select New, Other..., and then click on Filters to find it.
Name it
Waterand click on Finish.Right-click on the newly created Water.j3f file and open it.
We are now moved to the FilterExplorer window. From here, we can create, add, and modify scene-wide effects, choosing from a number of premade ones. Right-click on the Water filter and select Add Filter and then Water.
To see filters in the SceneComposer window, we need to click on the Eye icon shown in the following screenshot. This should give the scene a whole new look. Do it and see the scene transform.

A few properties need to be modified in order to make the water appear smoothly. The Properties window for the WaterFilter element can seem a bit overwhelming. For now, let's change the Water Height parameter. The filter will create foam wherever it meets the land and finds a good separation or where the shore height is essential. The sweet spot is dependent on the scene but starts out with -2 units. Changing the following values will affect the appearance along the shoreline:

There are also Light Direction and Light Color properties in there. Let's copy the values from our Directional Light element here to make them match. You will find them by moving to the SceneExplorer window, selecting the Directional Light element, and looking in the Properties window.
Lastly, we need to add the following lines to the
simpleInitmethod of our test application:FilterPostProcessor processor = (FilterPostProcessor) assetManager.loadAsset("Effects/Water.j3f"); viewPort.addProcessor(processor);
Post filters are rendered last as a screen effect in the rendering stage and applied to the entire scene. There are many ready-made filter variants made by the jME team and community that you can use to change how a scene appears. Filter Explorer is a great way to set up and test these before applying them to your game.