Book Image

KeyShot 3D Rendering

By : Jei Lee Jo
Book Image

KeyShot 3D Rendering

By: Jei Lee Jo

Overview of this book

Creating realistic images has been always a meticulous process where setting up the stage is a long and complicated task. KeyShot has simplified this process by allowing us to have a greater amount of control and flexibility in all aspects of the rendering procedure."KeyShot 3D Rendering" provides a series of exercises with a detailed explanation of each part of the pipeline, from importing our model, to texturing, lighting, and rendering. In addition, the book covers in detail how to use all the necessary parameters inside KeyShot and also explains alternative methods to showcase your work."KeyShot 3D Rendering" starts with covering all the basic principles and fundamentals of how to work and navigate in KeyShot. Throughout the book, there will be exercises that will guide and help you to complete the chapter's assignment. Also there will be an explanation of all the terms and parameters used in the exercises.You will learn how to use HDRIs (High Dynamic Range Images) as the primary source for lighting and also how to incorporate backplate images into a scene. You will learn how to create your own materials, textures, and labels. Lastly this book covers camera functions, real-time settings to improve the workflow of your assignments, and also rendering properties.The exercises in the book will provide you with all the tools necessary to bring your models to life and set up your own environment. You will learn how to adjust overall properties accordingly to maximize rendering output.
Table of Contents (13 chapters)

Creating a turntable presentation


To create our turntable presentation we are going to use our cup model from the previous chapter. Perform the following steps:

  1. Open up KeyShot.

  2. Select Open and load up our Cup file.

  3. Once Cup is loaded, hide our other two cups leaving only the red one in the scene.

  4. Next, click on the Animation icon from our viewport to open the Animation window, as shown in the following screenshot:

  5. Click on the Animation Wizard icon.

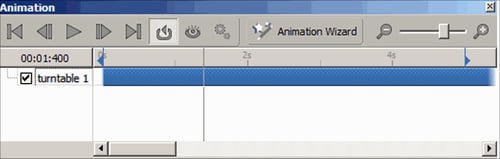
  6. A new window should appear with different types of animation at our disposal.

  7. For our exercise, let's select the turntable animation and click on OK.

  8. Now we are going to select an object or a model that will have the turntable animation.

  9. In this case we will select the red cup and click on OK.

  10. Once in the Settings window, you can add your own preferences, such as how long you want the turntable animation to last for. It also gives us options such as Ease in and Ease out for our animation.

  11. Click on OK or Next once we are done with the preferences.

Notice...